Hi friends! I love the looks of botanical inspired décor but it can be pricy. Today I’ll show you how to turn inexpensive pillar candles into a beautiful rustic natural looking accent that would be perfect for an outdoor party.
Heck, I think these would be pretty snazzy as a wedding table place setting/favor. Pair it with a mason jar of seasonal wildflowers for a trendy (and thrifty) celebration!
Supplies can be found at most dollar stores but I have also linked similar products to Amazon with affiliate links)
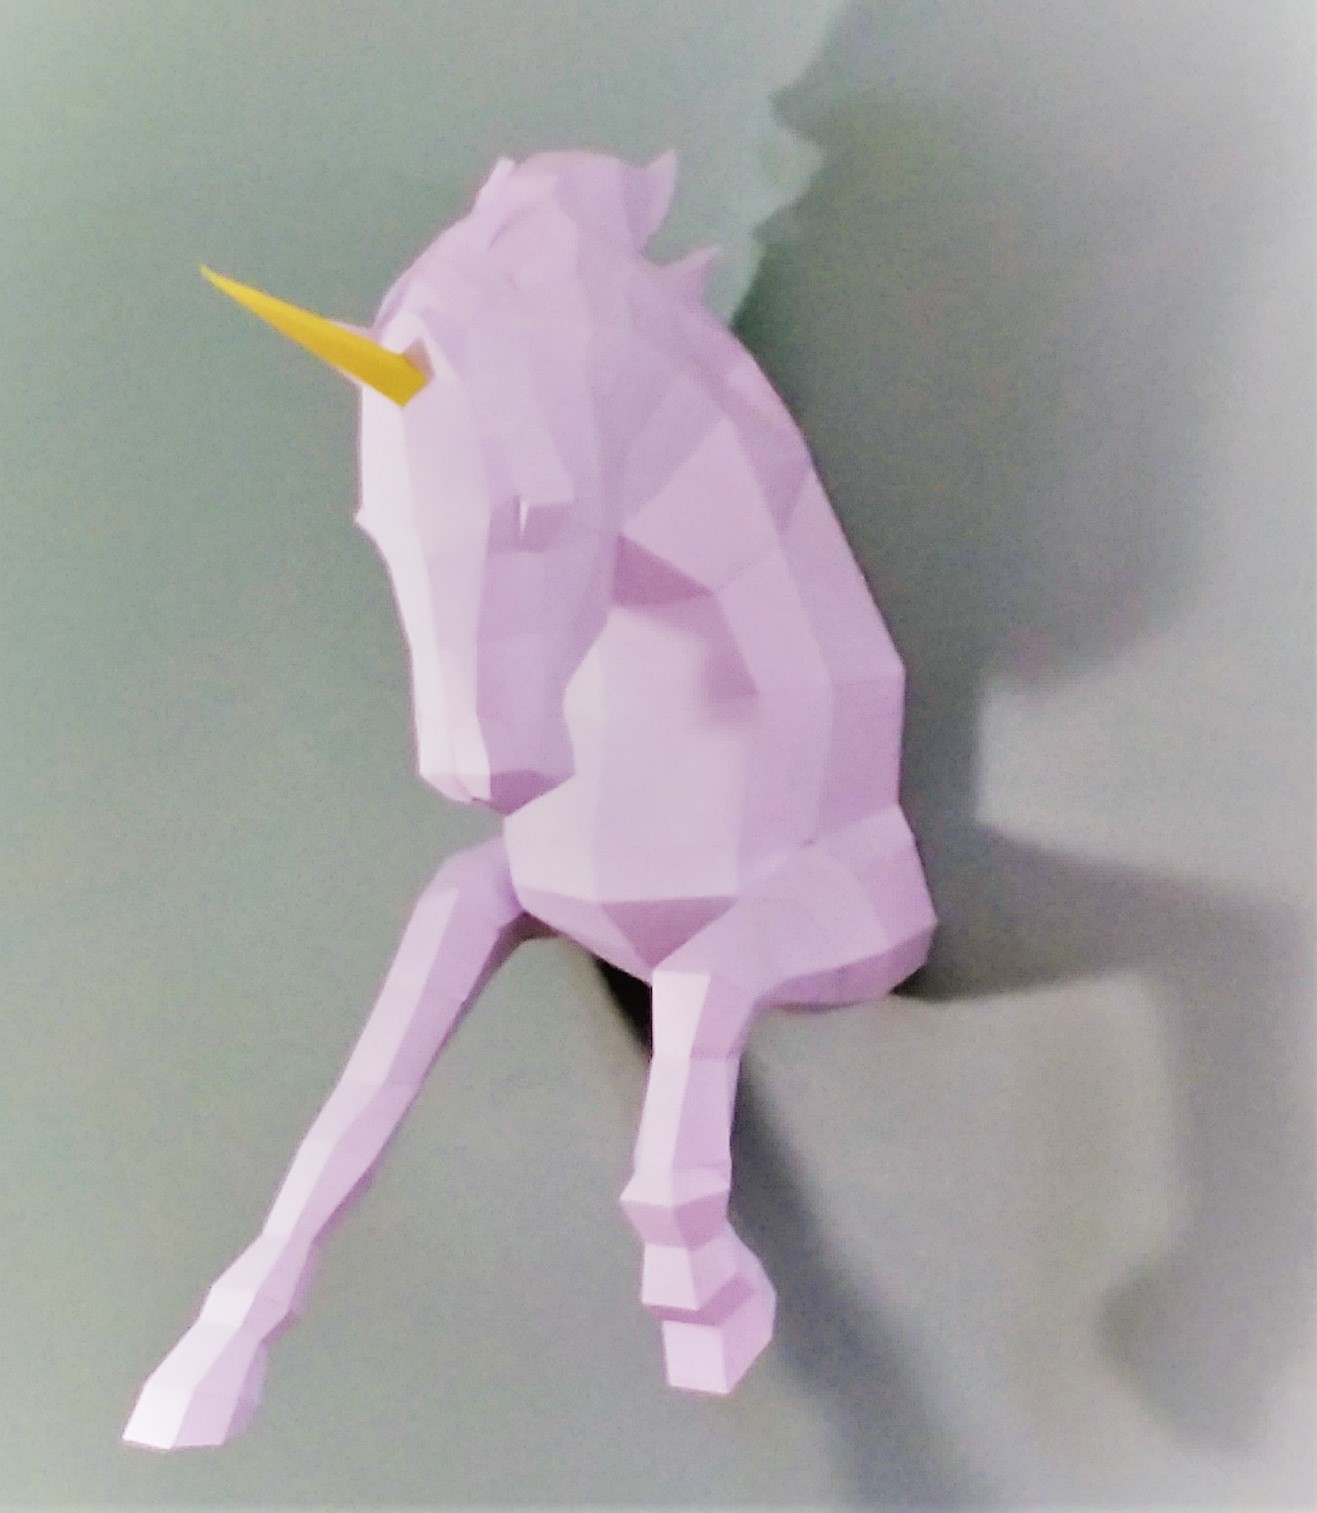
Hi friends! Paper is an amazing material. You can bend, fold and twist it and make really neat stuff like this big unicorn wall art!
I wish I knew about these when my kids were little, this would have been a wonderful party or room decoration! Watch the video to see how I made it!
This huge wall mounted unicorn was made from cardstock and an inexpensive template from today’s sponsor Origadream! LIMITED TIME SAVINGS: Save 10% on all products in Origadream Etsy shop with coupon code LINDSAY
Thin, strong double-sided tape (I used Scor-Tape in 1/8″ & 1/4″ widths)
Cardstock (I used #65)
Cardboard
Scissors
Scoring board (I used a score pal) or you can use a bone folder/butter knife and a ruler to score fold lines.
Time and patience:)
Tips!
This kit comes with very detailed illustrated instructions. Either print them out or have them open on your computer as you work in case you get confused.
Work in an assembly line fashion: Cut all pieces, score and fold all pieces and add tape to the back of tabs before assembling. *Having a friend help you will make it fun and save time!
Plan on 8-12 total hours (printing, cutting, scoring, folding and assembling) to complete this project.
I love that you can make these paper sculptures to inexpensively make a big impact in your home. They are surprisingly sturdy too! If you have a party coming up or just want a way to add a bit of whimsy to your home check out Origadream and make something awesome! Happy crafting!
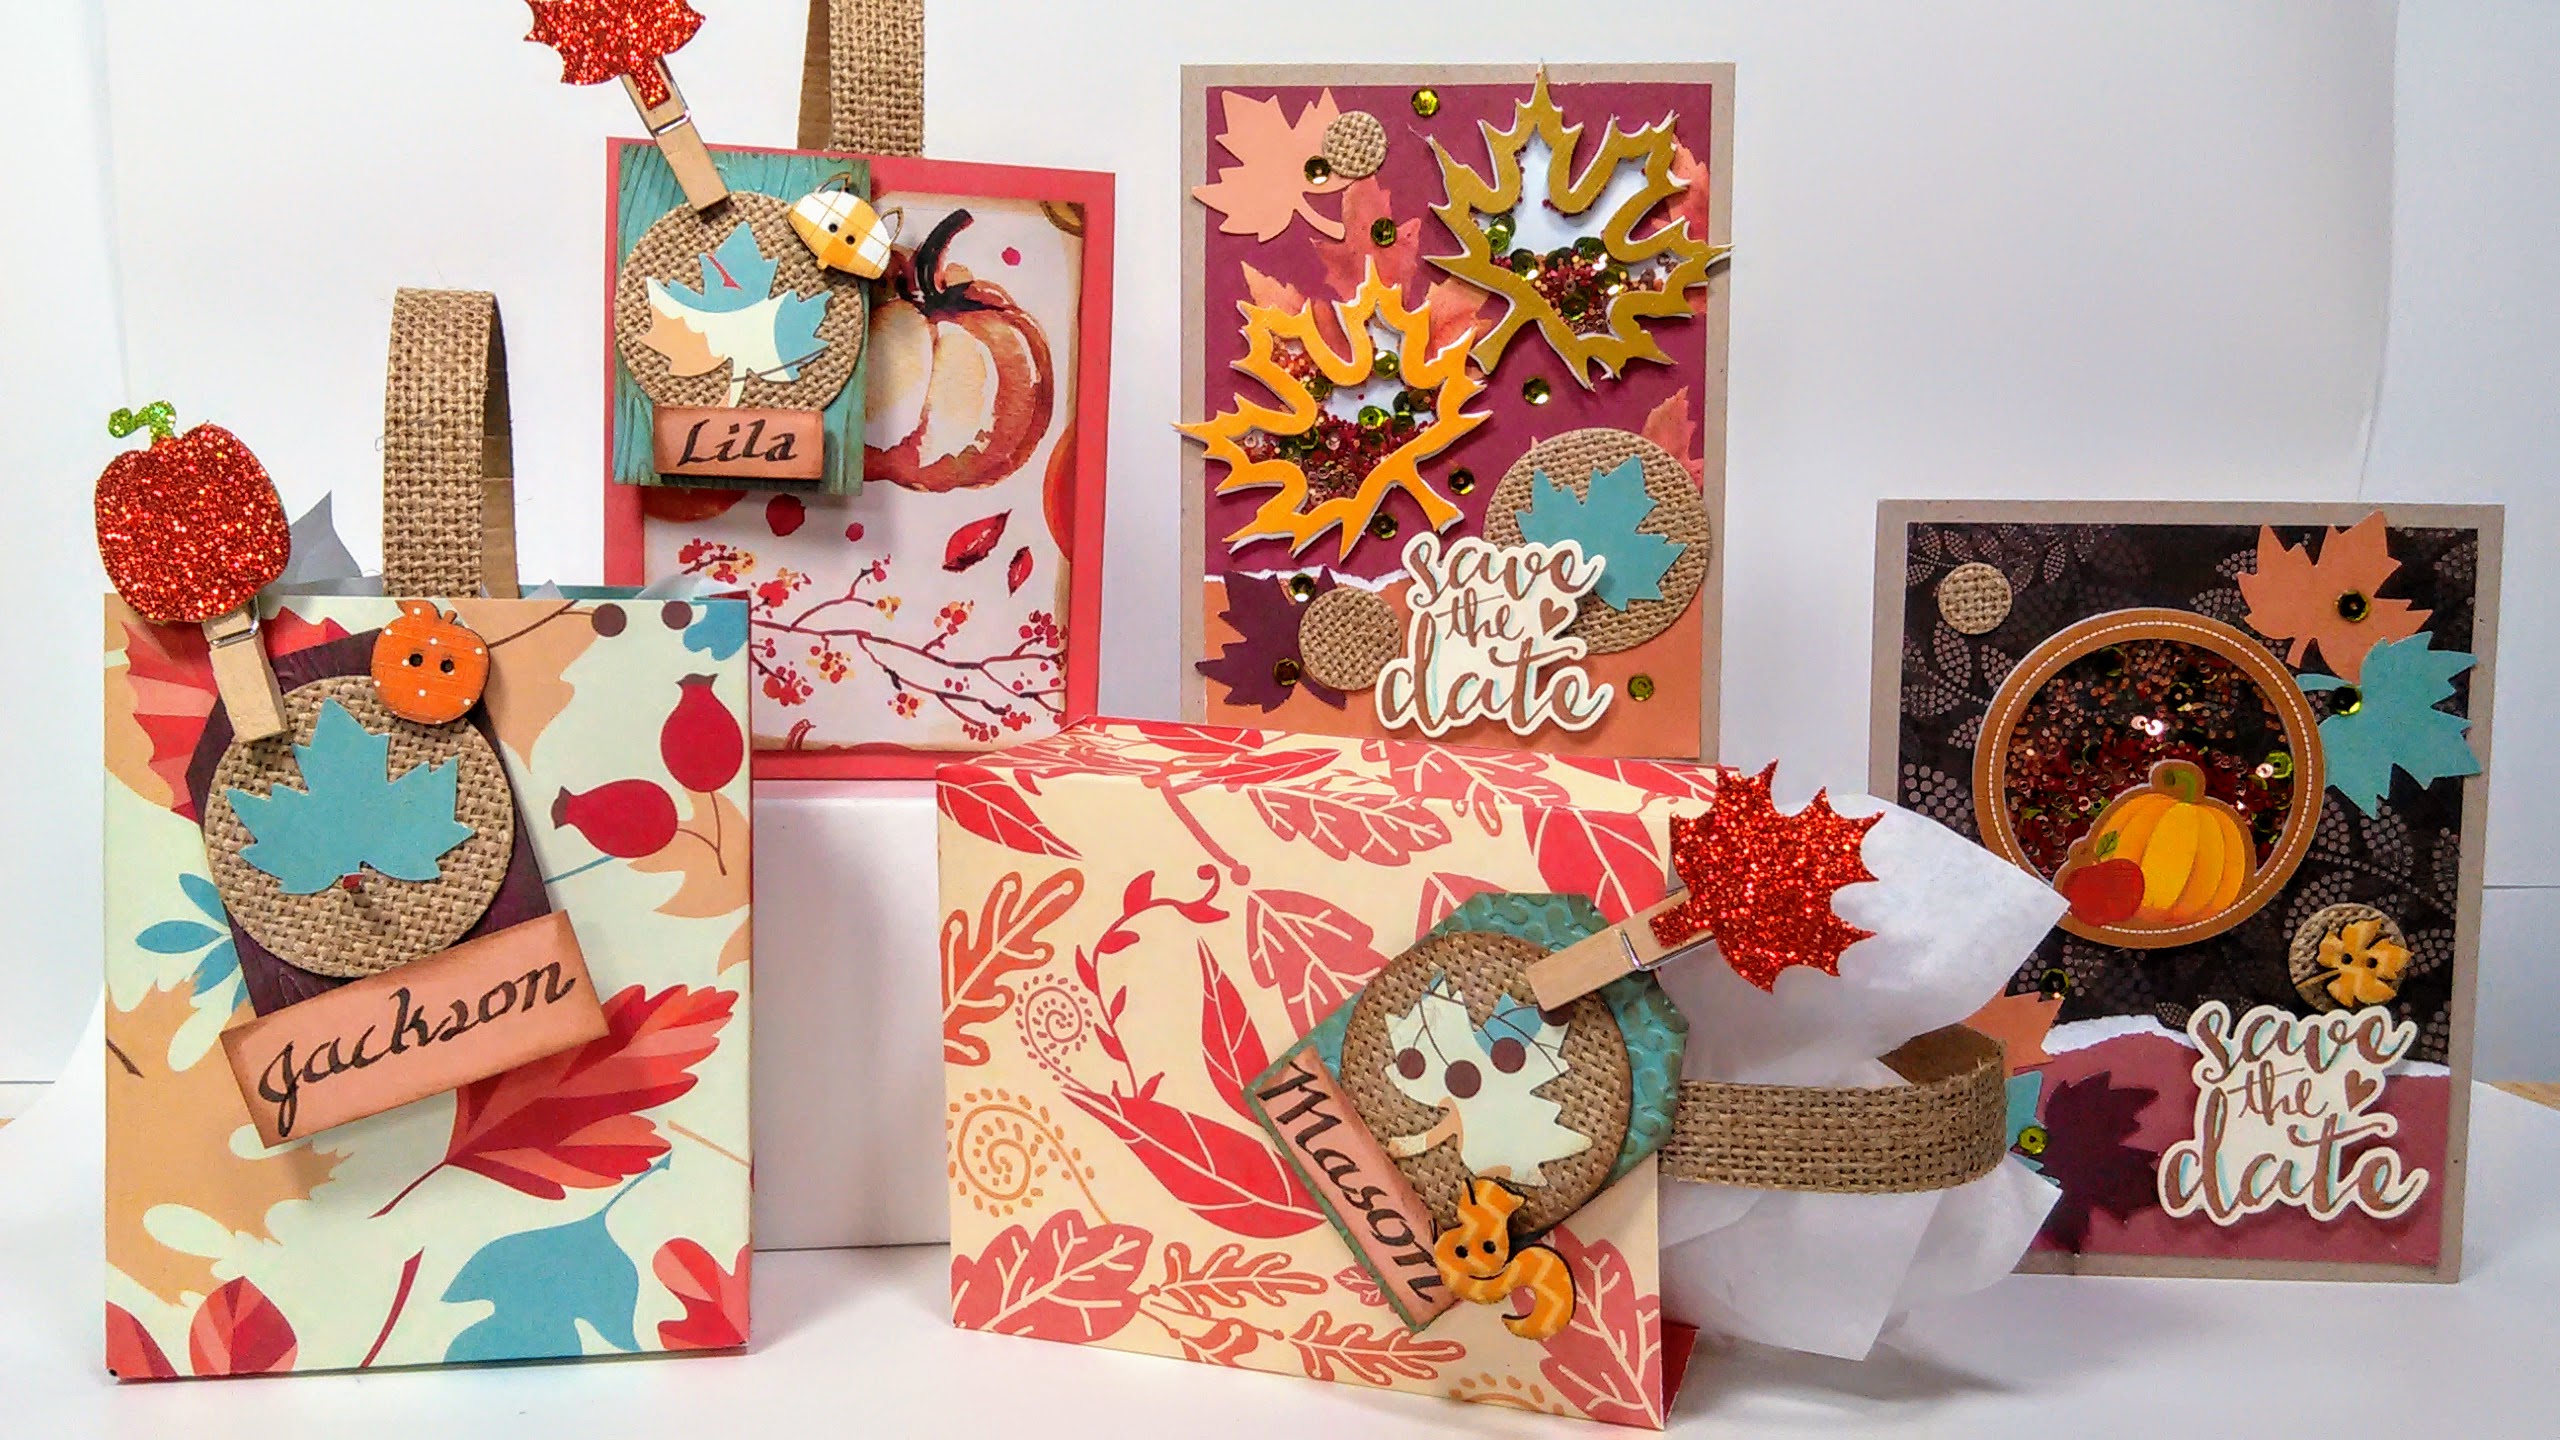
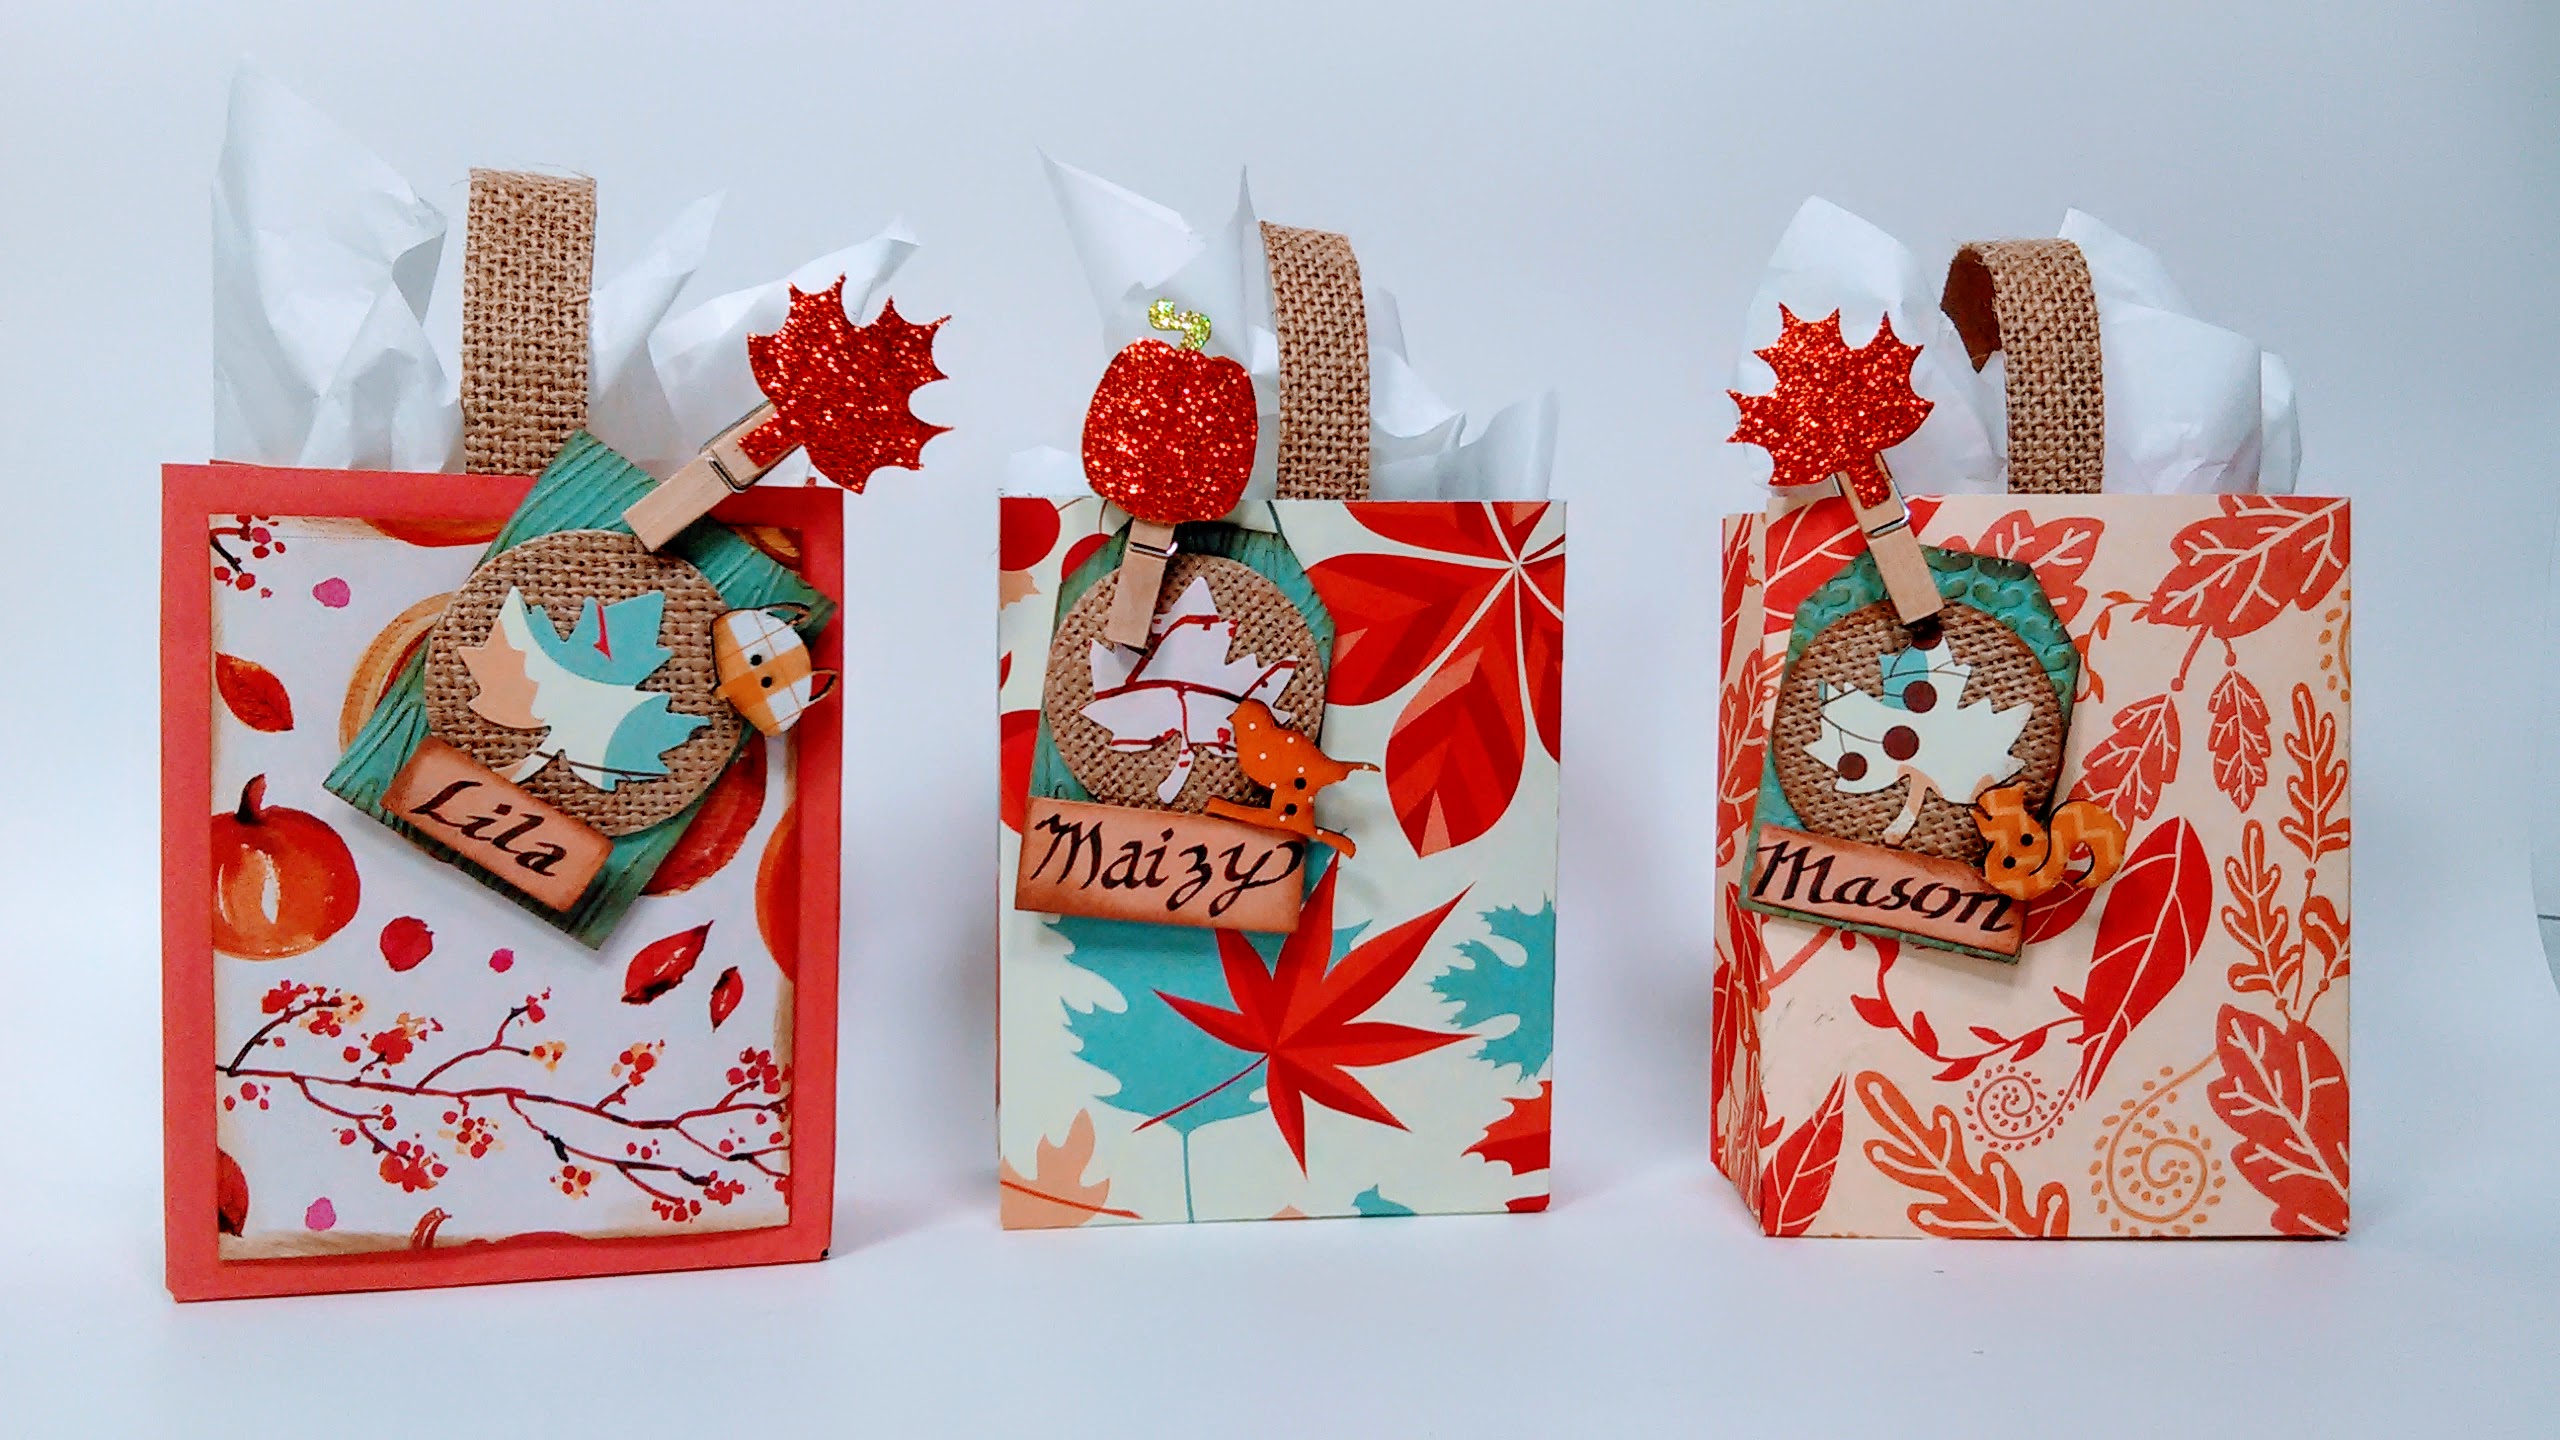
Hi friends! This week I had the pleasure to play with some beautiful new products from our sponsor A.C. Moore and make a Thanksgiving (or Friendsgiving) papercraft project!
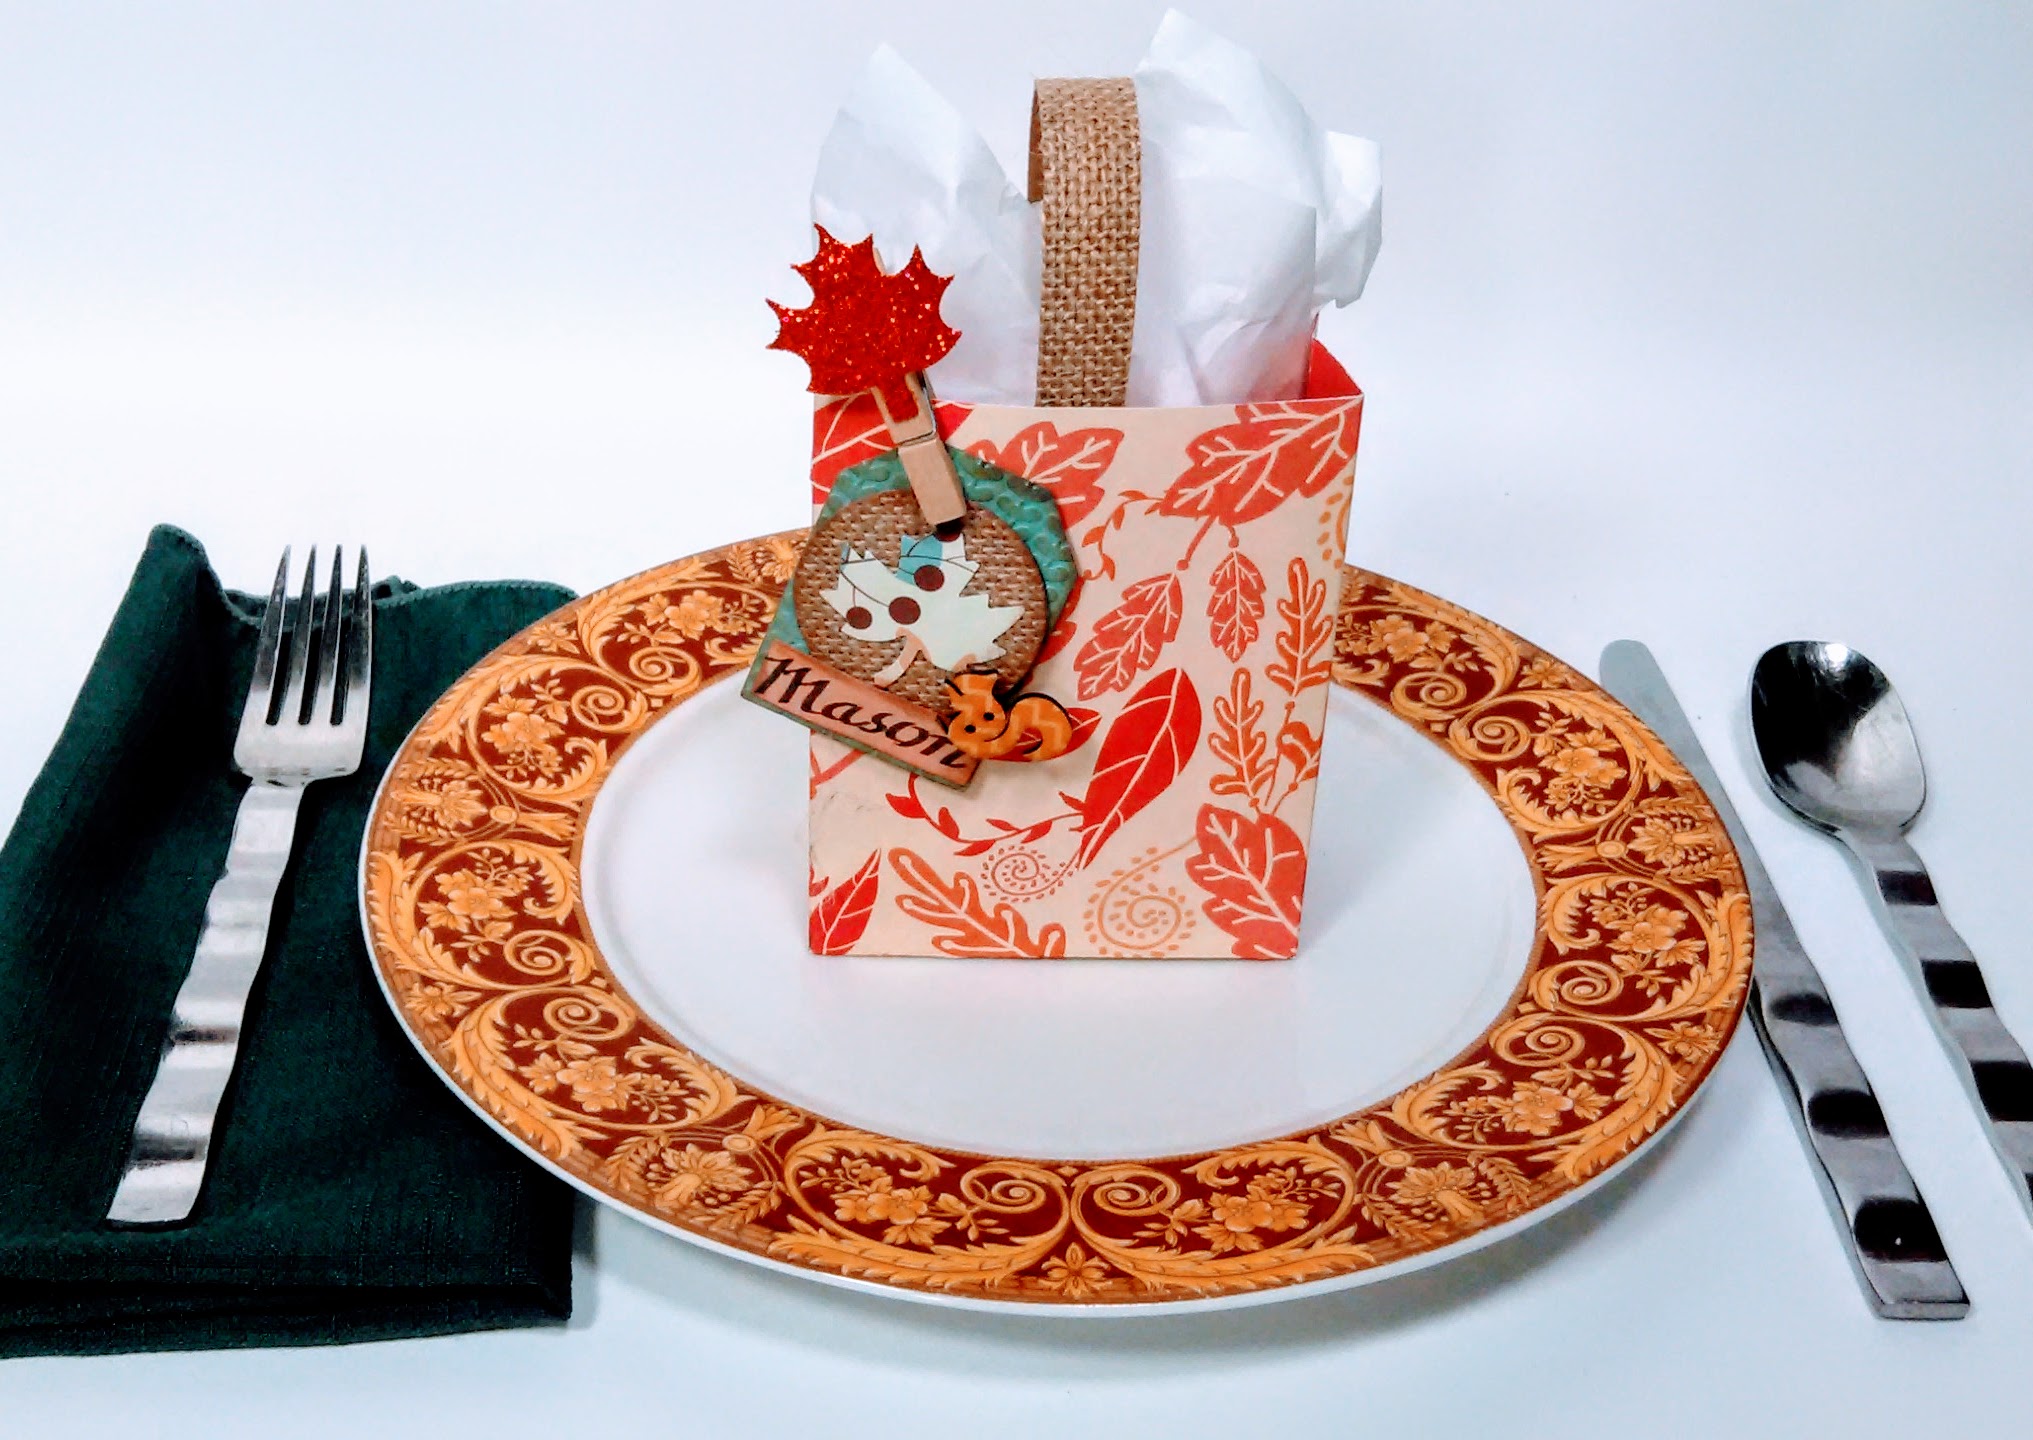
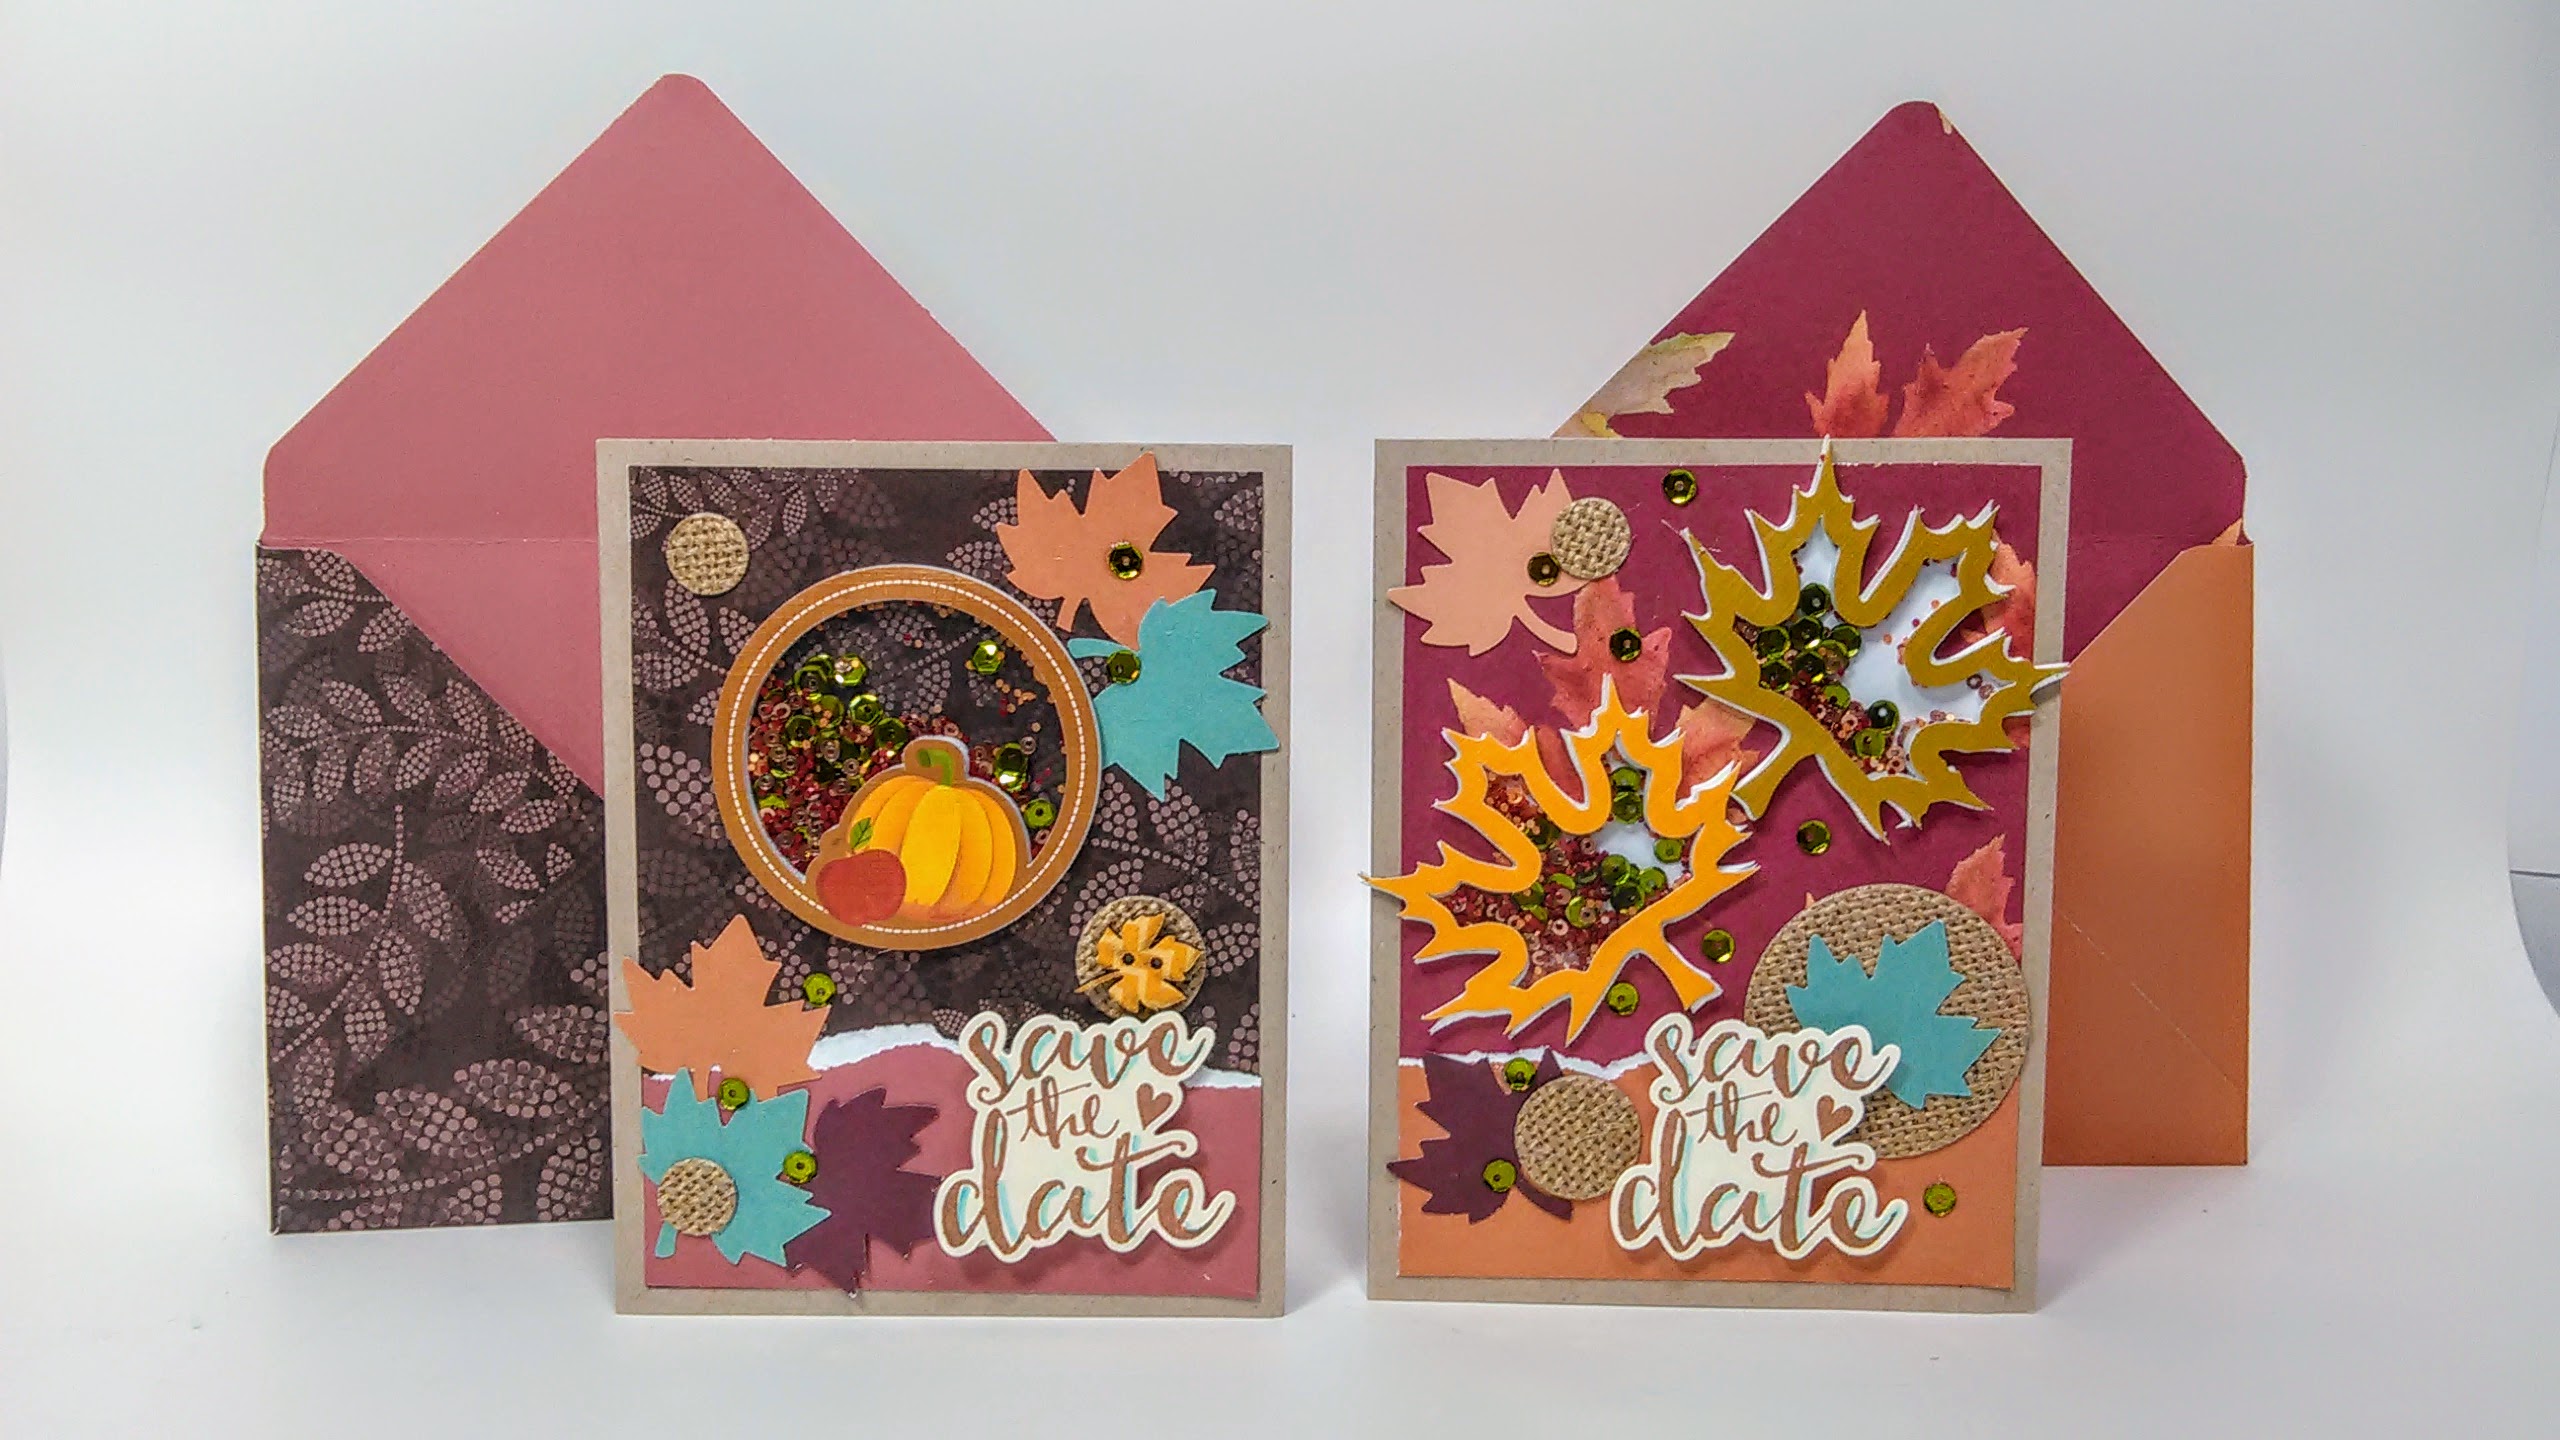
I am a big believer of my projects being pretty and practical so today I am going to show you how to make an easy shaker card invitation and a favor bag that doubles as a place card.
These are the easiest shaker cards ever!
These projects feature the new Love Nicole™ line exclusively at A.C. Moore. The products are affordable, high quality and on trend and can be found at your local A.C. Moore store. Don’t worry if you don’t have a store near you, you can use the ideas in this video to come up with projects using the supplies you already own! Watch the video to see how!
Supplies are from the Love Nicole™ line of products exclusively at A.C. Moore unless otherwise noted.
Love Nicole™ Die Cut/Embossing Machine
Love Nicole™ Stamps/Dies,
Love Nicole™ Embossing folders
Love Nicole™ Embellishments: Buttons, Clothespins, Shaker kits, Washi tape
Love Nicole™ Maple leaf punch
Love Nicole™ Autumn Splendor Paper pack
Other Supplies: Zip Dry Glue, Foam Tape, Envelope and Gift Bag Punch Boards (We R Memory Keepers), Double sided Tape, Light blue marker, Brown Archival Ink, Kraft Cardstock, Calligraphy pen (2.0 Elegant Writer)
Project tips!
Save your scraps! You can die cut or punch embellishments from small paper scraps.
Make paper goods ahead of time for a stress free holiday!
Fill goodie bags with crayons and activity pads for kids or fresh-baked goods for adults! (pre-wrapped candy is a fun & easy option too!)
Stick to one paper pack and a few embellishments/tools to keep crafting simple, coordinated and fun!
I hope you liked today’s project. It was a lot of fun to partner up with A.C. Moore to bring you this fun craft you can share with your friends and family this fall. Happy crafting!
Hi friends! I have made so many pinatas over the years that I fancy myself a bit of a pinata expert. Never mind that I can’t remember how to make “n” with the “~” over it, hey, I said I was an expert at pinatas, not typing. Or grammar, or spelling for that matter… But I can make one heck of a pinata!
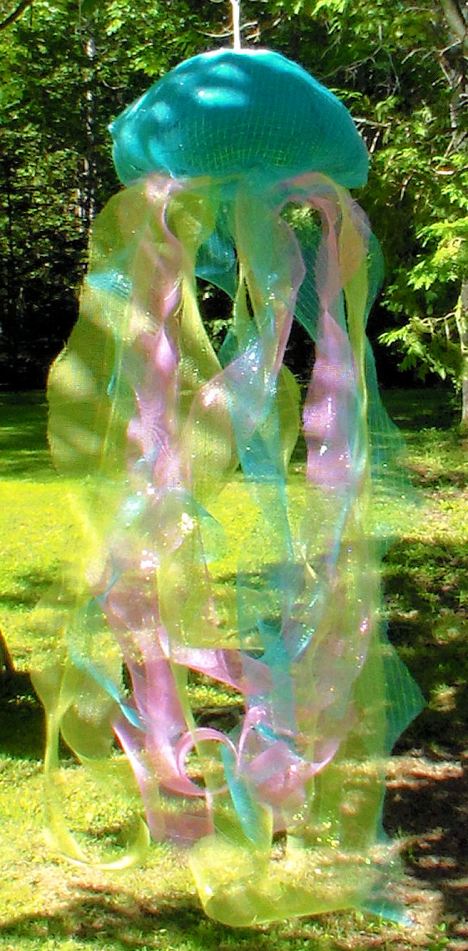
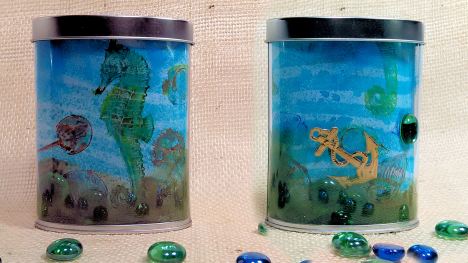
I love that you can take cardboard, tape and tissue paper and basically make a sculpture that holds candy, whoever thought up pinatas was a genius! I like that the art you make is temporary so there is no pressure to be perfect, just have fun and enjoy the process. I decided this time to show you how to make a pull style pinata. This kind of pinata can be reused if you want. But let’s be honest, most kids want to whack at it and that’s just fine, I am giving you an option. The other plus to a pull style pinata is that if you were a bit overzealous with the tape of glue and the kids can’t break it you have a second candy escape route. Because really, it all about the candy. I mean, you probably could fill a paper bag with candy and hang it from a tree and the kids would be just as happy but it’s fun to make something pretty I think! And because I wanted something pretty I used some sparkly deco mesh and I think it really captured the ethereal l floatyness of the jellyfish.
Watch the video to learn how to make your own!
Knowing how to construct a dome will help you construct other cardboard masterpieces you might want to make and as you saw in the video it was not difficult.
This pinata took less than an hour to make and it was fun to do. You can also do it well ahead of a party so you don’t feel rushed or stressed because that is a total creativity killer. I hope this project inspires your next creation and til next time happy crafting!
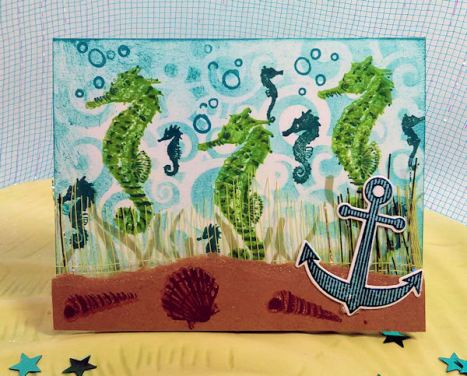
Hi friends! I think the title of this post perfectly explains why my craft room is full to bursting, I mean, why toss a scrap of pretty metallic deco mesh if it can be used on card, right?
I love that it adds texture and sparkle without bulk and weight and since it is a leftover from a project you would otherwise throw away it’s free! That’s my story and I’m sticking to it! This tip really comes in handy when you are planing around a theme like an under the sea birthday party (Jellyfish pull-style piniata project coming in a week or two!) because you can use the same materials to creat decorations, party favors and invitations to not only create a cohesive look but also save money on supplies and have fewer leftovers when you are done. I always say the supplies you use are the best bargains!
Video!
Supplies: Clear Bags (I find 6″x9″ to be the most versatile for mailing and craft fair packaging) Deco Mesh in pink, turquoise and lime green (we will be using more of this in the future!)
Stamps of your choise (mine are from hero arts) Seahorse, Anchor, Goldfish Dye ink pads
White cardstock Kraft paper (or a brown bag)
Sequins if desired
This idea is not limited to birthday parties. Are you using deco mesh, tulle or burlap to make a Christmas wreath? Why not use your scraps to embellish your cards, gift tags and wrappings. Thinking dual purpose when you purchase will help you get the most bang for your buck and keep your craft room from looking like a museum of unused craft supplies. Thanks for stopping by and til next time happy crafting!
BTW there will be a live painting tutorial tomorrow at 12:30m ET! See you there!
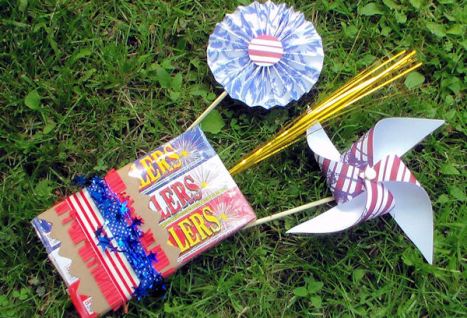
Directions:
1. Wrap box with paper and ribbon fringe edges if desired.
2. Make pin wheel and rosette and attach to skewer.
3. Insert metallic spray, pin wheel and rosette behind paper at the back of the box.
I you want a pin wheel that spins I have a tutorial here, it does take a bit more time but they are really fun:) Thanks to Papermart for sponsoring today’s tutorial. Thanks for stopping by and til next time happy crafting!
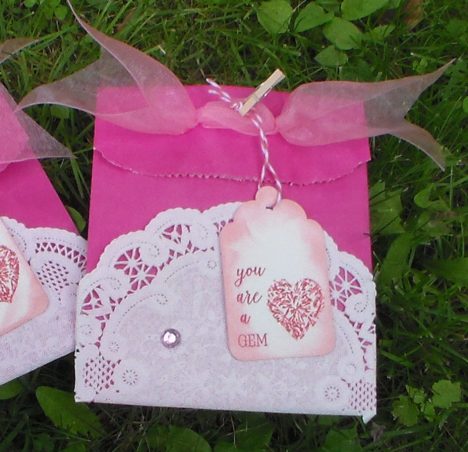
Those were so easy to make and if you are not into pink Papermart has lots of colored and patterned bags to pick from. Thanks for stopping by and til next time happy crafting!
Hi friends! Do you want a clever way to wrap up a small gift or cash? Here’s a fun packaging idea that serves as a decoration after the gift is unwrapped and best of all it takes no longer than a card to make!
Tip! Stencil the bin box before assembling! I hope you have a safe and happy holiday weekend! Just a programming note we WILL have a live painting class tomorrow at 12:30pm Eastern Time. I will post all the info here tomorrow morning and on facebook so stay tuned! Til then Happy crafting!