Build a Bauble Wreath {Christmas Ball/Ornament Wreath}

Hi friends! First off today I want to announce the winner of the stamps from last weeks ArtNeko giveaway! The wnner is: Ruby Guitard! Ruby, check your email to claim your prize! Now on to today’s project!

15259307_10207790063454974_1702917963867569775_o

I have always wanted to make a Christmas Bauble Wreath and now I have satisfied that desire:) I think these wreaths turned out pretty cute but I have to say I had some struggles. Hopefully my tips and tricks will help your Christmas ornament wreath project go more smoothly than mine did!

2wreaths

First let me say that I recommend the Styrofoam (on left) wreath form and hot glue method if you only need a single sided wreath and you want to pick the way your baubles are arranged. I am not remotely “Type A” but I really liked being able to decide the layout of the ornaments. I think for anyone who is particular about that sort of thing would like this method. Watch the video to see how they are made and decide for yourself:)

Here is what I used for the Styrofoam wreath, cost $13:
10″ Styrofoam wreath form (Dollar Tree)
1 large drum of blue/silver large balls (Nicole-AC Moore)
2 sleeves of small and medium balls in red and silver (Dollar Tree)
Hot glue (lots)
Satin Ribbon for bow (optional)

For the wire form method:
1 large drum or ornaments (glue the caps on the ornaments before you begin!)
*You can also add smaller ornaments, you can either alternate them when you slide on the big ornaments or hot glue them on later (which I did to add stability to the wreath)
heavy duty wire, a wire wreath form or a coat hanger bent into a circle
Ribbon

*The advantage of the slide on wire form method is that you get a double sided wreath and theoretically it is quicker unless you have to chase all the ornaments that fell off the hangers and re glue them on. Just save yourself the trouble and glue them on first.

So, would you attempt this Christmas craft project? Let me know in the comments below and til next time happy crafting!

 

Interchangeable Brushes Back in Stock & Winner Announced!

Hi friends! I am so happy to let EVERYONE know that the FABART set of 12 (15 pc) interchangable brushes are now back in stock. I shared them with you last week and they sold out in a couple of hours. I have been getting emails, comments and messages from viewers all week wanting to know how to get a set, hopefully there is enough in stock this time to satisfy you guys:) They have also extended the coupon code through 12/7/16, save 20% with coupon code: 7XOWSQJ9 that code is good for everything in the Fabart store as well (and I have projects coming up using the knitting needle sets and kids brushes if you want to plan ahead or grab some gifts.)

The folks at Fabart also let me give a set away to a lucky winner: Janet Okelley!!! Janet, check your email shortly for directions on claiming your prize:)

15250712_10207798675870279_4550524900062663510_o

If you were thinking about grabbing some sets of these interchangeable brush sets for gifts I really would not wait, they just popped up back in the shop seconds ago and they will ship out December 3rd. I would hate for any of my viewers to miss out. I just wanted to make sure you knew in time to get some and use the coupon code.

If you missed the video I did on these brushes you can find it here, I went through 12 different brush types and what they are used for and as a bonus all of these brushes are included in this travel set in a compact case that keeps the brushes safe and secure. The brush set retails for $24.95 and shipping is free if you have Amazon Prime. Don’t forget to use the coupon code for: 7XOWSQJ9 for 20% off through 12/7/16. Happy crafting!

A Christmas Craft Haul & Sales!

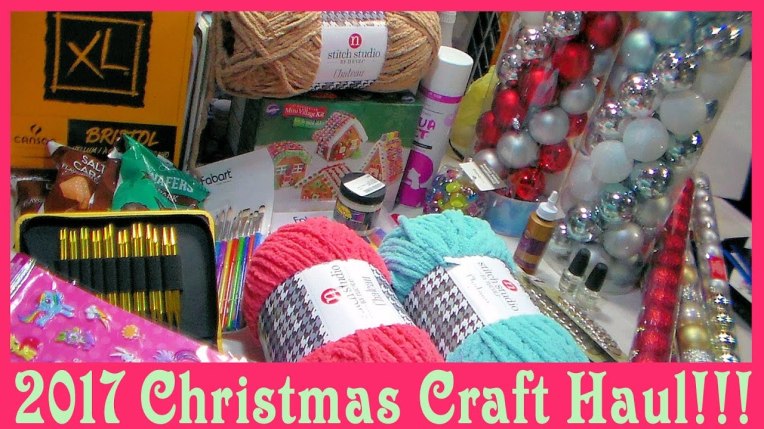
Hi friends!  I spent the day making stuff with the things I will show you in tonight’s haul! I was so excited to start some holiday crafting that I had to film this haul quickly so I could use this stuff! Have a look at the bargains I picked up at AcMoore and The Dollar Tree! (yes, I realize I got the year wrong LOL!)

maxresdefault

Video!

Just a reminder, today is the last day to enter a for a chance to win the FABART brushes and tomorrow is the last day to enter to win the Art Neko stamps so make sure to leave a comment on those posts if you have not already;)

Also I wanted to let you know you have until 11:59pm tonight to get 25% off and free USA shipping at Rubber Stamp Tapestry! I have never seen a sale this big, don’t miss out on that big peg stamp discount, peg stamps are a great gift for someone just starting out in stamping!

7917

Also the big sale at Craftsy is over at midnight so be sure to use my special discount link to snag any class for under $17.99 (many are $13.99) it’s the lowest prices of the year and I would hate for you to miss out!

black_friday_cross_sell_class

Did you find any awesome bargains this weekend? Let me know in the comments below and I will be back tomorrow with a super fun craft project! Happy crafting!

Five Seashell Painting by Request!

Hi friends! I got a very enthusiastic response earlier this week when I asked if you would like to have a tutorial of this painting, your wish is my command!

15137457_10207729964832546_3321219794592592303_o

I am using Mission Gold watercolors on Arches paper but feel free to use whatever paper and paint you prefer. Let’s Paint!

Video!

Supplies:
Watercolor paper: Arches 140# CP 11″x4″
Watercolors (mission gold) Yellow ocher, burnt umber, peacock blue (you can use Prussian or Pthalo blue), magenta
Round watercolor brushes #2, #4, #8
Credit card scraper
Paper towel and water buckets

Did that tutorial make you want more in depth painting classes? Check out all of the fabulous painting and crafting classes on sale now at Craftsy, many for only $13.99 including my class Mix it Up Mixed Media Step by Step! All of the teachers at Craftsy are top-notch and I think it is nice to get many different perspectives when you are learning. You get lifetime access to your Craftsy classes and they make a great gifts so stock up now during their lowest prices of the year. Don’t wait because he sale ends tomorrow night! Remember ANY classes you purchase via my special discount link help keep my YouTube videos and blog tutorials frequent and free! I thank you for your support:)

craftsybf1

I hope you are having a fabulous weekend and til next time happy crafting!

Get Ready for Wrapping With DIY Tags, Tape & Labels!

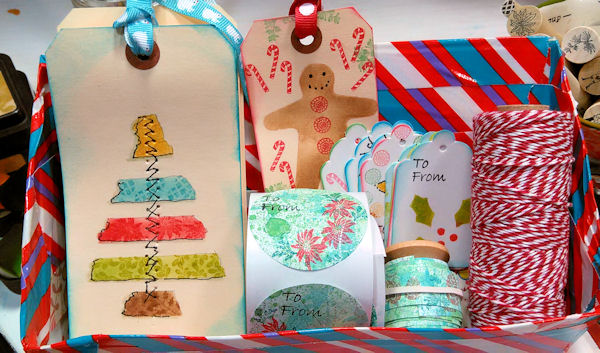
Howdy friends! Today we are going to make some fun wrapping supplies in bulk. I like to keep these in a box on my pool table with wrapping paper, scissors and ribbon so anyone in my family can wrap a present quickly!

washitags_thumb

I had an empty tissue box handy so I cut a diagonally on each edge and pushed the top into the box to make a holder for everything. I reinforced it with duct tape from the dollar tree and you can easily see everything in there. Try not to be jealous of my fanciness LOL!

tagsinbox

You can easily make a seasons worth of tags in  an afternoon and it make a nice way to relax during a hectic week! Learn these easy and fun techniques in today’s video!

Sponsored by Rubber Stamp Tapestry. Cyber Monday Sale: 25% off Sitewide and free USA shipping on orders over $50 on 11/28/16 only.  And you can sign up for the Rubber Stamp Tapestry newsletter to get reminders of sales, project ideas and coupons!

Supplies:

All directions to make these handmade gift tags, labels and tape are in the video! Feel free to substitute any supplies you want and make it extra unique! Happy crafting!

LIVE! Deer in Watercolor Painting Tutorial 12:30pm Eastern Time Today!

Hi Friends! Today we are going to paint a peaceful deer in watercolors live at 12:30pm on YouTube.

deerfinal

deer1

I have added holly to the design in case you would like to use it as a Christmas card but you can easily paint the deer in a meadow if you prefer, just omit the holly. Here is the sketch you can print out and trace on your watercolor paper. Here is the reference photo of the fawn in a meadow by Joan McLellan and here is a reference photo of holly and berries by Margaret Battye from Paint my Photo.

deer2

Here are the colors we will be using: Burnt Sienna, Yellow Ochre, Sap Green, Ultramarine Blue, Quin Rose and Pyrrol Red. We will mix all colors from them.

deer3

You can watch the free live class or replay in the player below but if you want to chat with other crafty friends be sure to watch at 12:30pm ET on the YouTube watch page so you can take part in the conversation.

You can find the supplies I am using from your Sponsor Jerry’s Artarama, I have all of the supplies arranged in a handy teachers list. Be sure to check out their Black Friday deals and Holiday Sales Flyer! They also have a bunch of affordable samples to try including Turner watercolors and Mimik watercolor brushes!

Speaking of sales Craftsy is having their huge Black Friday sale, all classes are $17.99 or less, it is the lowest price of the season. My class Mix it Up Mixed Media Step by Step is on sale for $13.99! That is the lowest price ever and with Craftsy you get lifetime access so stock up or buy a class as a gift! Any classes you by at Craftsy via my special discount link greatly helps support the free tutorials I post daily on my blog and YouTube channel and I thank you for your support!

black_friday_cross_sell_class

Don’t miss out on Craftsy’s lowest prices of the year! The sale runs through Monday 11/28/16! I hope to see you for the free live painting class today! Happy crafting!

Let’s Mess Around With Different Supplies & $15 Off Coupon!

Howdy friends and happy Thanksgiving! Today you get to see what really happens when I design a project. When I share my monthly Smart Art box with you I like you to see the actuall process of discovering the new tools and mediums, sometimes it goes smoothly, and well, sometimes we have many teachable moments like we do this month.

img_20161121_141121

As you may be aware acrylics are not my go-to medium but they are a big part of this months box, the theme was mixed media. They say hindsight is 20/20 and indeed they are right because I discovered many things about the products in this box and how my project would have turned out nicer and easier had I done things in a different order but that is how we learn. I heard a quote once that went “There is no failure, we either succeed or we learn.” If anyone knows who said that please let me know, I could not find it…I am probably misquoting but you get the idea. With that, here is today’s video!

This tutorial is sponsored by Smart Art Box:  Save $15 on any past box with coupon code BLACK2016 through November 30th

Supplies:
Black canvas panel
Acrylic paint (red, yellow, blue, white)
Gold outliner
Paint brushes
Sand texture paste
*I also used an art journal for color mixing and q-tips to remove paint and I use disposable palette paper.

Tips:
1. When working on a black canvas paint all of your objects white and let dry, then paint with your colors.
2. Save the gold outlining until the end of the project.
3. You can tint the texture paste with your acrylics so you won’t have to paint it later.

I hope you enjoyed this cautionary tale of a project:) Even though I struggled along the way I enjoyed the process and it looks pretty festive upon my mantle and I am sure I will put the leftover supplies to good use. Thanks for stopping by and til next time happy crafting!


Simple Seashell Watercolor Tutorial for Beginners!

Hi friends! Need to relax? How about a sweet and serene seashell?

15156742_10207736461474958_3242700792507947654_o

Paint along with me in today’s video tutorial!

Supplies:

  • 5″x7″ watercolor greeting card (or watercolor paper)
  • Watercolors (Mission Golf) in colors: Ultramarine blue, Burn Umber (or burnt sienna), Yellow ocher
  • You will also need watercolor paper and a pencils and eraser.

Let me know in the comments if you would like me to paint the more advanced 5 shell painting:) Have a wonderful Thanksgiving tomorrow to all my fellow Americans and til next time happy crafting!
Stamp School: Stamping on Embossing Folders & Giveaway!

Hi friends, this lesson will make your stamps and embossing folders way more useful! I am a bit of an embossing folder collector, I shudder to think at the amount of folders I have on my desk but these are tools we invest in and can use over and over. I mean, heck, why pay $1 for a pre embossed sheet of cardstock when we can buy an embossing folder for $4 and emboss until our hearts are content.  Oh! Before I forget be sure to leave a comment if you want a chance to win the rubber stamps I used from Art Neko, I will pick a winner in a week and this giveaway is open worldwide:)

15039536_10207699919281426_7623283722161137556_o

Sometimes though, we want more than just a textured paper and many of these designs are pretty enough on their own to be the focal point if a card and that is what we will do today. We will make a card by stamping on top of an embossed image! Watch the video to see how!

Sponsored by Art Neko  *Save 10% off your next order of any size or get free shipping on orders over $50 (whichever discount is greater you get!) just by mentioning thefrugalcrafter!

Supplies:
Embossing Folder (Birch trees from Darice)
Dye ink in navy and green
Colored pencils
Leaf or branch dye cuts
White and green cardstock (green can be glittery!)
Christmas tree stamp
Season’s Greetings stamp

Directions:
1. Emboss paper then tape to secure it in the open embossing folder.
2. Stamp on paper while still in folder.
3. Ink paper to color the background, use a sponge blender if you don’t have a spongy inkpad.
4. Accent with colored pencils.
5. Remove paper from folder and use this beautiful image on a card!

I really love this technique and I hope you give it a try! You can use this with any embossing folder, just make sure you stamp on the debossed side (the side with the most flat area) and it will work. Remember that generic patterns will give you more of a designer paper look while folder with a defined motif (like the birch trees) will give you more of a finished scene. It literally adds more dimension to your stamp art! Don’t forget to leave a comment for a chance to win the stamps I used and til next time happy crafting!