Embossing Powder Fun and a Fancy Fashion Card!

Hi friends! I made this card a couple months ago and thought it was about time I shared it!

dame_blog

We will use a lot of techniques here, mainly playing with embossing powders and adhesive sheets, I hope you enjoy the tutorial!

Video!

Embossing powders are so versatile and I hope this video inspired you to use them more!

Supplies:
Double stick tape and sheets (Punch Place Plus/Craft Chameleon) Check out their Adhesive Sheet Seconds for fantastic quality at a lower price-basically there might be a wrinkle on the backing paper but the adhesive is fine, why pay more?
Embossing Powder (rust tapestry and gold)
Stamps & Stencil: (Stampendous: vintage labels & Fashion Dame)
Patterned paper: DCWV-Hippie Chic matstack
Ribbon: Burlap and grosgrain
Buttons
Alcohol markers
Ink pads in black (pigment versa color) and brown (memento)

I hope you give these a try! Thanks to Craft Chameleon for sponsoring today’s video and til next time happy crafting!

LIVE Kingfisher in Watercolor/Colored Pencil Tutorial 12:30pm ET today!

Hi friends! Wow, what a whirlwind week! I have been so busy with the launch of my Craftsy class that I did not get a chance to prepare my live stream project until this morning, here is what we will paint:

kingfisherblog

Just a heads up, I plan of doing the free live painting classes every Friday at 12:30pm Eastern Time so you can plan on that even if I am late preparing the lesson. I don’t want anyone to miss out on the live chat! If you want to chat live, ask questions and hang out with your crafty friends you can do so on the YouTube watch page. As always you can also watch the live show or the replay in the player below:

This tutorial is sponsored by Jerry’s Artarama!
Supplies:

I can’t wait to hang out and paint with you on YouTube. Please feel free to share this with all of your artsy friends! The more the merrier! Happy crafting!

10621_728x90-69f3487a-a83b-4bcf-8da9-19bb6fe4b711

DIY Card Box for Weddings, Showers or Graduation!

Hi friends! Have you ever wanted to decorate plain boxes for pretty storage? Today I am going to show you how to make a box to hold cards at a wedding, shower or graduation. It is a good idea so cards do not get lost in a pile or gifts or misplaced. Even if you do not have one of the occasions coming up you can still use the techniques I will show you to cover other boxes with fabric for gift giving or storage and if you are anything like me you’ve got boxes.

SAM_4963

One of my favorite writers, Erma Bombeck, said “I never met a box I didn’t like” or maybe it was “She never met a box she didn’t like” and she was talking about a crazy relative, either way the shoe-box fits! Watch the video to see how to cover one with fabric!

Supplies:
Cardboard box
Satin Fabric *Papermart has an awesome deal on satin fabric right now!
Hot Glue
Strong double-sided tape
Rhinestone Jewel ribbon
Lace
Rhinestones
Pearls
Optional: Flowers

Directions:
1. Open the flat. Use the box as a template to cut the fabric, I give 2″ of extra fabric all the way around. Save your scraps for making rosettes.

2. Spray the “outside” of the box with spray adhesive and press to the wrong side of the fabric.

3. Trim around tabs. Leave extra fabric around flaps and use double-sided tape to adhere the excess fabric to the inside of the box.

4. Fold the box back up and decorate it!

I hope you enjoyed this project. Wedding card boxes can be very expensive so it’s nice to make something classy and save some cash while matching the décor of the party. You can also use the satin fabric to make chair bows or covers or sew them into sweet little favor bags (check out this tutorial for tips on sewing on satin fabric!) Thanks for stopping by and til next time happy crafting!

Sponsored by Papermart.

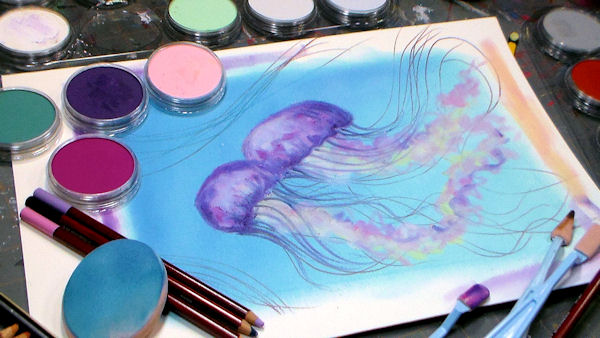
Jellyfish in Pan Pastel Tutorial (Beginner)

Hi friends! I have another pastel tutorial for you tonight, this time using Pan Pastels. Many people dislike the scratchy sound pastels make and even more folks dislike getting their hands chalky and dirty. Well, this is the solution to your problem!

jellythumb2

I really enjoy using Pan Pastels. They are expensive but you can do so much with a thin layer of media that I think they are cost effective over some other pastels in the long run. Watch the video for a full beginner tutorial. Feel free to replicate this in regular soft pastels or oil pastels if that is what you have. Always use what you have, I am trying to show you what is out there so you can decide what is best for you instead of you buying tons of stuff that is not right for you.

Video!

Supplies *Affiliate links to Blitsy used:
PanPastels (I recommend starting with the Painting set because you can mix all of the other colors from that one, also it comes with sponges and tools)
Blitzy accepts competitors 40% off coupons! Here is one 4MOM42416

Pan Pastel Accessories: Sponges, palettes and blending knives

Pastel Pencils: (any brand is fine)

Pastel Paper

Do you have Pan Pastels? What do you think of them? You can also follow along with an oil painting or acrylic painting tutorial with them as you apply them in the same manner, I think it makes them very versatile and the palette is always ready with no worry about paint drying out. Thanks for painting with me tonight and til next time happy crafting!
jellyfishblog


Stamp School: Colored Pencils & Solvent Tutorial {House Mouse!}

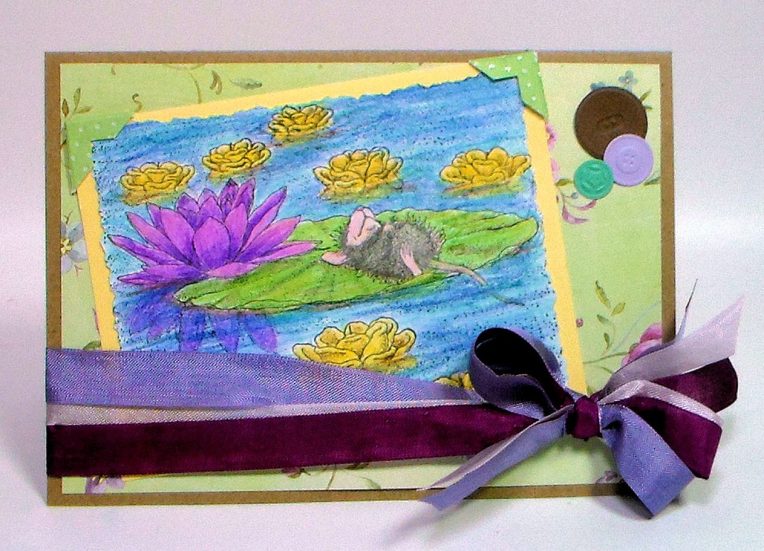
Hi Friends! Today I am going to share a technique that can help you stretch your supplies and this technique work with any wax or oil based colored pencils, even your kid’s Crayola or Prang colored pencils.

SAM_4949

I am using the House Mouse stamp Lily Pad Life from Stampendous. These designs are fun to color, my friend Tracey turned me on to these stamps years ago and I am still adding to my collection, I think they are so darling but any stamp that has areas to color will work just as well. Watch the tutorial to see how it’s done!

Video!

Supplies:
Stamps: Stampendous-House Mouse Designs Lily Pad Life
Ink: Memento Tuxedo Black
Medium: Colored Pencils
Blending Solution: Gamsol
Blending Stumps

If you don’t have Gamsol brand solvent you can use odorless mineral spirits (aka paint thinner), goo-gone or baby oil to blend these:) You can also use clear alcohol based markers to blend the pencils but they do not work as well as the other solvents and it can clog the marker. If you have watercolor pencils you can use a water based blender pen, I prefer a water based blending pen (marker) as opposed to a waterbrush because you can control the color better and it leaves the color on the paper rather than washing it away.

SAM_4951

Disclaimer: This post contains affiliate links to Hallmark Scrapbook and Blitsy, 2 shops that have good prices and selection of the products we use a lot. When you make a purchase through these links we earn a small commission on the sale but it doesn’t cost you more, in fact, I try to find the best price for you:) Tip: Blitsy takes competitors 40% off  coupons so if you have a big-ticket item to purchase check there first!

Thanks for stopping by and til next time happy crafting!


Studio Tour & Craftsy Class Launch!

Hi Friends! Wahoo! Today is launch day for my class at Craftsy! It is so cool to see 4 months or work finally come together! The class is called Mix it Up Mixed Media Step-by-Step and I get to give all of my blog readers a 50% discount on the class! Just click the link in this post to get the discount, if you go to Craftsy and look up the class it will be full price ($29.99) but because you are the most awesome, supportive people ever you get the class for $14.99 and you can be the first to take the class! Oh, and I have a winner to announce from the random drawing for a free spot in the class, drumroll please … it’s Stephanie Drury!!! I sent you an email with your prize so check your SPAM folder if you don’t see it!

titleCard_10621

So after I got back from filming in Denver I had so many ideas on how I could improve my studio for filming, it is a work in progress but so far it is working out well. We all have different stuff and take part of different hobbies but hopefully it will help you get some storage and workflow ideas to fit your needs.

Studio Tour Video!

What are your best storage ideas? I’d love to hear them in the comments below. Don’t be afraid to move your room around and try different storage ideas. My room is a work in progress, as my interests change I want to have different supplies within reach and that’s OK! The worst thing you can do is expect your room to perfect and static, give yourself permission to change what doesn’t work AND to do what is right for you. We are all different and have different needs so out craft rooms will be different. I hope you got a few ideas that will work in your space or at least you have a video to show your husband to prove that you are not a crazy craft horder, or at least you are not as bad as me LOL!

Thanks for stopping by, thank you for having a look at my new class Mix it Up Mixed Media Step by Step (and don’t miss out on the 50% off deal!) I’ll have a new pastel tutorial for you tomorrow, til then, Happy Crafting!

10621_728x90-69f3487a-a83b-4bcf-8da9-19bb6fe4b711

SOHO Colored Pencil Review (and last chance to win…)

Hi friends! I just wanted to remind you that you only have a few hours left to sign up to win a spot in my new Craftsy mixed media class! If you haven’t already entered the giveaway you can here, good luck!

sohothumb

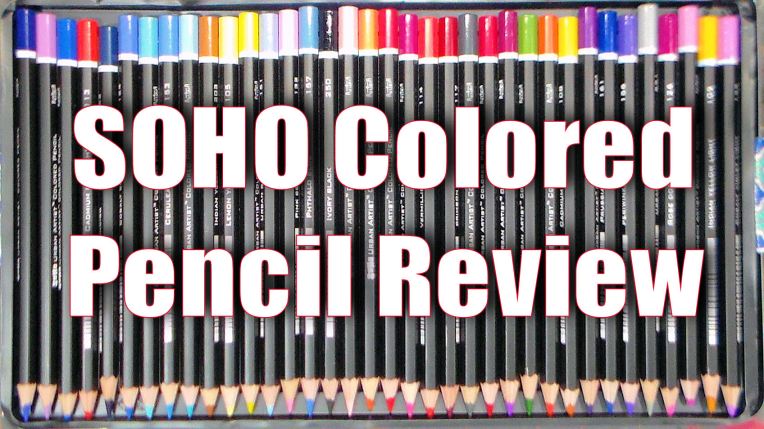
I recently got a set of 72 SOHO colored pencils from Jerrys Artarama. They are artist quality pencils made by Creatacolor specifically for the SOHO line. I tested them out on an adult coloring book, watercolor paper and smooth cardstock. See the results in today’s video!

Pros:

  • Pencils are labeled with real artist color names (ie cadmium yellow, sap green) so it makes selecting colors easier and reinforces pigment and color recognition.
  • Highly pigmented
  • No wax bloom on the papers I tested.
  • Affordable compared to other artist quality brands.
  • Hexagon barrels won’t roll off your surface.
  • The harder lead is stronger and less likely to break when sharpened.
  • Open stock is available so you can try out a few color is you are unsure about buying a set and you can replace colors if they get used up or lost.

Cons:

  • Drier than other waxier or oiler brands so it will feel chalkier than other brands when colored with. I only mention this as a con because we associate the creamy feeling with media as a plus and some people are put off by the feel of a drier/scratcher media.

I hope you found this review useful, there are so many great products out there that is can be tough to choose and you don’t want to buy a low quality product or something that is identical to something you already have. I think these will work nicely with the colors I have as they are less waxy and I can use my softer pencils over them if I want more richness in color. I recommend trying these on a paper with some tooth but they will work on coloring books and smooth card too. Happy Crafting!


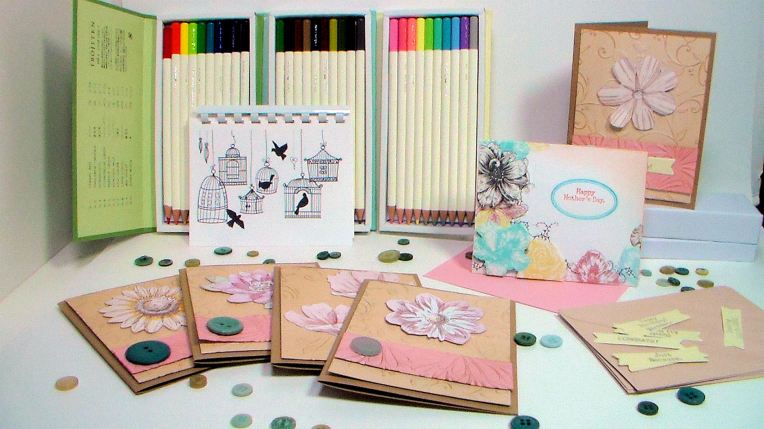
3 Quick Craft Ideas for Mother Day!

Hi friends! Mother’s Day will be here before you know it, here are a couple quick gifts you can make!

momsaysetnoborder

Watch the video to see how!

Tip: If you don’t have a binding machine bring your pages to a copy shop and they can bind it for you inexpensively.
This video is sponsored by GraphicStock. Get started today with only $39 for 6 months of unlimited downloads from their extensive library!

Supplies:
Clip art & Graphics: GraphicStock
White cardstock
Adhesive: Foam tape and glue
Plastic binding comb
Tools:
Computer and Printer
Binding machine (an office supply store can bind your book for you as well)
Paper trimmer & scissors

You can make a custom coloring book, stationary and a lovely mothers day card simply using images from GraphicStock. Print only what you need when you need it and since these images are commercial use and royalty free you can even sell the items you make at craft fairs and ETSY! The Sky’s the limit!

Do you have any great DIY Mother’s Day gift ideas? Please share your ideas in the comments below, I’d love to see them and your fellow crafters would too! Thanks for stopping by and til next time happy crafting!
 

LIVE Painting Class Today! 12:30pm ET {Betta Fish}

Howdy friends!  It’s been a crazy week, the kids are on break so there have been sleepovers, softball practice and lazing around. The weather was so nice yesterday that my son and I took the kayaks out! We also had the water well pump bite the dust after 40 years of faithful service so I had a repair man in yesterday to replace the pump, boy, running water is something you take for granted until you don’t have it and then it is the most important thing! I am feeling so thankful:) This is what we will be painting today at 12:30pm Eastern Time(I must have water on the brain LOL!)

bettablog

Sarah will be in taking your questions during the live stream as usual so it will be a fun and informative class. You can watch it live (or the replay) in the player below but if you want to chat with friends watch it on the YouTube watch page.

Supplies Sponsored by Jerry’s Artarama:
Turner watercolors

Inktense Pencils (or whatever watercolor pencils you like)

Soho Colored Pencils

140# watercolor paper

Princeton #6 cat’s Tongue (filbert) Brush

Mimik Kolinsky brushes
Water, paper towels

Reference photo by Hannah Waymack

See you at 12:30pm ET for this fun painting lesson! It should take less than an hour so I hope you can squeeze it in:) Happy crafting!