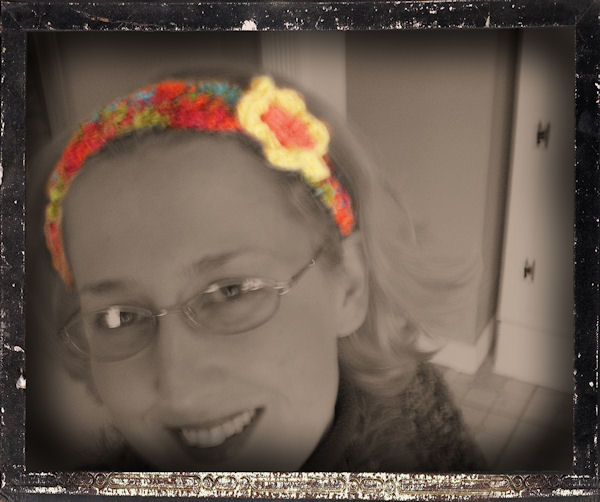
Happy Saturday! I hosted my first knitting group at the local library this week and it was a small but fun group. There is something about watching someone knit that makes you want to join in too. Especially if you are making something cute like this:
I designed this fun and fast headband to share with the group because it is easy (garter stitch) and it works up quickly. There is nothing worse than those first couple of inches of knitting for a beginner and since it is only 6 stitches across you can get the first few rows done in no time. As an added bonus one of my students kept finding extra stitches on her needle so she learned increasing and decreasing too LOL! BTW I am not a proper knitting teacher, I do not believe in ripping out a bad row, if you happen to have an extra stitch you can just decrease on the next row. The other good thing about this is that your first wobbly rows will be hidden in the back under your hair when you wear the headband so a few accidentally increased/decreased rows won’t even show 😀 Lazy knitters of the world UNITE!
Easy Headband Pattern by Lindsay Weirich (fell free to share!) I used Lion brand Boucille yarn in Popsicle for my headband, you can use any yarn you like but I would make sure it is soft! Smoother yarn (like Red Heart) is easier for beginners because you can see your stitches better.
Cast on 6 stitches (count the slip knot as your first stitch!)
Knit until 18″ long (this is sized for an adult, you can wrap it around your head as you go to make sure it is sized for your head. You want it to stretch around your head but not too tightly, if it is too loose it will fall off so you just want to have to stretch it a bit to fit it around)
Bind off your stitches. Sew the ends together being careful not to twist your knitting. Weave in yarn ends.
The Flower is done with a size G crochet hook and smooth worsted weight yarn such as Red Heart. HDC=Half-Double Crochet, DC=Double Crochet. There is a free Learn to Crochet series of videos here if you are a beginner or need to brush up on your stitches.
Round 1. Color A. Chain 6 stitches and connect with a slip stitch to form a ring or use the Magic Ring method (I used the Magic Ring method.) Make 12 HDC in the ring, and slip stitch to complete the round.
Round 2. Switch to color B. In the next stitch crochet this series of stitches: 1 HDC, 3DC, 1HDC. All stitches are in one stitch (hole) this makes one petal. Skip one stitch and repeat. You are creating a petal in every other stitch. You should have 6 petals, slip stitch to close round. Tie loose ends together but do not cut them. Use the loose yarn ends to sew the flower to the headband. Weave in loose ends and trim if needed.
If you are having a hard time getting the hang of making the flower I have a video I filmed last year that might help. It is not the flower I used on the headband but you can see a demo of the stitches. These are super cute on cards and scrapbook pages too, try using a small hook and embroidery floss for a dainty flower!
Thanks for stopping by and til next time happy crafting!

