40? I Demand a Recount!

Hi friends! I hit the big 4-0 today and things are already going downhill. When I finished up my live class on Friday my throat was scratchy and by the end of the day I was achy, tired and cranky. I spent the weekend under blankets drinking tea and alternating Tylenol and Advil. I have decided that turning 40 is bad for my health and from now on I’m going to be 32 🙂

40

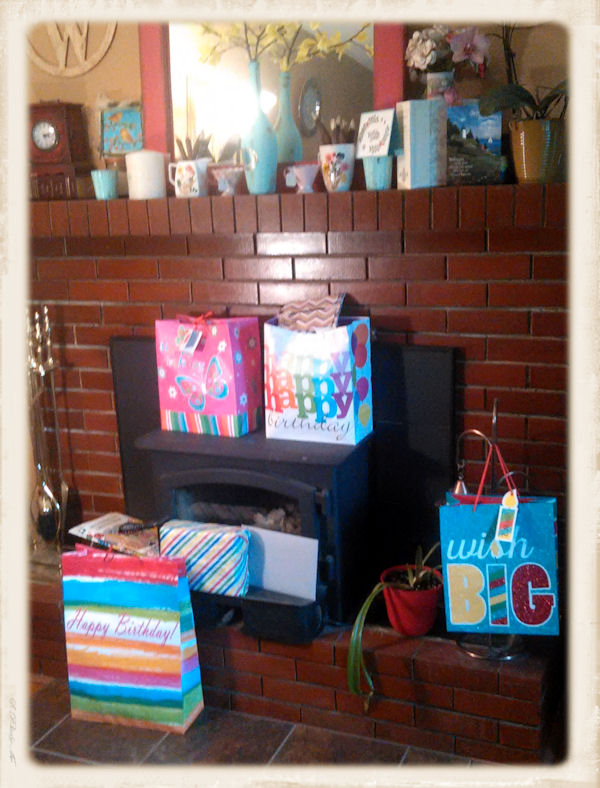
Actually I woke up to lovely presents and a no-bake cookie “cake” from hubby and kids ( love peanut butter no-bakes and I am not crazy about cake as vegan cakes tend to be lackluster) and then my mom and sister stopped by and took us to lunch. My sister gave me a pretty adult coloring book and I remarked at how it will be nice for me to use during my convalescence and she accused me of milking my illness. Pffftt. She just doesn’t understand how long it take people my age to get over a cold. Since I had no voice to shoot videos I spent some idle hours online watching craftsy classes (today is the last day of a big sale if you want to check out some 50% off classes shameless affiliate linkage) and looking at new watercolor paints online. I know, I need more paint like a hole in the head right? I was checking out the brands you guys had been asking me to review and a few sets hopped into my cart. I have not hit “buy” yet so if there were any brands you were curious about let me know and I will see what I can do.

All kidding aside I am very lucky to have lovely friends and family (that I hopefully have not given this crud too) to celebrate this milestone with. I am so grateful to have you here as well so I wanted to let you know why I did not have any new videos up this weekend (if I go a few days I get worried emails LOL:) and if you know of any good remedies to get rid of a sore throat let me know. It is driving me crazy, every time I swallow it feels like razors and I sound like Rudolf when his dad made him cover his red nose with mud. That would make for good video huh? Oh well, I don’t get sick that often so I guess I am due. Thanks for stopping by and til next time happy crafting!

WOYWW: Pinata!

Howdy folks! I started training for a race today. My son runs cross country for his school and every year they have a “parent race” and I figure what’s good for the goose is good for the gander so I am going to run it. I have 2 goals:

  1. To finish the race and not have a heart attack.
  2. Not to come in dead last.

So today instead of walking my dog I jogged the first 3rd of our route, walked a third and jogged the last third. That might sound impressive but our route is 1/2 mile long. The race is 1.62 miles long.  I had to drag my dog the last third of the way because she is more of a leisure breed I think. Come to think of it I probably am too. My ankles hurt and my lungs burned.  Good times. I am trying to recruit other moms of x-country runners to join me because misery loves company I guess. 🙂 I have to say though, a half an hour after the run I felt really good and had lots of energy the rest of the day too so that is worth a little bit of agony I guess…right? Oh, you did not come hear to read about my running? OK then, here is my work desk this week, my twin daughters birthday is this weekend and here is the pinata we began tonight:

woyww_piniata

You might wonder why we spend so much time making something that is going to be destroyed (I think that when I see the elaborate food some people cook) well, I’ll tell you:

  1. It is fun to design and make.
  2. It is inexpensive (cardboard and party streamers) and it is nice to save money on the pinata and spend the money on the good fillings!
  3. What kid doesn’t love a pinata?
  4. It is really fun and freeing to make something that you know is temporary, it is liberating!

I was running low on cardboard and had to get creative with this. I just had some new goodies arrive from Papermart today so I used the box as the belly of the pinata (I filled the box chock-a-block full of candy) then I used a panel of flat cardboard for the nose and tail. I had to scrounge clean cardboard from a pizza box to make the fin and some tapering pieces from the box to the ends but who cares, it will all be covered in crepe paper! Man, I love making pinatas!  If only I could figure out how to put the squiggle over the “a” whenever I spell pinata….

Do you want to see what other craft folk have on their desks today? Well hop over the Julia’s blog The Stamping Ground for more WOYWW fun! Thanks for stopping by and til next time happy crafting!

A Stamping Tip for Beginners (or anyone frustrated by splotchy stamping!}

Howdy folks! I just wanted to pop in and share some beginner stamping tips with you today using this quick tag as an example. The cool camouflage ribbon I am using is from Papermart.

DCF 1.0

One of the biggest mistakes new stampers make is not leaving the rubber on the paper long enough and not using the right ink or paper. Here are some easy tips to improve your stamping now:

  1. Choose silky smooth paper for stamping. You can visit a print shop and buy a few sheets of the different kinds they have, it is a great way to try out paper inexpensively and they can order you a ream of paper at a lower cost that the office supply store! Notice how crisp and clean the orange stamped image looks on the white paper. That is my favorite cardstock: Neenah 80# super smooth in Solar White, it also is great for alcohol ink markers!
  2. Choose the right ink: notice the difference in sharpness between the orange stamped image and the brown wood-grain on the manila tag. I used Stampin Up Dye base ink on the white panel (a stamping ink) and distress ink on the tag (a specialty ink made to give a distressed look). Also, white manila tags are fun to stamp, and stamp pretty well, they are not quite as good as a super smooth stamping paper. It is totally fine to stamp on anything, but you should try out different stuff so you can learn to get the effect you want!
  3. Don’t rush it! I know it is exciting to stamp and you wan to see the image ASAP (step away from the stamp ma’am) but you need to give the ink time to transfer.  First ink up the stamp well, tilt it to the light to make sure the entire surface is shiny, you might even want to breathe on the stamp to moisten the ink a bit more. Gently but firmly press the stamp to the paper and hold it in place for a few seconds (roughly the amount of time it takes you to sing the song “happy birthday” then lift the stamp straight up. Viola a great image!

I hope these tips helped some of the newbies out there! I also recommend curved stamp mounts like Rock-a-blocks and the Mega mount because they make even the most finicky detailed stamps stamp well. I have a tutorial on using those here. Thanks for stopping by and til next time happy crafting!

Bring on the cuteness!

As I am writing this blog post I am listing to the sweetest cheep-peeping noises coming from our six new baby chicks! More on that later. Baseball season has started and I have two ball players in the house this year! We had a birthday party to go to over the weekend for a ball fan so I made this card using my Baseball Party SVG & Printable kit:

Here is a look at the Baseball Party kit, the printables are full-color so just print, cut and glue! Or use the die cut files to cut from colored cardstock and assemble. They make great embellishments for cards and scrapbook pages too!

Baseball Party SVG & Printables!

…back to the chickens…

I have never has chickens before and I can’t believe how snuggly and cuddly they are. My kids adore them, they will perch on my girls’ arms for the longest time.  Check out how cute they are:

They are Rhode Island Reds in case you were wondering. They are so funny, all of a sudden they will all stop what they are doing and take a nap.

Do you know that a lot of famous people raised chickens? Martha Stewart and Al Gore come to mind.

A bird in the hand…awwwww….

Well, there is your dose of cuteness for a Monday morning! Til next time happy crafting!

I am Robot.

Here is a quick card to make for a birthday.  I used paper I made with my MacGyver stamp machine and a stamped brad. The glittery brads are plain ones I painted with glitter nail polish and then dipped in a pot of silver glitter. I heat embossed the robot in silver. The background paper was embossed with diamond plate embossing folder, inked with black and silver in then sprinkled with clear embossing powder and heated. Quick, easy, fun, robot.


Thanks for stopping by and til next time happy crafting!

A Royal Summons!

Howdy folks and happy Saturday! Just a reminder that today is the last say to save 30% on EVERYTHING in the Lindsay’s Stamp Stuff shop at MyGrafico. This year my daughters decided they wanted to have a tea party for their birthday so what better way to make invitations then with my Vintage Alice ATC set:

I used both the black and white and colored printable sheets for these cards.

You get 2 printable sheets in this kit, a black and white sheet of 12 stamps and also a hand colored sheet, I used both sheets to make the cards. This set was very frugal to make, I cut 2 envelopes from each sheet of 12×12 scrapbook paper using my Envelope Bonanza template set (use the bb_envie file) and I cut them with my Cricut  and SCAL software, so quick! Also it only took 3 sheets of pink pattern paper to cover the fronts of 18 cards, and 9 sheets of white cardstock cut in half for the bases. The punched edges add a fancy flair perfect for a tea party!

Here is a card made with the black and white sheet I colored with markers:

And here is one I made with the pre colored sheet:

These invitations qualify for the following challenges: Challenge up your Life (celebrations) and Polk-a-Doodle (vintage).

Here is a look at the set, you get both 8.5″x11″ printable sheets:

If you want a kit with more versatility try the Vintage Alice Printables with 30 classic Alice in wonderland illustrations on 5 printable sheets suitable for cropping and resizing.

And to make the perfect envelope try the Envelope bonanza kit with SVG files to cut with your cricut and printable versions you can resize as well if you don’t use a cricut!

Thanks for stopping by, have a great weekend and remember the 30% off sale ends tonight at midnight at Lindsay’s stamp Stuff! Happy Crafting!

Happy Birthday USA!

Happy 4th of July to all of the Americans out there! To celebrate everything in the Lindsay’s Stamp Stuff shop (myGrafico Only) is 30% off all day! Here I used stamps from the Patriotic Collection, All Around Phrases and a sentiment from the Cool Kid card kit to make this birthday card:

I digitally paper pieced the digital stamps to make this quick card!

DT member Tamara posted a great tutorial on placing digital pattern paper inside digital stamps. I could not believe how easy it was, you can read her tutorial here. I used Cowboy Up papers from Lettering Delights to digi-piece my stamps, how fun!

Digital stamps: Lindsay's stamp Stuff, Digital papers: Lettering Delights, Rubber Stamp (star wheel) SU!

I crumpled up the blue paper (from the scrap bin) and smoothed in inked it to give it a manly distressed feel, inking the edges of the card base also makes it manly 😉 this card qualifies for the following challenges: Curtain Call, AI Factory Crafty Catz (distressing), Robyn’s Fetish, MelJens, Paper Cuts, Pals Paper Arts, Paper Romance, Paper Sundaes, Party Time Tuesdays, Pixie Dust Studio, Raise the Barn, Rosie Dee, Stamp Insanity, Stamp Something, Stamping for the Weekend, And the weekly MyGrafico Challenge and you could win my Patriotic set if you play along too!

That’s all for today, don’t forget the 30% off sale at Lindsay’s Stamp Stuff is only until Midnight Tonight (Sunday) Thanks for stopping by ant til next time happy crafting!

Blow out the Candles!

Howdy! I made a new card with beautiful Birthday papers and clip art from lettering delights (get 60% off your order with coupon code: firecracker, hurry offer ends 7/9/2010!) I simply printed the paper, mat, sentiment and border together on cardstock then I cut it out with scallop scissors and glued it to a pink card base and added one of my new digital stamps from the Sweet Treats 2 collection from Lindsay’s Stamp Stuff over the printed mat and I was good to go! Quick, cute and easy, gotta love it!

Digital Stamp: Lindsay's stamp Stuff, Markers: Copic, Paper&Embellisments: Lettering Delights

I colored the cupcakes and cake stand with my Copics. The cool thing about the new Sweet Treats 2 set is that there are 3 empty covered cake plates that you can fill with whatever goodies you like including stamps from the set or any other digital or rubber stamp you have, it so versatile, the cupcake in the plate are actually from the Sweet Stuff set. It is a really fun set 😉

This card qualifies for the sketch challenge at Card Patterns.

Thanks for stopping by and til next time happy crafting!

40% off and a Freebie!

Howdy folks! It is unofficially Summer here, the kids are out of school and I am feeling like some easy-breezy crafting! To get you in the crafting mood I have put the ENTIRE Lindsay’s Stamp Stuff shop at MyGrafico 40% off!

Here are a couple of cards and envies that were a breeze to make using my new Digital Stamp set On The Line and my trusty Envelope Bonanza templates.

digital Stamps/templates: Lindsay's stamp Stuff, Paper: DCWV, Cardstock: Staples, Markers and Pencils: Prismacolor

To make the envelopes I simple cut the SVG file with my Cricut and SCAL software, Don’t worry if you don’t have a Cricut because you get re-sizable jpg templates in the Envelope Bonanza set too so you can print if you prefer 😉

Stamps from the new On The Line set from Lindsay's Stamp Stuff.

These cards were simple to make. First I layered my stamps and text the way I wanted them and placed my arrangement on a new 8.5″x11″ document. I printed both cards on one sheet of cream cardstock.  Then I dragged apart the banners and printed them again on a piece of copy paper. After that I taped scraps of patterned paper over the spots where the banners printed and put it through the printer again so that the banners were printed on my pattern paper. Then I simply cut out the banners from the PP and adhered them to my card over the printed banners. I stamped “DAY” and “BOY” with rubber stamps (inkadinkado) and punched them out, inked them and added them over the banners with foam tape. This is an easy pattern you could make a bunch of quickly and have on hand for birthday’s and baby showers. Just don’t forget to make matching envelopes too!

I have a hard time with "boy" cards and clean and simple but I think this time I pulled it off 😉

These cards qualify for the following challenges: Aimee’s (something for a girl: It’s your Day card), Craftalicious (anything new), Drunken Stampers (Birthday),  Cupcake Inspirations (it’s your day card), Incy Wincy (paper piecing), Pile it On (Quirky), Stamp Something (use a Digi), Dancing Pajamas (alphabet stamp) and Artful Inkables (a new technique: paper piecing with a digi).

Now Lets have a look at the new On the Line set, it is on sale along with everything at Lindsay’s Stamp Stuff (mygrafico shop only) until Saturday!

wow! 19 stamps in all!

And because it is Thursday I have a timely freebie for you for all those last-minute graduations cards, click the picture to download.

3 free stamps, cool huh?

Now let’s see what the terrific Lindsay’s Stamp Stuff DT has for us today:

Cheryl Gorka DT Coordinator

Margie Visnick

Lisa Jurecek

Leanne Garner

Tamara Bennett

Cindi Hooks

Micki Harper

Rebekah Doak

Karin Martin

Jennifer Bliss

Rhonda Walker

Diane Bove

Thanks for stopping by, don’t forget about the Lindsay’s Stamp Stuff 40% off sale going on through Saturday, till next time happy crafting!