Hi friends! Any type of frame can be used to create this unique shaker card. Try using nesting circle, rectangle, square or Triangle dies to make the frame for this and have fun!

Watch the video to see how!
This video is sponsored by Rubber Stamp Tapestry – use coupon code: LINDSAY and receive 15% off your retail order of $10 or more of peg stamps, peg stamp sets, and unmounted stamps! Coupon expires a week from this video publication. Continue to receive great deals by becoming a PegStamp VIP here. As a PegStamp VIP
you’ll get a weekly deal via email plus links to fabulous tutorials by me, Lindsay the Frugal Crafter and other designers.
Supplies from Rubber Stamp Tapestry:
- Succulents unmounted stamps set (Hey, I designed these:) *Also try the succulent peg stamps if you are making a smaller terrarium
- Handmade with Love Clear Stamps (inside of card)
- Dye ink (Northern Pine) Memento *Ink refills for Memento ink pads now available at RST!
- Adhesive: ⅛” scor-Tape
Other Supplies(Affiliate used where available)
- Gold Metallic Cardstock
- Heavy white cardstock (110# recollections)
- Craft foam (I used yellow because it was close to gold, you could also use white)
- Clear “window” transparency sheets (I use this kind because you can also stamp in it if desired or print on it with an ink-jet printer but you can use any clear sheet including product packaging!)
- Seed beads in shades of brown and white
- Dies or shape cutter to cut the shaker frame of your desired shape. I used the treasure trove die from Local King that I bought at the stamp show
- Markers: Ohuhu brush tip 48 set
- Cactus washi tape
- Other: Clear stamp blocks, foam mat for stamping, scrap paper, post-it notes for making masks
Directions:
- Cut terrarium frame from gold cardstock and craft foam. Make a 4 ¼” x 5 ½” card from white and trace the terrarium shape on it so the top of the shape hangs off the fold and cut out with scissors. This will be the base of your shaped card. Cut a window for the shaker from clear transparency.
- On the card base stamp your succulents masking as needed. Color with markers.
- Using skinny tape adhere the foam layer on top of the cardbase over the image you just colored.
- Fill the opening of the frame with small beads. I used brown and white so it would look like potting soil. Adhere the transparency sheet on top to seal in the beads.
- Carefully line up and adhere to top frame with skinny tape.
Inside of card:
- To disguise the bleed through of the markers from the front of the card doodle around them with a water-based black pen. Then, if desired, glue down another die cut frame like you used in the front. If your card isn’t symmetrical and you used a die you can cut it from the reverse side of the cardstock and it will work.
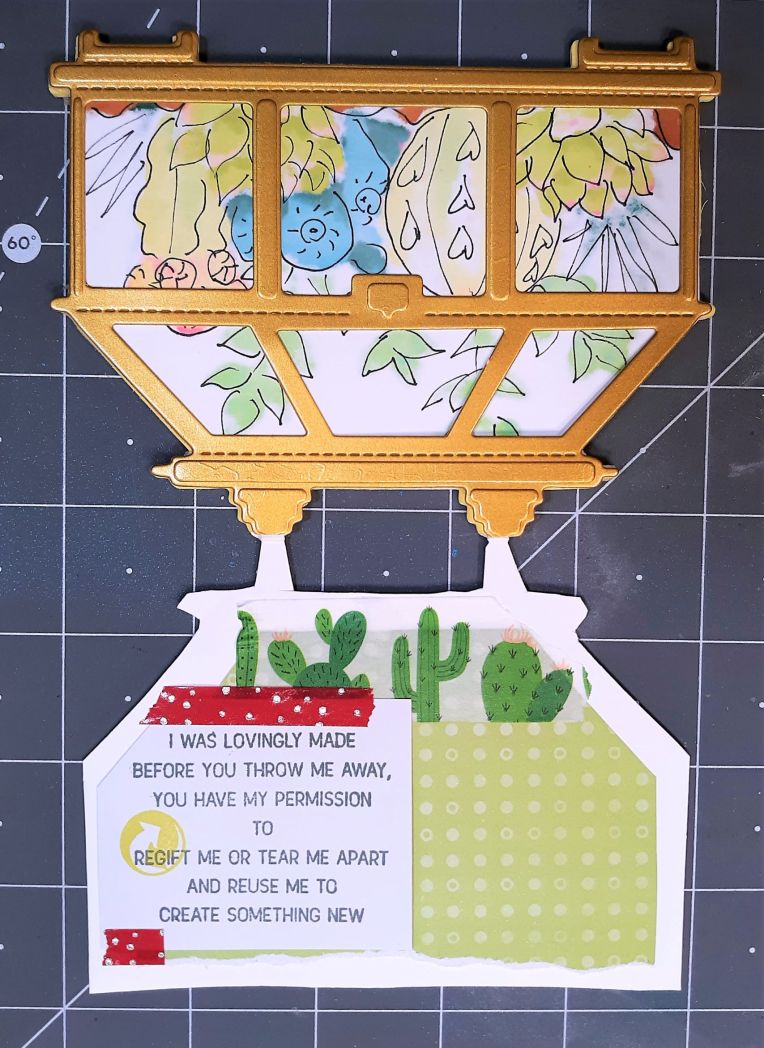
- Use washi tape and paper or a post-it note to add a sentiment to your card. I stamped an “ok to reuse” sentiment inside my card that can be easily removed if they would like to regift the card.
Tips!
- Foam tape can be used in place of craft foam if that is more convenient for you.
- Don’t worry if you don’t have the exact die cut I used. You can use any dome or frame or any nested die set to make one. You can also use shape cutters. If you are not using a die then foam tape will probably be easier than craft foam for the middle layer.
- Sequins, glitter or sand can be used in place of beads.
- If you don’t have alcohol markers you can use whatever you like (watercolor, chalks, water-based markers, ink and daubers etc) and as a bonus you won’t have to decorate the bleed through on the inside.
I hope this project sparks some ideas!
