Join me for a craft-along! How to make classy cards with Dollar Tree Supplies!

Hi friends! Last week I visited several Dollar Tree stores in my area and bought some craft supplies. The problem with dollar store supplies is that you pick them up on impulse and sine you don’t put a lot of planning into buying them you can easily forget about them. that’s why I decided to play with them right away! Firstly because I wanted to make sure there was nothing wrong with them (the dies cut and the stamps stamp etc.) and secondly I wanted people to be able to find these supplies if the want them. Please keep in mind that you can use stuff you have in your stash already and try these techniques. The more unique the better I say! Another reason I am excited to share this project is because I want crafting to be accessible to as many people as possible so if you can make something pretty with a $1 stamp set it will make the craft available to more people. Granted I will pull inks and other things from my stash (as I am sure most will) so not everything will be from the dollar store. Use what you have (even the kids watercolors and markers!) and let’s have a crafty good time!

I’ll be be chatting live during the premiere of this video at 12 noon Eastern time today over on YouTube so be sure to watch at that time on the watch page if you want to chat with me and fellow crafters! We’ll have an arty party! don’t worry if you can’t make it, a replay will be available too!
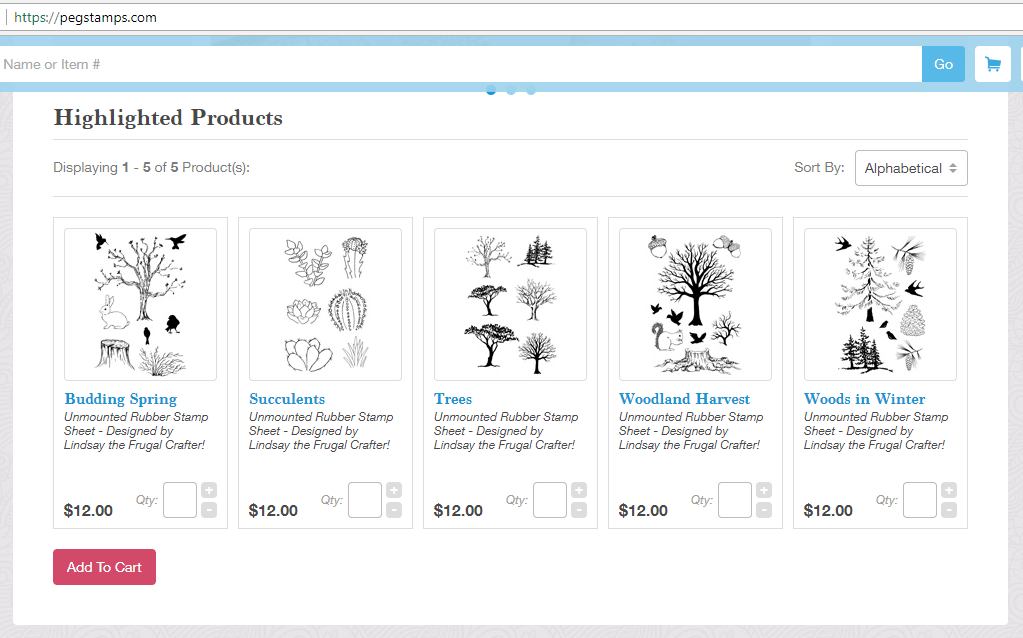
Supplies!

Supplies from dollar tree: *You might be able to order some of these things online from dollar tree (affiliate links used) https://shrsl.com/2syl1 but you might need to order in bulk.

Stuff from my stash:

In the video I mentioned the DIY cloud stencil tutorial from Local King Rubber Stamps, it is such an ingenous idea! Lisa is so fun too, you will enjoy her videos. Happy crafting!

Succulent Shaker Card

Hi friends! Any type of frame can be used to create this unique shaker card. Try using nesting circle, rectangle, square or Triangle dies to make the frame for this and have fun!

P1030551

Watch the video to see how!

This video is sponsored by Rubber Stamp Tapestry  – use coupon code: LINDSAY and receive 15% off your retail order of $10 or more of peg stamps, peg stamp sets, and unmounted stamps! Coupon expires a week from this video publication. Continue to receive great deals by becoming a PegStamp VIP here.  As a PegStamp VIP
you’ll get a weekly deal via email plus links to fabulous tutorials by me, Lindsay the Frugal Crafter and other designers.

Supplies from Rubber Stamp Tapestry:

Other Supplies(Affiliate used where available)

  • Gold Metallic Cardstock
  • Heavy white cardstock (110# recollections
  • Craft foam (I used yellow because it was close to gold, you could also use white)
  • Clear “window” transparency sheets (I use this kind because you can also stamp in it if desired or print on it with an ink-jet printer but you can use any clear sheet including product packaging!)
  • Seed beads in shades of brown and white
  • Dies or shape cutter to cut the shaker frame of your desired shape. I used the treasure trove die from Local King that I bought at the stamp show
  • Markers: Ohuhu brush tip 48 set
  • Cactus washi tape
  • Other: Clear stamp blocks, foam mat for stamping, scrap paper, post-it notes for making masks

Directions:

  1. Cut terrarium frame from gold cardstock and craft foam. Make a 4 ¼” x 5 ½” card from white and trace the terrarium shape on it so the top of the shape hangs off the fold and cut out with scissors. This will be the base of your shaped card. Cut a window for the shaker from clear transparency.
  2. On the card base stamp your succulents masking as needed. Color with markers.
  3. Using skinny tape adhere the foam layer on top of the cardbase over the image you just colored.
  4. Fill the opening of the frame with small beads. I used brown and white so it would look like potting soil. Adhere the transparency sheet on top to seal in the beads.
  5. Carefully line up and adhere to top frame with skinny tape.

card_inside

Inside of card:

  1. To disguise the bleed through of the markers from the front of the card doodle around them with a water-based black pen. Then, if desired, glue down another die cut frame like you used in the front. If your card isn’t symmetrical and you used a die you can cut it from the reverse side of the cardstock and it will work.
  2. Use washi tape and paper or a post-it note to add a sentiment to your card. I stamped an “ok to reuse” sentiment inside my card that can be easily removed if they would like to regift the card.

Tips!

  • Foam tape can be used in place of craft foam if that is more convenient for you.
  • Don’t worry if you don’t have the exact die cut I used. You can use any dome or frame or any nested die set to make one. You can also use shape cutters. If you are not using a die then foam tape will probably be easier than craft foam for the middle layer.
  • Sequins, glitter or sand can be used in place of beads.
  • If you don’t have alcohol markers you can use whatever you like (watercolor, chalks, water-based markers, ink and daubers etc) and as a bonus you won’t have to decorate the bleed through on the inside.

I hope this project sparks some ideas!

Stamping Succulents! (BTW I designed these stamps!)

Hi friends! I am so pleased and humbled by the response to my first line of rubber stamps with Rubber Stamp Tapestry. It is a wonderful feeling to know my artwork will inspire others to make their own art. Today I am going to share one of my new sets: Succulents.

SAM_5459.JPG

I designed these stamps to be used together to make scenes and arrangements but I also want them to be big enough to be used on their own if you just want to do a quick & simple card. I also wanted you to be able to use them with other stamps you already have because in order for my stamps to earn a place on your craft table they need to make your other stamps and supplies more useful.

SAM_5461.JPG

In today’s tutorial I am going to show you 3 different ways to create masked scenes with these stamps so you can use them on their own or with other plant pot stamps you have. I will also show you how to layer colored pencils to create rich images with depth and contrast.

Video!

This video is sponsored by Rubber Stamp Tapestry! Use coupon code FRUGALJANUARY18 for 20% off all stamps on orders over $10, expires 1/31/18. Become a Peg Stamp VIP here & get the deepest weekly discounts available

Supplies:

Here is a look at the five new stamp sets!

2018-01-27

Click here for a closer look!

SAM_5465.JPG

Thanks again for all of your words of support and encouragement! Sales have been brisk and I am so thankful for that too:) I hope you try these techniques with the supplies you have on hand and til next time happy crafting!

Cute Christmas Pup Card!

Hi friends! Today I am making a Christmas card from a couple of sets of everyday stamps! I love it when I find a stamp set that suits my personality and it is versatile enough for any occasion. These cute and quirky animal stamp sets from Katzelkraft really fit the bill when it comes to my type of cardmaking. They are funny, cute (but not too cute), a bit silly and they are large enough to color and take up some real estate on a card.

24130479_10210579793396479_2058088150284457436_o

In this video we will do a Distress Oxide ink background and some simple alcohol marker coloring with lots of tips and explanations for blending colors. I hope you find it useful:)

Video!

This tutorial is sponsored by Top Flight Stamps!  SAVE 10% off your next order with coupon code: thefrugalcrafter10 *USA orders of $50+ ship free!

Supplies from Top Flight Stamps

Other Supplies:

Full directions are in this real-time step by step video tutorial! Enjoy:) I had so much fun making this card that I stamped out all of the dogs and cats and colored them up as I watched TV, it’s so fun, like being a kid again!

24173057_10210593600701653_34617035856853067_o.jpg

I hope you enjoyed this fun card tutorial! Happy crafting!


Stamp School: Layered Stenciling! {a USE YOUR STASH project}

Hi friends! Do you ever look at the pile of supplies in your craftroom and feel badly that they are collecting dust? Well today we will put some neglected supplies to use: stencils, Gelatos, gel sticks, watercolor crayons, pastels, distress crayons, ink pads you name it. And don’t even think that you can’t do this project because I am sure you can find something in your stash that will suffice. No excuses:) I had been feeling badly about the small fortune I spent on Distress Crayons (because quite frankly I was not impressed with them and then I felt bad that I wasted my money) but then I thought, well, they are bought and paid for, I might as well see what I CAN do with them and turns out they worked darn well for this technique!

stencillayerblog

No more Distress Crayon guilt for me! Do you have any supplies you feel guilty for buying and not using? Let me know in the comments and hopefully today’s video will inspire you to use them!

Video!

Sponsored by Art Neko  *Save 10% off your next order of any size or get free shipping on orders over $50 (whichever discount is greater you get!) just by mentioning thefrugalcrafter!

Supplies:

  • Stamps from Art Neko: Marine stuff,  Steampunk, Postcard
  • Bristol board or smooth cardstock (cut 4.5″x6″)
  • Stencils
  • Water-soluble crayons or oil pastels (Distress crayons, Gelatos, gel sticks, gel crayons, portfolio water-soluble pastels, Prima water-soluble pastels or watercolor crayons.)
  • Die based ink (Like Distress Ink)
  • Black Pigment ink (Like Versafine Onyx black)
  • Baby wipes
  • Make up sponges (cosmetic wedges)
  • Heat Tool (optional)
  • White gesso or acrylic paint
  • Low tack painters tape or masking tape
  • Cheap aerosol hairspray (I like Aqua Net for this)
  • Most importantly, time to play and have fun!

Directions:
1. Cut cardstock or 9″x12″ Bristol board into quarters. You can stamp postcard info on the back or use this as a card front.
2. Place a big stencil on top of the panel and secure with tape. Sponge ink over the stencil.
3. Ink up some pattern stamps with the same color ink and stamp over stencil, it does not have to be perfect.
4. Add similar color pastels to the openings of the stencil and blend with a baby wipe.
5. Place a smaller stencil on (over the big stencil still in place) and stencil with gesso.
6. Remove stencils and add ink to the panel if desired. You can stencil more with the gesso too if you like!
7. Stamp your focal image with black pigment ink and ink the edges in black.
8. Spray with a fixative or cheap hairspray to seal the postcard.

Remember if you don’t want to use this as a post card or if you mess up the back this makes a pretty card front as well. You can even use this technique on an art journal page! I would love to hear what you think of this project in the comments below and if you liked it please consider sharing it using one of the handy social media buttons at the end of this post. Thanks for stopping by and til next time happy crafting!

Stamp Giveaway & Fabric Stamping Tutorial!

Hi friends! Today I am going to show you how to stamp on fabric! This technique is handy if you are looking to gussy up premade t-shirts, tote bags or baby onesies (how cute!) or if you want to make your own fabric for quilting and other crafts. Today we will use inexpensive cotton muslin fabric to make a scarf. This way you can try out these techniques without it costing you an arm and a leg:)

scarfclassy

Also the fine folks at Art Neko are giving away a set of the stamps I used, all you have to do is leave a comment and I will draw a name at random in one week! This contest is open to everyone world-wide. Thanks Art Neko!

13323310_10206453527122401_7021408726201614966_o

I want to mention that the dye I am using is Dr Ph Martin radiance watercolor. It is kinda pricey as far as dye goes but it also can be used as watercolor paint BUT it is not lightfast on paper, it is like using a marker as far as how quickly it would fade, but many paper crafters like this watercolor and use it. It is a wonderful, high quality dual purpose product.

Watch the video to learn how!

Sponsored by Art Neko  *Save 10% off your next order of any size or get free shipping on orders over $50 (whichever discount is greater you get!) just by mentioning thefrugalcrafter!

Supplies:

  • Lightweight cotton muslin fabric (white)
  • Mordant (I used Soda Ash aka washing soda)
  • Fabric Dyes (I am using Dr. Ph Martin Radiance which can be used as fabric dies or watercolors)
  • Stamps (ArtNeko)
  • Ink: Ranger Archival (if using another ink test it first on washed fabric)
  • Inktense pencils or blocks
  • Stiff brushes
  • Textile medium (optional)
  • Lumiere paint by Jaquard for accents (optional)

Directions:
1. Prewash fabric and trim to size, I used a 10″ wide strip as it comes off the bolt.
2. Mix a tablespoon of soda ash with 2 cups of very hot water. Soak fabric in this mix and ring out the excess.
3. Protect your table with plastic bags and spread out your fabric.
4. Apply dies. Pick colors near each other on the color wheel to avoid mud.
5. Let dry and press the fabric with a hot iron.
6. Hem the raw edges (I did not hem the short edges as they were the bound edges off the bolt of fabric)
7. Using firm pressure and a well inked stamp add images to the fabric. Heat set.
8. Color with inktense pencils or blocks.
9. Apply water to the images to liquefy the inktense and add more pigment from the block if desired.
10. Spatter more inktense if desired.
11. Accent with fabric paint, let dry and press again with a hot iron to set.

So, can you think of a project that this technique would be good on? Let me know in the comments and don’t forget, I will pick one lucky commenter to receive the stamps I used! Thanks for stopping by and til next time happy crafting!

Easy Scene Stamping & Fun Faux Wood Grain!

Hi friends! I am so happy to share these projects with you tonight. I discovered a really fun stamp company (OK, they have been around for years, I’m just late to the party LOL) called Rubber Stamp Tapestry who makes sweet little stamps on pegs and they are so fun a quick to use!

rstblog

DEAL ALEART!!! 20% off any order $10 or more of peg stamps and sets from Rubber Stamp Tapestry (does not apply to inks, tools, etc), coupon code:  RST16 You can also phone in your order and mention the coupon code if you prefer.

See how these are used in todays video!

Here are the stamp sets I showed in video:

Demo #1 “Heart Wreath” Cherry Blossoms

Demo #2 “Rose ATC” Brambly Rose

Demo #3 “Pond Scene” Lotus Pond  and lily pad and Lotus Flower

The completed cards and ATCs used the flowing sets. Please note there are no duplicates between sets at Rubber Stamp Tapestry and it is noted on individual stamps if they are a part of a set so you don’t have to worry about buying duplicates, love that!

Tip!
Using the peg stamps to build a scene is like putting rocks in a jar, first put the large ones in, then the medium, then the tiny pebbles and then the sand. It is a great way to think of balancing the design with the small stamps.

wood1

Faux Wood grain how-to:

1. Score paper every 1/2″

2. Swipe paper with ink going in the direction of the score lines (wood grain)

3. Dry-brush on some white paint or gesso going in the direction of the wood grain.

4. Trace the score lines with a dark brown colored pencil and add nail holes and knots to the “wood” with the same pencil.

I want to thank Rubber Stamp Tapestry for sponsoring today’s video, if you shop be sure to use the coupon code RST16 to save 20% on stamp orders over $10! Thanks for stopping by and til next time happy crafting!

Cyber Monday Sale & Another Mystery Craft Challenge!

Hi friends! First up tonight I have a great sale to share that is exclusive to Frugal Crafter readers, Lost Coast Designs and Carmens Veranda are offering 20% off AND free shipping  if you buy 6 or more stamps now through tomorrow. To get the deal mention The Frugal Crafter in the comments of your order and the discount will be refunded:) Here is a new set they just released that I am excited to use:

Mini Cracked Critters

Make sure you check out all of their new and classic stamps, I bet you can’t stop at 6, it is a great time to shop for friends or secret stamping sisters this holiday season. Deals like this do not happen often at Lost Coast Design or Carmen’s Veranda so don’t miss out, the deal ends Monday 11/30/15 at Midnight.

Now, on to the challenge! Kim at Made by Mommy asked me back to do the #MBMCraftChallenge again this month, I got a random assortment of stuff, see what I made in today’s video!

Video!

That was so much fun, the thing I love about this challenge is seeing what all of the other participants made with their boxes, you can see all of the November Craft Challenge videos here.

mbm_november_thefrugalcrafter

Good luck if you are planning on doing any Cyber Monday shopping and don’t forget about the deals at Lost Cast Designs and Carmen’s Veranda (mention The frugal crafter for 20% off and free shipping when you order 6 or more stamps.) Thanks for stopping by and til next time happy crafting!

My Mega August Crafty Haul!

My studio is full to bursting with crafty goodness for upcoming tutorials, have a look!

haulthumb

If you want to see everything then watch the video and be sure to let me know what products you would like to see me demonstrate first.

Video!

Craft Supplies from the video:

I think that is everything from this haul, let me know if I missed any thing:)
Disclaimer: Some of these products came from sponsors or were sent by companies in exchange for promotional consideration. That said,I only use products that I love and you will always get my honest opinion about them as well as DIY alternative for things you already have. Thanks for stopping by and til next time happy crafting!