Hi friends! Today’s project has a fun, modern and stylized look! If you have never done a line & wash before this would be a fun project to try. All you need is a waterproof pen and watercolors!
Watch the video to see how!
Supplies available at sponsor Jerry’s Artarama! Use coupon code: frugal20FS49 for 20% off $49 + Free Shipping (Excludes: Sale, Super Sale, Egift Cards, Buy It Try It’s and Vendor restricted items. Look for the green coupon eligible icon on the product listing.
Supplies:
Turner Watercolors *colors: Rose red, Olive green, Ultramarine, Permanent yellow
I hope you give this a try. You don’t need anything fancy, a fine point Sharpie and your kids watercolor paints would even do the trick! Have fun and til next time happy crafting!
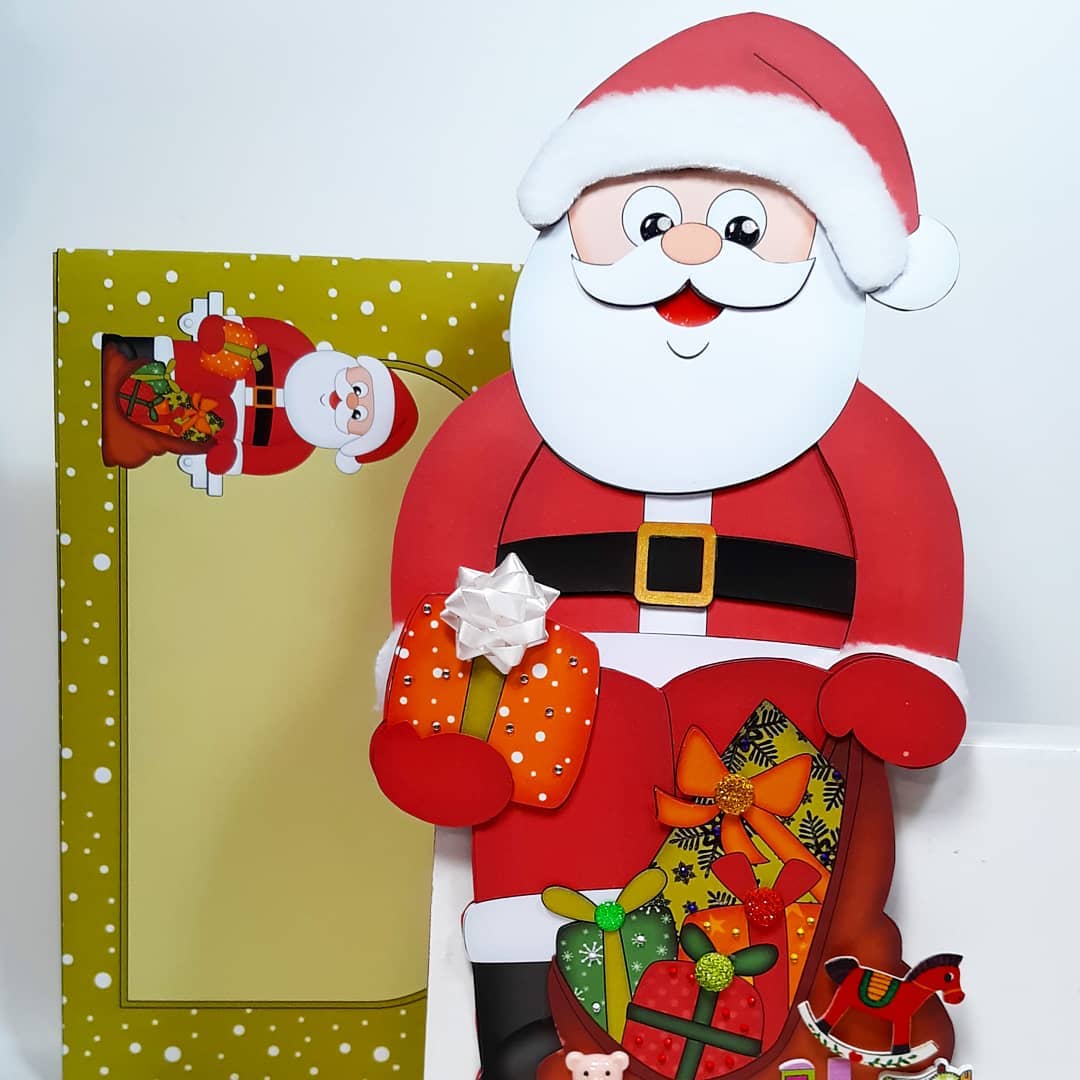
Hi friends! You are probably not thinking about Christmas Cards yet but with the heat we have been having it is kinda nice to chill out in my cool craft room and create some! Plus it’s nice to have a few done ahead of time because it gets really busy once the holiday’s roll around!
This video is sponsored by craftsUprint! Snag the free printables for today’s project video here. *Note, you can download this kit for free. You can also get a free printed version of the 7-page template at the link above. A $4.80 postage & handling fee will apply and they ship worldwide. The printed version will also come with a craft gift worth $4. If you have trouble downloading you can contact CraftsUprint support here.
Adhesive (strong double-stick tape, foam tape, and glue stick)
Ruler
Bone folder, stylus or butter knife for scoring
If you enjoyed this tutorial please check out the other On the Shelf cards and other printables CraftsUprint has to offer. These affordable templates are fun, unique and are sure to brighten someone’s day! Thanks for stopping by and til next time happy crafting!
Hi friends! Grab an old jar out of the recycling bin and let’s make a pretty stained glass vase!
I am using this to propagate a begonia and it is so pretty sitting on my windowsill! This project is very easy and you can even do this with kids! Watch the video to see how and check out the end of this post for other DIY ideas to make this project even more affordable!
Sponsored by Smart Art Box. Visit their website to purchase a subscription, see available past boxes and see what countries they ship to. You can purchase the July box here while supplies last.
Frugal Tips!
I used store-bought glass paint but you can make glass paint by mixing white glue or glossy Mod-Podge with ink or food coloring. This DIY version may fade eventually but it is a less toxic alternative for kids and cheap too!
You can use dimensional fabric paint (like the Tulip puff paint) to draw the leading lines and it’s only about $1 a bottle.
You can work directly on the glass instead of using the Duralar film, it will adhere fine, it was just easier for me to trace the design with the film.
Another “stained glass” option for little ones is to use bits of cut up colored tissue paper and glue them to jars, it’s pretty!
I hope you enjoyed this project and til next time happy crafting!
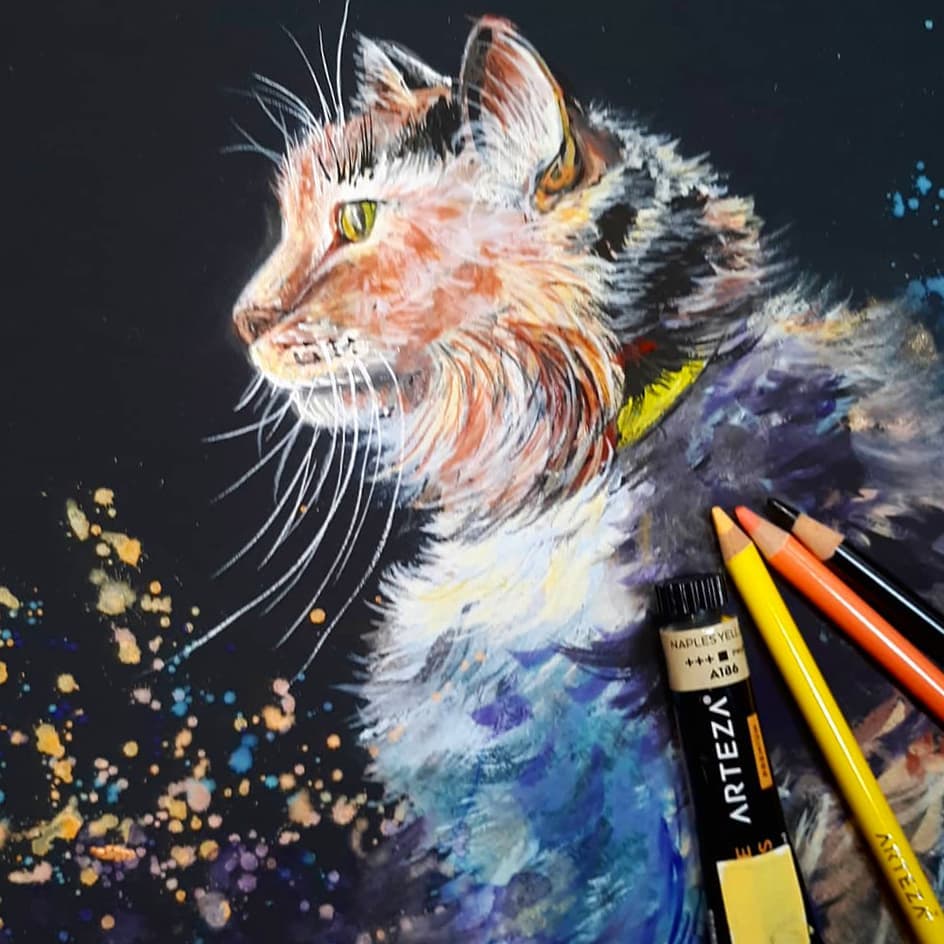
Hi friends! Today’s project was a challenge but it was fun to work through the kinks in this painting.
You can find the real-time version of this tutorial in Critique Club. Every month you get a new creative prompt, 2 real-time intermediate/advanced tutorials and the ability to upload 2 paintings for an in-depth critique from me to help you grow as an artist. You also get access to previous months tutorials as long as you are a member. Click the link above to learn more or join today! *Some people join just for the tutorials, you only have to upload your work for critique if you want to.
Enjoy the time-lapse version and see how the piece came together.
Supplies (affiliate links to Arteza and Amazon, if shopping on the Arteza website use coupon code PROMO10 for 10% off)
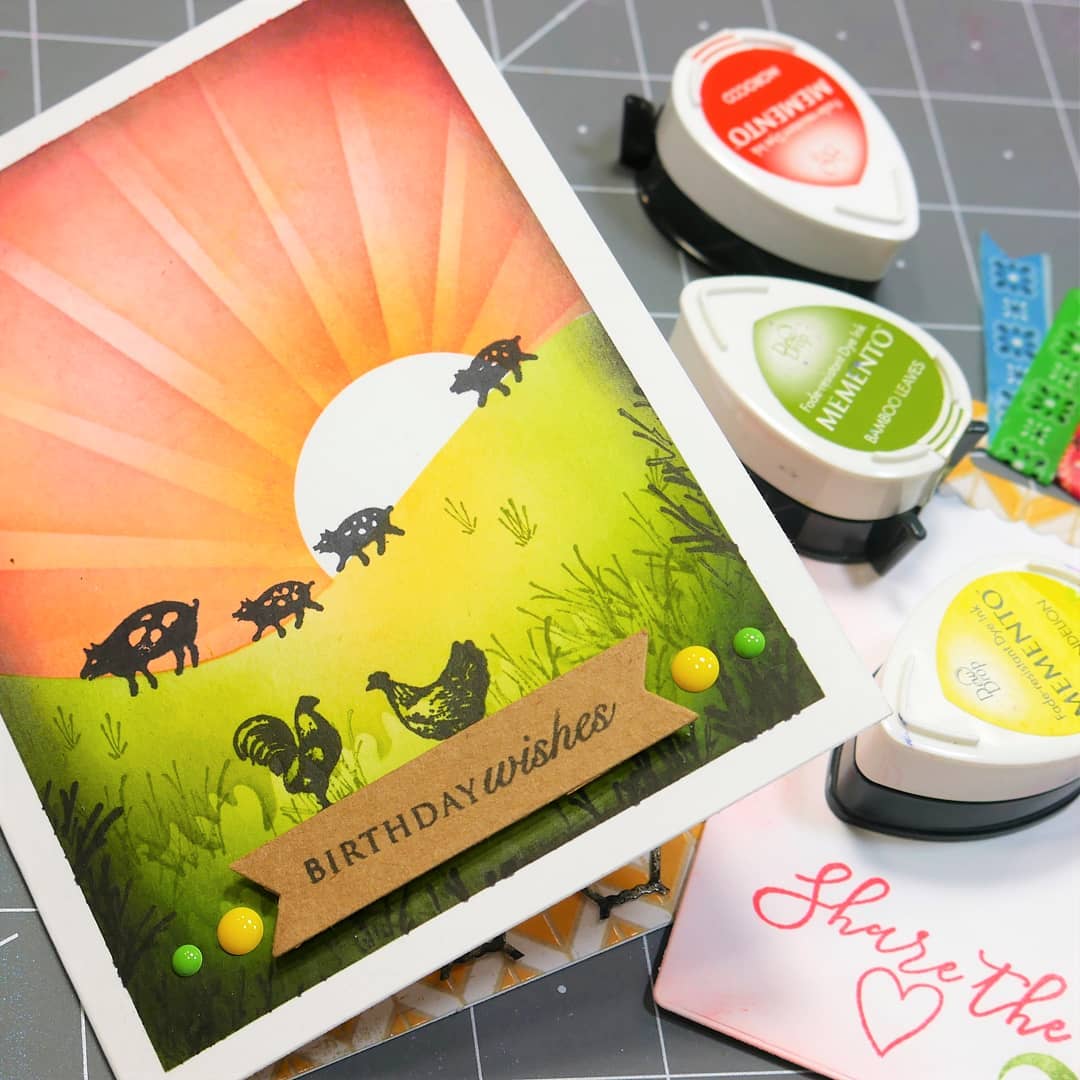
Hi Friends! This birthday card is fun to make with limited supplies! It comes with an interior pocket that holds a bookmark/tag and would also be handy to hold a gift card! This card can be reused too.
Watch the video to see how!
This video is sponsored by Rubber Stamp Tapestry! Use coupon code: LINDSAY and receive 15% off your retail order of $10 or more of peg stamps, peg stamp sets, and unmounted stamps! Coupon expires a week from this video publication. Continue to receive great deals by becoming a PegStamp VIP here. As a PegStamp VIP you’ll get a weekly deal via email plus links to fabulous tutorials by me, Lindsay the Frugal Crafter and other designers.
Make an A2 size card and tape it to your workspace.
Cut a curved line out of a scrap piece of thin paper and cover the bottom half of your card. Cut a circle from a post it note and place in on the paper overlapping the mask.
Use a straight edge of paper as a mask to ink sunbeams protruding from the masked circle in orange ink. Then repeat from the other direction using a different shade of orange or red. Add yellow over it all if desired.
Remove the mask and place the other half of the curvy mask over the sun/sky area and ink the grassy area with shades of green ink.
Stamp the pigs on the hill in black and the roosters towards the bottom. Stamp grass in green and black on the bottom edge and ink around the edges in black.
Remove the tape and add banner to card with foam tape and add enamel dots.
Use a scrap of paper to make the inside pocket of the card and decorate a tag to go in it. Use the tag for writing so the card can be reused by the recipient!
Feel free to use whatever ink blending tools you like to make this project! The more you practice the better you will get and the more professional your cards will look! Happy crafting!
Hi friends! Today for sketchbook Sunday I decided to draw the same subject twice. Once in marker and once in watercolor. Watch the video and let me know what one you like better!
Supplies (Affiliate links used)
Mixed Media Pad Arteza 2 pack *Use coupon code PROMO20 if ordering from the Arteza website. Also available on Amazon
That’s it for me tonight! I am late getting this blog post up because I got to spend the afternoon teaching an amazing group of ladies how to paint lilacs in watercolor! What a fun time! I hope you had a great day too and til next time happy crafting!
Hi friends, I just saw Arteza has come out with an artist-grade acrylic and I wondered how it compared to the student grade (AKA premium) paint I have been using for a while. My general opinion of Arteza products is that you get a bit more than you pay for and seeing these new expert acrylic paints with a higher price tag piqued my interest. Are the worth double or triple the price of the premium paints I have been enjoying all along? I will compare the premium tubes and pouches to the expert paints in today’s video!
FYI: Arteza products come in 3 levels: Classic-children’s grade, Premium-Student grade and Expert-Artist/professional grade. I have used many of their premium and expert products and they all live up to the claims.
Video:
Affiliate links to the products I mention. If shopping at Arteza website you can use the coupon code PROMO10 FOR 10% off. I also linked to Amazon because sometimes the price can vary between sites.
Characteristics of the premium acrylics: *Semi-gloss sheen *Bright colors *High tinting strength. *Colors mix well *Large range of colors to choose from *Some colors are semi-transparent due to pigments used and gloss-addition of mediums and perhaps extenders. *soft body consistency Price is between .03 and .07 cents per ml
Characteristics of the expert range
*Matte to Satin finish (Browns and black are a bit shinier)
*Heavy body consistency
*Great tinting strength
*colors mix cleanly
*Available in 12 colors (good mixing range)
*Costs .15 cents per ml
Differences: I noticed that the expert paint went further in a stroke and have more solid uniform coverage where some colors in the premium range could be streaky and need another coat. The matte finish of the Expert paint is a difference as well but I think is more about personal preference than a quality issue. I also noticed that even though they kept the names and color numbers consistent they did use different pigments in 4 of the expert colors but the crimson was the only one that looked different swatched out.
Bottom line: This 12 color set would last a while and you could learn to paint and mix colors without hindrance however the premium paint is still really good at half to a third of the price. If you are someone who preferred to have a lot of colors to play with go for the premium, you can’t beat it. I think learning to mix colors might be easier with the limited palette of the Expert 12 color set tho. I like the big pouches myself because I tend to mix colors if I am painting and when I am working on crafts or furniture I like to have a large amount because I go through it. Choose what is right for you, it’s all good:) I’ll say the best value per ml is the premium tubes if the smaller tubes are useful to you.
One thing I forgot to mention is light fastness and both the premium and expert ranges had great light fast ratings so you shouldn’t worry too much about fading in either product. Which would you pick? Til next time happy crafting!
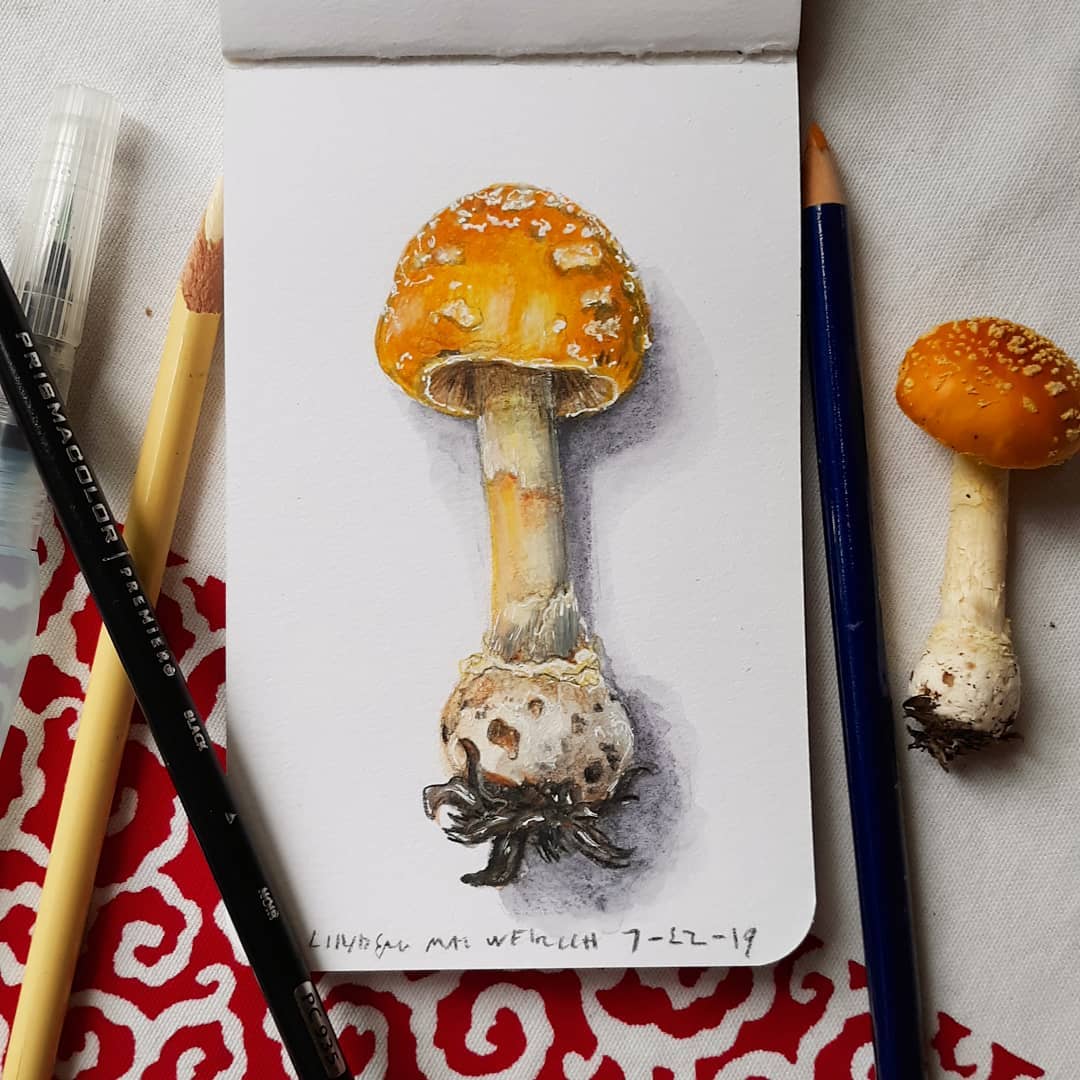
Hi friends! Can you believe it’s August already? Crazy huh? I have been busy since I got back from my week off but unfortunately I don’t have something completed, instead I have about 4 projects in the middle in various stages of drying, setting up or curing so today I thought I’d share a drawing of a mushroom I did on vacation:
I used my Inktense pencils (those have been way too neglected) and a few Prismacolors and a white gel pen. My sketchbook is Stillman & Birn Beta Series mixed media. I really like how it turned out. Honestly I didn’t do too much art on vacation. I read, relaxed and played with my family (including our new puppy Penny) most of the time. I really needed to recharge!
A couple of fun things to note!
Tomorrow (8/2/19) I will be at Accents on Harlow Street in Downtown Bangor from 5-8pm for the first Friday artwalk, Hope to see some local peeps there!
The new monthly prompt is up in Critique Club, it’s all about setting and achieving art goals. You can find in in the curriculum if you are a member and if you want to join you can do so here.
I am working on several new craft projects to share soon. I got such a wonderful response with my “10 Boho Jewelry Designs” video that I decided to put up a few more craft tutorials as folks were missing that kind of thing. Stay tuned for that!
I hope August is treating you kindly and til next time happy crafting!