Stamp School: Inky Backgrounds & Silhouette Stamps!

Hi friends!Today we are going to play with inks and make some fun cards!

gina1

Don’t be shy, try these fun and inky techniques! Jut make sure to put a craft mat, piece of freezer paper or old plastic place-mat on your table to work on. It is a lot of fun! Watch the video to see how!

There are many supplies you can use to create similar works of art so don’t be shy, experiment with what you have! I am using supplies from Gina K Designs where they have free shipping on USA orders over $50 and reasonable international rates.

silcard1

Supplies:

Directions:
1. Apply ink to cardstock directly with an inkpad. Apply ink to a craft mat, spray with water and soak up the ink with the cardstock. Flick watered-down ink on the card. Repeat until you like the way it looks and let dry.

2. If desired stencil a design on top with ink.

3. Stamp silhouette images over background panels using black ink. Ink edges of panel in black and adhere to card base.

The cards I made were 4 1/4″x 5 1/2″ (A2) and the small panels were 2 1/2″x3 1/2″ (atc size) and the farm panel was 4″x5 1/4″

*Please note, Affiliate links are used to Gina K Designs and I receive a small commission on the sale without costing you a penny more. It helps keep my videos on YouTube free and I thank you for your support and til next time happy crafting!

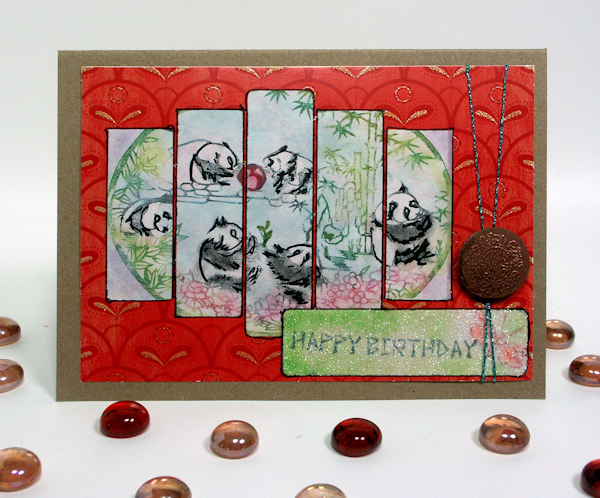
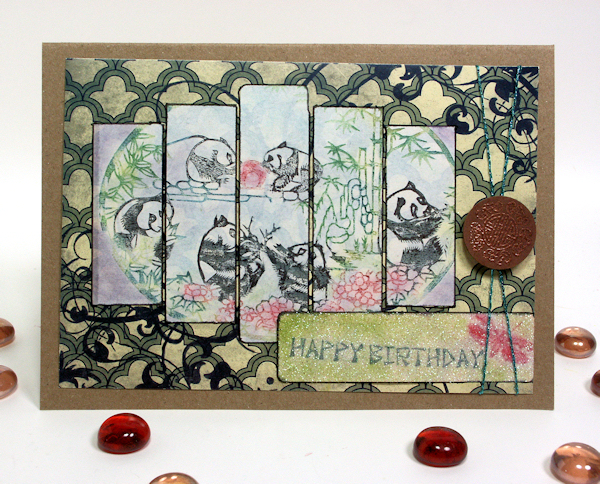
silcard2

Old Office Labels and OSA Challenge #235

Good morning friends. The other day while digging through a  drawer I cam across a box of old office labels. I remembered a technique one when I painted across a bunch of them and used them on a card. It just so happened that they would be perfect for this weeks challenge at Oriental Stamp Art:

DCF 1.0

It is a really fun technique and easier than it looks too. You can use any stamp you like but I used this Panda motif from About Art Accents (it’s on sale for $4 too!) to make mine. Watch the video for full instructions on making the card:

Easy huh? I think I have a package of small rectangle yard sale labels around here somewhere, If I can find them I will try this technique on a “window pane” looking card. Of course I’ll probably get distracted by something else (probably something shiny) while I am on the hunt.

DCF 1.0

Let me know what you think and if you have any questions! Thanks for stopping by and til next time happy crafting!

Stamps a Stencil & a Stipple Brush = Awesome!

Happy Friday folks, it is the first day of Summer Vacation and I have started my kids on their pre-TV routine: 30 minutes of IXL Math (a school recommended math program) and I have also informed them that their rooms have to be tidy before the TV is turned on! I know, I’m awfully mean, they also have to read 30 minutes (at least) a day but they don’t mind that. I went down to my studio the other day to tidy up but was distracted by the bin of new stamp show stuff so after clearing a spot to work I played with my new stash, I liked my first try so much I simply turned on the camera (which is always set up) and filmed the process. You can use whatever stamps and stencils you have, stencils with bigger holes work best, and dye based ink, You can use any large brush you have too.

Pretty fun huh? Now between this and the gelli-prints I am going to have to actually use these backgrounds before my pile-o-backgrounds gets out of control. Thanks for stopping by and til next time happy crafting!

I’m like a big furry alien…

…you’ll just have to watch the video to get that reference. Kidding aside, can you believe it is just 25 days until Christmas? There are so many things to do this month: Parties, concerts, plays, decorating, cooking, cleaning (no seriously, I do from time to time) and entertaining! Who has time to scrapbook? But what if you could put a book together cheaply, quickly and easily so you could just jot stuff in as it happens and enjoy the month guilt free? Well, my friend you can, and I’m gonna show you how!

That’s pretty chic huh? And it is made from coffee filters! I had hundreds of them left over when my coffee make broke and they do not fit my new machine. The fancy bakers twine, tags, rhinestones and other odds and ends are fromPapermart. Let me tell you folks, if they sell it they will have the best price, often times by as much as 50% so check them out if you are in need of some crafty goodness 😀

OK, folks, this is an easy project but the video is a bit long so grab your favorite beverage (Whatever you want, I don’t judge LOL), sit back and watch some scrapbook magic happen…no wait, can’t say that with a straight face…I mean, we are using coffee filters…maybe not magic per say but some darn nifty crafting!

So, are you ready to give crafting with coffee filters a try? Do you have a Bobby McFerrin song stuck in your head! well, welcome to my crazy world then!

Got questions? Leave a comment and I will get back to you. Have a wonderful weekend and til next time happy crafting!

Find the freebie and a new way to color!

Hello Folks, well it is Thursday again and time to find the Lindsay’s Stamp Stuff Hidden Freebie, which DT member will have it today I wonder? If you like free stamp be sure to play along with Tuesday Morning Sketches this week and you could 10 Lindsay Stamp Stuff Stamps! You can see a list of all DT members at the end of this post! Today I wanted to share a fun technique with you using supplies you likely already have on hand, and it is an easy one too: Colored Pencil on colored paper.

Digital Stamp: Lindsay's Stamp Stuff, PP: MME, Cardstock: SU!, The Paper Co., Font: Lettering Delights
Digital Stamp: Lindsay's Stamp Stuff, PP: MME, Cardstock: SU!, The Paper Co., Font: Lettering Delights, Tool: Scor-Pal/Scor/bug (for faux stitching)

On this example I used the Cherry Preserve Digital stamp printed on creamy yellow (so saffron: Stampin Up!) and I printed my digital stamps right on the colored paper, before printing I went under layer in pant shop pro and chose properties and reduced the opacity to 60% because I did not want the design to show much after I colored it. Then I put down my white highlights and deep red (black grape) shadows very thickly with colored pencil. Then I added a bit of the black grape lightly to the jar and cherries, I burnished (colored firmly) over the light layer if black grape with crimson red mixing the tow colors together. Then I used light blue to color the gingham fabric with a layer of white on top of that to blend. I used cream, gold, bronze and dark brown pencils to “paint” the gold band on the jar and apple green and dark brown to color the stems. A grey shadow under the objects finishes the design.

This is the way we blend the pencil early in the morning! See how opaque and bright the color is when applied thickly to cardstock! If the color get a dull waxy film ontop (bloom) simple rub it with a tissue or soft cloth to remove it and your colors will be bright and shiny!

Remember I said that I would show you what I was going to do with the crocheted cherries yesterday? Well here they are on a button box.

I used Tacky Glue to adhere the crochet cherries to the box, I place an acrylic stamp mount ontop to hold it flat as it dried.

If you missed the pattern you can snag it here.

Here is the set, I may give it to my MIL for her birthday Sunday, I figure everyone could use a little box to hold stray buttons, paper clips or safety pins ;)
Here is the set, I may give it to my MIL for her birthday Sunday, I figure everyone could use a little box to hold stray buttons, paper clips or safety pins 😉

Be sure to visit all of the Lindsay’s Stamp Stuff Design Team Members Blogs to see their fabulous work and find the freebie (it’s a sweet one!)

Tamara

Margie

Melissa Craig

Lisa

Row

Katt

Melissa Bove

Janet

Olena

Kim

Tracey

Erin Bailey July Guest DT

Thanks for stopping by and til next time happy crafting!