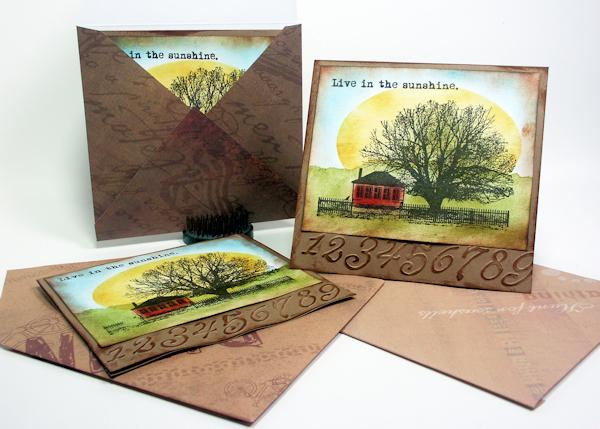
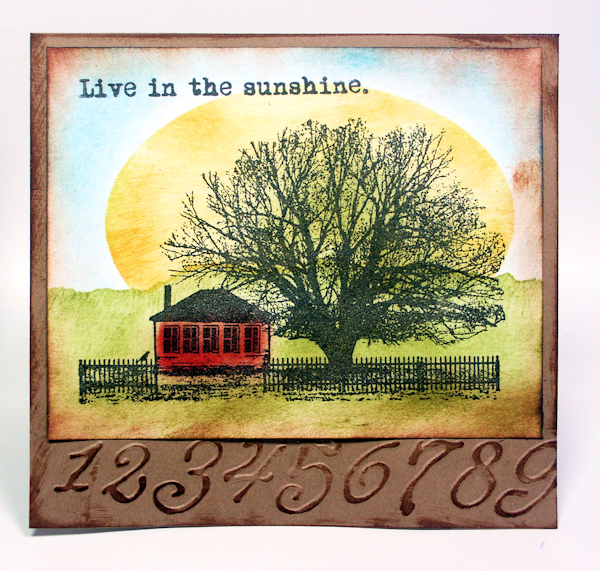
Hi friends! This technique is so fun and useful! You can use it to make card and scrapbook embellishments or make full backgrounds with it! You can even use it to make doll house miniatures (Time to craft with your kids huh?)
All you need for this are cardstock, stamps, ink, embossing powder and a heat tool. Watch the video to see how!
This video is sponsored by Rubber Stamp Tapestry! Use coupon code: LINDSAY17 – 20% off peg stamps and peg stamp sets on orders of $10 or more. Coupon expires July 3, 2017
Supplies:
- Peg stamp sets: Wisteria Frame, Petit Poppies, Summer’s End, Embellished Wreath, Sunny Daisy, Retro Sundress
- Unmounted stamp set Uplifting Sentiments
- Dye ink
- Ink blending brush
- Embossing ink pad
- Make up sponge (if you are worried about messing up your embossing ink pad)
- White and kraft cardstock
- Patterned paper (Authentique)
- Ribbon
- Buttons
- Foam Tape
- Double sided tape
- Wet (tacky) glue
- Clear ultra thick embossing enamel * or several coats of regular clear embossing powder
- Heat tool
- Stencil (Patti Tolley Parrish at istencil)
- Masking tape
- Spray ink (optional)
- large crackled roller stamp (optional)
Directions:
1. Tape stencil to paper and stamp in the holes of the stencil with dye ink and peg stamps.
2. Brush ink over stencil.
3. Wipe stencil clean then press embossing ink over design. Remove stencil, sprinkle with embossing powder and heat. Repeat this step until all the tiles are raised and shiny.
4. Spray panel with ink and swipe ink in the grout area with your fingertips. Trim panel and attach to card base. Embellish as desired.
Remember you can also cut the shapes apart and use them as decorations! Thanks for spending part of your day with me today and til next time happy crafting!