Hi friends! Today I am going to share a fun way to make ribbon flowers that can be glued onto barrettes, pin-backs or used to embellish your cards or scrapbook pages:
You will need ribbon (I am using beautiful solid and patterned ribbon from Offray, see other ideas with this ribbon here), a needle and thread, scissors and a button. Follow along with the video and have fun!
For a removable card embellishment glue or sew the flower to an alligator style clip barrette so it can be worn in the recipient’s hair! Here is a closer look at the card we made:
Ribbon flower how to:
Cut a 4″ piece of ribbon for each petal you wish to have.
Thread a sewing needle with thread to match your ribbon.
Make a right angle fold in the middle of the ribbon by folding the right side down, then take the left half of the ribbon and fold it down over the right to create a point. Please refer to the video so see this in action.
Hold the ribbon so that the smooth side is facing you (the side that shows the folds is down) and pleat it in the middle and fold the edges back to make a petal. Again, refer to the video if you are confused.
Stitch through all the pleats to create a petal.
Repeat steps 3-5 until all of the cut pieces of ribbon are used and you have a full flower.
They look great on a scrapbook page too!
I have a video on making this scrapbook page here on my YouTube channel if you want to see how the page went together. Lots of tips in that video too!
I want to thank Offray for sponsoring today’s blog post. You still have a couple of days to take advantage of the coupon FRUGAL15 (it expires 2/28/15 so hurry) for 15% off your order at Offray.com They have all the ribbon you want in the quantities you need so save a trip to the craft store and snag it online! Thanks for stopping by and til next time happy crafting!
Hi Friends! I love all of the options for memory keeping and scrapbooking there are right now. People are sharing pictures and updates on social media, digital scrapping, journaling, using pocket pages and even day-planners to record their memories. I am a traditional scrapbooker. I tried the pocket pages but found them more useful for organizing my pictures and for putting pics in my scrapbook that I don’t feel I want to do a page on. I love social media for being able to have access to photos that people have tagged me in or shared with me (I download them and print them small in photo collages due to their size) but I have never been comfortable posting personal info on Facebook or other networks. I have been scrapbooking long enough that I can look at a new system and pretty quickly know if it will work for me or not.
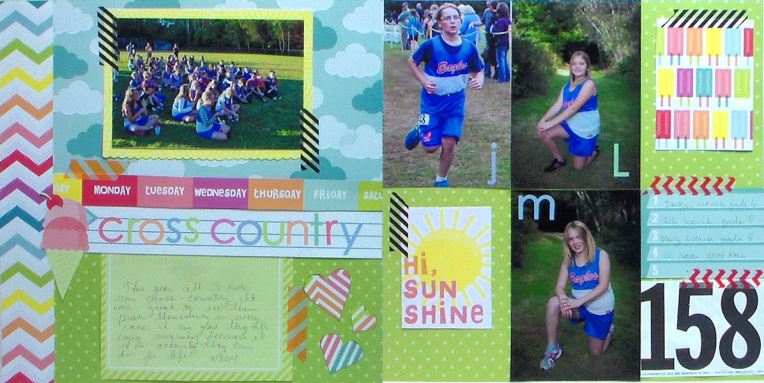
This 2 page layout was made using a sketch provided in the Memory Keeping 101 course at Curious.com.
I had the advantage of starting scrapbooking when it was a fairly new trendy hobby and there was not much choice and quite frankly it made it easy. You got a stack of photos from the developer, you had cardstock, stickers, adhesive and an album. Maybe you local store had a rack of patterned paper to choose from if you were lucky. We borrowed ribbon and buttons from our craft stash but that was about it. Now there is an overwhelming amount of choice. Choice can be paralyzing. Do I try digital? Do I try Project Life? What if I buy supplies and don’t know what to do with them? How do I get those darn photos off my phone anyway? And everyday there are more options for memory keeping from apps, to cloud storage, to planners and other crafty goodies (last weekends CHA show unveiled a staggering amount of new memory keeping and scrapbooking gadgets) so where do we start if you are a beginner? I had the chance to take the Memory Keeping 101 class taught by Studio Scrapping at Curious.com a couple of weeks ago. I wanted to see if it could really demystify the memory keeping options out there today:
I made a layout and altered a journal prompted by the course. They talked a lot about memory keeping apps that you could use with your smart phone, it was interesting to know what was available. I don’t use a smart phone and quite frankly I spend so much time on my computer for work I want to be tech free when I enjoy the hobby of scrapbooking. I edit photos and print them on the computer but that’s it for me. Still, for a modern memory keeper it could be perfect.
I altered this notebook following instructions from the course.
I think this course is best for a beginner (hence the name Memory Keeping 101) or a traditional scrapper who wants to know about the techie options for memory keeping. I can see how journaling apps can make things easier. This is not a “How to scrapbook” course. It is an overview of memory keeping options.
The teacher is well-organized and you can even download the class syllabus before enrolling to see if the topics she covers will be up your ally. You can access that during the free preview by clicking the attachment icon on the screen.
This is typically not a class I would take but, then again, I am not the target audience. I have a scrapboking style that I enjoy and works for me. This is more for the folks that are not happy with what they are currently doing and want to try something new or who need a starting point. If you are interested in the class you can check it out here and watch the free intro video and see if it is for you. If you end up buying the course you can get a $5 credit towards your next class at Curious by emailing support@curious.com with the words: thefrugalcrafter. Don’t forget to sign up for curious so you won’t miss any special deals or daily free classes! I don’t think it matters whether you use a pad of paper, an app, a planner or a good ol’ scrapbook as long as you record your story before you forget! If your new years resolution was to start memory keeping give it a try! This blog post was a partnership with Curious.com and I was compensated for my time to take the course. Thanks for stopping by and til next time happy crafting!
Hi Friends! Do you ever get in a creative rut? Maybe you have trouble coming up with fresh new ideas with the same old supplies. I go quite a while between buying scrapbook supplies and stores where I live never have the new stuff so when Edith at Scrapbooking With Me Boutique asked me to be the guest designer for September and use the new kit I jumped at the chance. BTW they are having a Labor Day sale through Monday, prices reflect the discount, no coded needed:) Here is the layout I made with the kit featuring new 2014 My Minds Eye Paper and die cuts, stamps, stencils and more:
On the video I will show you all the techniques for making these pages, we will make a page start to finish using the contents of the kit plus white cardstock, adhesive and 4 colors of gelatos from my stash:
Here is a close up on the page we made in the video:
And the other page:
If you are looking for a way to inject some fresh inspiration into your scrapbook pages check out the Scrapbooking with Me September kit. You can also visit their facebook group too or check out their store in Vinemont, Alabama. Here is a look at what you get in the September kit:
These scrapbook pages came together really quickly (for me) and I love the way they look! No work, all fun. I think I will have to try kits again and I hope you do to! Thanks for stopping by and til next time happy crafting!
Hello friends! Today I am going to share some glitzy techniques for your cards and scrapbook pages. This video will show you how to incorporate a lot of hot trends quickly and easily in your cards, scrapbooks or art journals:
You can find the supplies I used from Papermart. I had a good time using these sparkly products, I have been using their awesome (and cheap, only 99 cents!) glitter for years and found that the Mod Podge held it in place beautifully. I wanted to use small mirrors on my scrapbook page but I was worried that they would cut the page protector, I don’t have that worry now that I made them from candy foil and cardstock! The bokah look stenciling and misting was fun and easy too! If you want to learn how to make the daubers and spray mists I used today you can check out my video here. Doilies, what can I say, I’ve used them a lot lately (and I have another doily project this week!) so if you buy some gold doilies you might want to grab a box of white ones too, they are a steal of a deal and so fun! The shipping tagsare also a steal if you don’t have them yet and now you know how to print on them! Well, I know you want to rush into your craft space and try out these techniques so I won’t keep you, thanks for stopping by and til next time happy crafting!
Hello Wowwers! Today my main craft desk is filled to the brim with stuff to package up for the craft fair I am doing in a week and a half {holy smokes! I am just now realizing it is less than 2 weeks away!?!} so instead of showing you the same old crap I’ve been making I thought I’d share another hard-used work area…my photography area!
That’s pretty sophisticated huh? Well, maybe not but the proof is in the pudding…or the photos so to speak so I thought I film a quick video blog today demonstrating my photography techniques and offering tips that you can try if you are unhappy with the way the photos of your crafts turn out.
Quick Tip Review:
Hold your camera steady, tuck your elbows in at your sides, hold your camera in both hands close to your body, press the shutter halfway down to focus, exhale, press the shutter the rest of the way. Viola! Alternately you can use a tripod and a remote clicker to eliminate shake.
Use the macro feature fore really small stuff like jewelry or details on a card or scrapbook page. This allows you to get physically close to the object and keep it in focus. It blurs the rest of the image for a professional ethereal look. I will often take a photo in regular mode too in case I don’t like the effect when I am editing. On most cameras there is a button on the back with a flower on it, push that to turn on the macro feature.
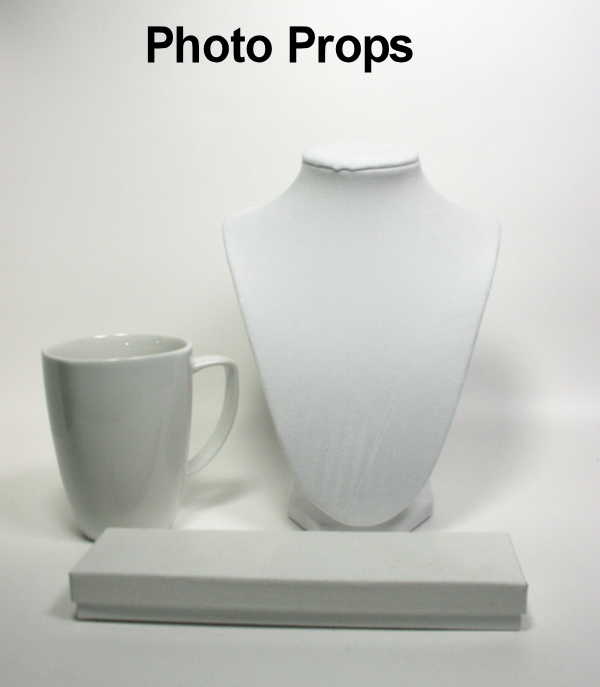
KISS: Keep it Simple Stupid, I photograph my art in my white box against a white background with white props. It keeps the attention on my artwork. It also reflects and maximizes the light. Sometimes I will scatter buttons, or add a branch or flowers to a plain project to make the photo more interesting or place some scrapbook paper or fabric as a backdrop but in most cases regarding the use of props and backgrounds I have this mantra: “When in doubt, leave it out!” Ironically when it comes to creating the art my mantra is “The more the merrier!”
Don’t use the flash, man! While the flash is great in a lot of circumstances it kills the detail and contrast in your still life photography, really what you are doing when you shoot your crafts is still-life. You should have plenty of light with your homemade light box so ditch the flash. To disable the flash look for a button with a lighting bolt on in and press it until you see an icon on the lighting bolt with a “not-allowed sign” around it.
Adjust levels in image editing software such as Photoshop, Paint Shop Pro or the free program GIMP.
I save white pottery, boxes and dishes to use and photo props.
This is the simple easel I made to lean my scrapbook pages and small paintings against when I photograph them:
Uh, disregard the 2″x11″ notation, the base is 2″x8″. 😛 Here it is in use, there is enough support for the paper that is does not slide down or bow back at the corners.
A tip when shooting larger items like scrapbook pages and paintings is to use the “perspective adjustment” tool in your photo editing software. It had an icon that looks like a crop tool but you set each corner at the corner of your project and it straitens out any parallax. Try to shoot it as level as you can so the adjustment has to only be minor. Then crop your photo, I like to leave a border of the white backdrop around my scrapbook page or card but that is personal preference.
After you have these well shot photos you might want to enhance them a bit more. Your camera is tricky, give it too much white and it might want to make it grey, give it too much black and it wants to make it gray but you know your background is white so you can go in your trusty photo editing software and give that photo what-for! I like to use the curves/levels tool for this. In Paint Shop Pro I choose Curves (from the Adjust menu) then click levels. That usually dose the trick but if it still does not look like the original I slide the curve a bit until it really represents the artwork.
I hope this helps answer some of your artwork photography questions without being to overwhelming. Really, holding the camera still, not using flash and shooting your artwork in a simple white box is pretty much all you need to know…huh, I could have just typed that to begin with and save you from listening to me gab for 5+ minutes and reading all of this..oh well;) I hope you learned something new anyway 🙂 If you want to see what is happening on craftier desks head over to Julia’s blog for more What’s on Your Workdesk Wednesday fun! Til next time happy crafting!