A “Best Day” Giveaway!

Howdy folks! Happy Monday! I am so excited today because Annette, the owner of About Art Accents, sent me an extra stamp set to give away to one of my blog readers! Here is a card I made with one of the images from the Best Day stamp set:

I used my stamping gear and a few small stamps to create my background and there was enough space in the center to stamp my couple. I wasn’t intending on stamping and coloring on this cheap Georgia Pacific cardstock but hey, it doesn’t look too bad for a 2 cent sheet of paper! I stamped the same flowers on a piece of masking tape, colored it and stuck it right on the card base.  I stamped a small double happiness on a punched stamp square and adhered it with skeleton leaves over the tape. Pretty simple…I wonder if this counts as a one layer card?


So do you wanna win a set of 9 stamps from About Art Accents? Great! Just leave me a comment on this post telling my your favorite About Art Accents stamp…that’s it…really, no strings attached:) Although if you do feel compelled to do a bit of shopping at About Art Accents you can use the code Lindsay10% to save 10% off your order! They have a lot of good stuff on sale right now too! BTW, here is what the winner gets, I’ll draw a name out of a hat next monday so be sure to leave a comment before then!

Good luck & Happy Crafting!

Faux Postage & Reverse Masking Video!

Do you want a quick and easy (not to mention inexpensive to make and mail) card technique? Well, read on my friend! Today I’ll show you some easy techniques while we make this card:


I used the sketch from Oriental Stamp Art and stamps from About Art Accents (all except the postmarks, they are Limited Edition and Hero Arts) Sorry about the length, it’s 20 minutes, but chock full of tips!

There you have it! Wasn’t that easy? Now go grab your ink and play and til next time happy crafting!

Easy Paper Marblizing {and OSA challenge #41}

Here is a fun technique! Paper marblizing! All you need is a pan of water and some oil based paint. Look what you can make

Stamps: About Art Accents, Tool: Scor-pal

I used the sketch over at Oriental stamp art and Geisha stamps from About Art Accents to make this simple card, it only took a few minutes (that rarely happens folks, LOL!) I also wanted to keep the layout simple so I could show off my hand marblized paper. Here is how to do it:

Fill a tray (you can use a disposable aluminium tray, or dedicate a metal or glass pan for this purpose, you won’t want to cook or eat out of the pan again after this project 😉 with water at least an inch deep.

Drip drops of thin oil base paint on to the surface with a skewer or toothpick. I used gold leaf paint but any thin oil pain will work. If your paint is too thick mix it with mineral spirits to thin it to the consistency of cream. Drag a toothpick through the paint to make interesting swirls.

Lay a sheet of paper on the surface of the water making sure the whole paper makes contact, lift the paper out and hang to dry.

variation: I wanted a pink shimmer on my paper too so after I swirled the paint I let the paint dry a bit (3 minutes) on the surface of the water then I sprayed it with some pink glimmer mist before pressing my paper, it is a subtle effect but quite lovely!

Marblilicious!
Marblilicious!

Thanks for stopping by and til next time happy crafting!

Spray it!

Looking for a fun way to make a background for a card? Try using mists and sprays on cardstock then cutting up the cardstock for card bases. Here I used my home made sprays to cover the cardstock then I placed a sheet of plastic wrap over it and let it dry:

Stamps: About Art Accents, White Cardstock (sprayrd) Georgia Pacific, Pattern Cardstock: DCWV (once upon a time stack)
Stamps: About Art Accents, White Cardstock (sprayed) Georgia Pacific, Pattern Cardstock: DCWV (once upon a time stack)

I used watercolor and water mixed in a spray bottle to make my color sprays (If you don’t have watercolor you can use re inkers) and I put fine pearl ex plus gum arabic/water (or use hairspray) and watercolor in other bottles. All the stamps on these cards are by About Art Accents and the paint is by M Graham & co. (2 of my faves there!) I love the effect and it’s Oh so Thrifty! To read my in depth article on making shimmer spray click here. Also the new issue of Vamp Stamp News features sprayed backgrounds, get your copy today!

Thanks for stopping by and til next time happy crafting!

Oriental Stamp Art Bunny Challenge

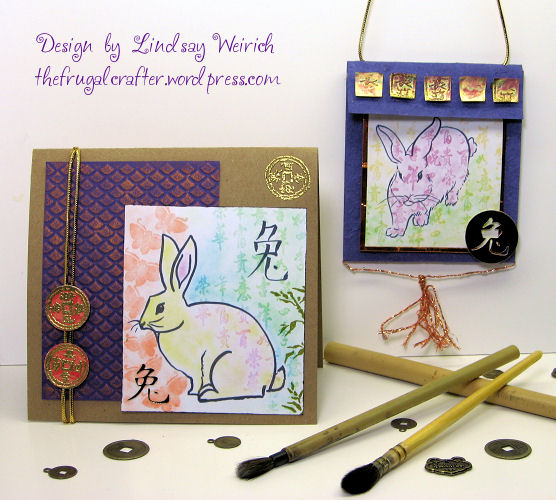
I just joined a fantastic stamp community call Oriental Stamp Art and you guessed it, it is all about creating with Asian themed stamps. I decided I would jump (or Hop as the case may be) right into this challenge to make some Asian inspired art with a rabbit as the theme. Well, I did not have a rabbit stamp so I sketched one with a brush tip pen so it would have a “sumi-e” feel and made it into a digital stamp, actually I made 3 stamps but who’s counting!

Stamps: Lindsay's Stamp Stuff, PSX

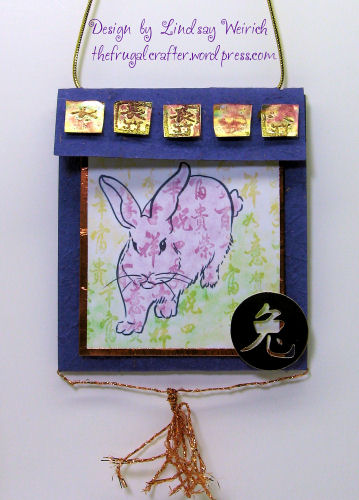
I had a lot of fun with this. I used a technique called “Poppin Pastels” to add color to my image, here’s how: First I printed out a sheet of my bunny digi-stamps and trimmed the ones I wanted to use. Then I used some old clear stamps I had by PSX (love this set so much but unfortunately PSX went out of business but you can get similar Asian calligraphy stamps from stores like About Art Accents) I inked them with clear embossing ink and stamped randomly over my image. Then I dipped a pom-pom in chalk and dabbed it over the stamped image. The embossing ink grabs the color making the pattern that you stamped show up like magic!

Stamps: Lindsay's stamp Stuff, PSX

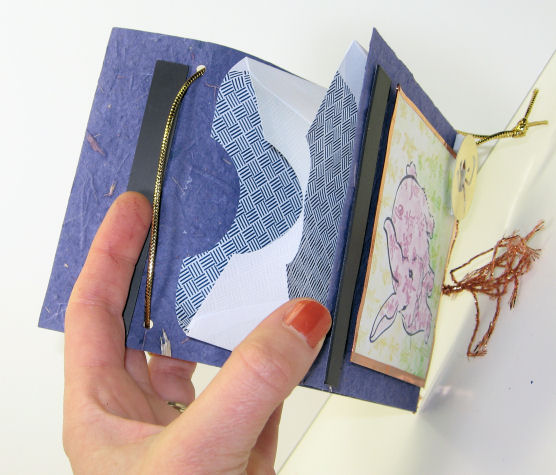
I made a cute little money holder too. My friend Tracy showed me how to make these once, you seal a standard No. 10 envelope shut, fold it in half and snip off the ends making 2 pockets. Then just wrap it in a half a sheet (the long way) of cardstock. I used magnet strips that I got free from a sign shop to keep the flap closed.

Download the SVG file for the Chinese charecter charm below.
The pockets in this money holder are made by folding an envelope in half.

The Chinese character that is on the charm and near the rabbit means (you guessed it) rabbit. I made an SVG file of the character and put a circle around it in SCAL software to cut the charm out using my cricut machine. You can download the Chinese symbol here. I used stained glass tape to wrap around the stamped panel for a bit of glitz. 2011 is the year of the rabbit and since Chinese people give away money on the new year I thought this project would be appropriate.

bunnyduo2

I had a lot of fun with this challenge, I hope you enjoyed it! Until next time happy crafting!