Hi friends! The holiday’s will be here before you know it! I love the time spent with family and friends but I don’t like feeling stressed out or rushed so I decided to do some things today that will make the holidays easier. One of these things is pre making gift packaging.
I have also had a big mindset shift this year. I had minimized so much excess clutter from my life that I really want to be mindful of what I give to others this Christmas. That is what I am giving consumable gifts like wine, coffee, fine tea or gift cards because they are small and hopefully will bring joy to the recipient. I am also striving to make my packaging reusable. The wine tag I am sharing today can be easily used over and over again to give a bottle of wine or homemade vanilla extract or other bottled homemade gifts. I hope you find this tutorial useful. If you don’t celebrate Christmas, or you need a gift for another occasion, you can switch up the stamps and paper to a more appropriate gift topper.
Video! (If reading this in your email click here to see the video)
This video is sponsored by Rubber Stamp Tapestry! Use coupon code: FRUGALNOVEMBER17 – 20% off ALL STAMPS! Coupon expires November 30, 2017. Become a Peg Stamp VIP here & get the deepest weekly discounts available
Edited to add the finished piece from the live broadcast. 😀
Hi friends! Today we are going to paint a loose floral bouquet! Below is the practise painting I did before the live stream.
We will have fun and let the paint do the work. I hope you will paint along. Please use whatever watercolor paint and paper you have on hand (even the kids supplies!) I will link the supplies I used below if you want to check them out. There was a great deal on the paints I used and I do earn a small commission when you shop through my affiliate links. 🙂 You can watch the live show or the replay in the player below but if you want to chat with fellow painters live or ask me questions be sure to tune in on the YouTube watch page at 12:30pm ET.
Supplies:
Cotman Watercolors (Permanent Rose, Cad Yellow Pale Hue, Hookers Green Light, Turquoise, Burnt Umber) *This is a great deal on the set of 45 pans I have. I recommend you remove the 5 colores we are using and put them on a palette or plate so you don’t get confused with all of the other colors in the kit. 🙂 I used poster putty to stick them in my palette🙂
Watercolor paper: Aquabee #140 100% cotton (my practise paper) and the live painting will be done on Arches 9″x12″ 140# CP
We will sketch together and paint from out imagination! (That’s what happens when my printer breaks and I have printed out a reference photo yet LOL!)
Want more watercolor?Try a Class! Use coupon code TRYME for 20% off!
Reminder, next week we will be on Daylight Saving Time so if you don’t turn your clocks back you will need to adjust for your time zone (we will be on at 12:30pm ET Daylight Saving Time which converts to 1:30pm ET standard time.) Happy crafting!
Howdy friends! Tonight I have a beginner jewelry project for you and a super cute packaging idea!
I wanted to design a holder hor handmade earrings that could double as a gift wrap and I came up with a sweet matchbook style display card that I think is adorable! Follow along with the video for the easy step by step instructions. I’ll also post the template below.
Video!
Here is the template. I actually took a 12″x12″ piece of kraft cardstock and did all of my scoring (using the measurements os a guide I scored all the marks on the left side and then the right side) and then cut the cardstock in half and then in 2″ strips and it was quick and easy!
Supplies: * Note, I have lined products to Consumer Crafts and Amazon where I am an affiliate and also Oriental Trading where I am not affiliated but I have had good luck with their products.
To & From Stamp *I could not find the stamp I used, it is discontinued 😦 but these are cute and inexpensive
Directions:
1. Remove jump ring from charm if needed. Open loop on ear wire and slide on charm. Make 2.
2. Cut a 2″x6″ strip of kraft cardstock and score/fold at 5/8″, 3 1/4″ and 3 3/4″.
3. Stamp “To & From” on the back of the cardstock as shown and glue a 2.5″ square of pattern paper on the part that will be the front.
4. Cut a 1 1/2″x2 1/2″ piece of white cardstock and poke 2 holes near the top. Nestle this into the folded kraft cardstock and staple at the bottom.
5. Insert earrings in the holes and tuck the top flap into the bottom lip to close.
This is such a simple project and I think it would be a great first earring project for a your girl to make for her classmates and inexpensive enough to make a bunch! Let me know what you think of this and if you enjoy this project please consider sharing it using one of the handy sharing buttons below. Thanks for stopping by and til next time happy crafting!
Hi friends! I hope my fellow northeasterners are warm and safe after the big and somewhat unexpected windstorms Sunday-Monday this week. We just got power and internet back late last night. Some towns recommended postponing Trick-or-Treating at the last-minute but since we had a generator we had our annual pot-luck Halloween Shindig and was able to pass out candy and host a hoard of teenagers (how are my kids teenagers?!?) My only regret is that I didn’t get any photos. I think many people are doing Trick or Treat on Friday so we all might costume up again, at least I’ll grab another bag of candy incase kids come around. I love Halloween!
The storm we had was nothing compared to the hurricanes earlier this fall down south. My friend Sandy Parker for Crafting for Almost everyone posted a video to gather supplies to help out our fellow crafters that lost everything during the floods and hurricanes. Her goal is to help crafters replenish their craft supplies and she has been receiving many donations from crafters! There have been fewer people requesting supplies though so if you were affected by the hurricanes and need supplies, or you want to help, check out this video and get in touch with Sandy.
I hope everyone had a safe and happy Halloween and til next time happy crafting!
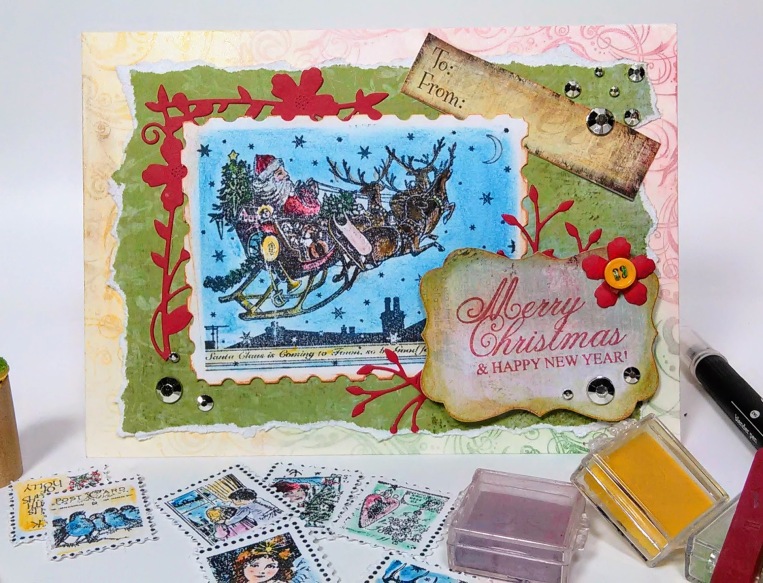
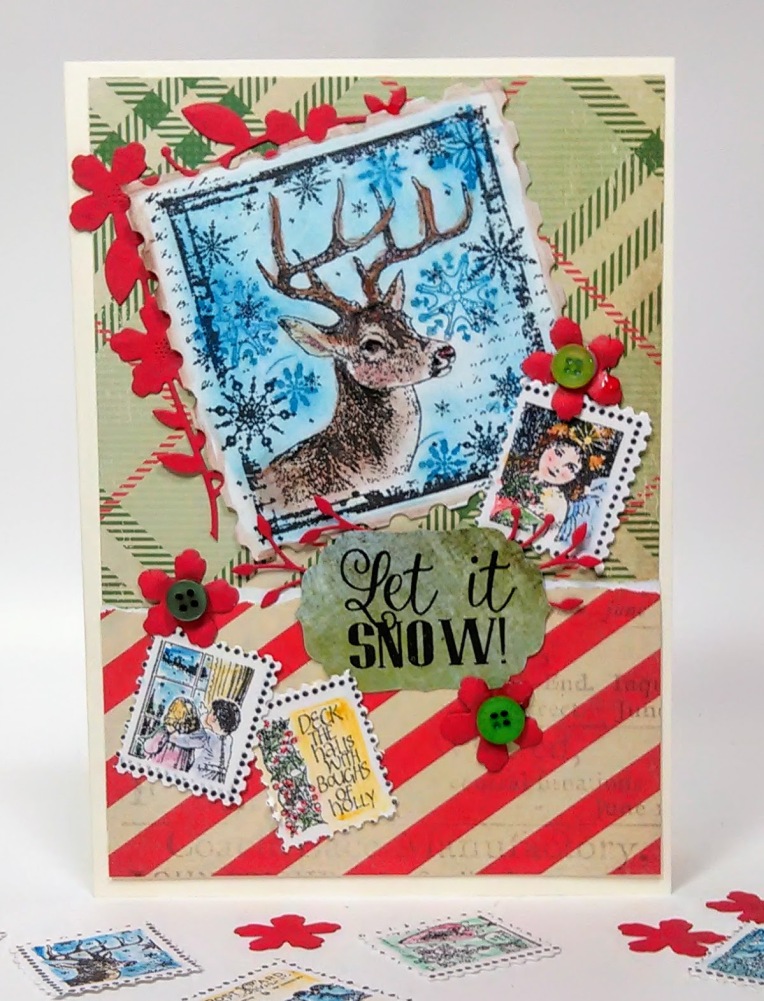
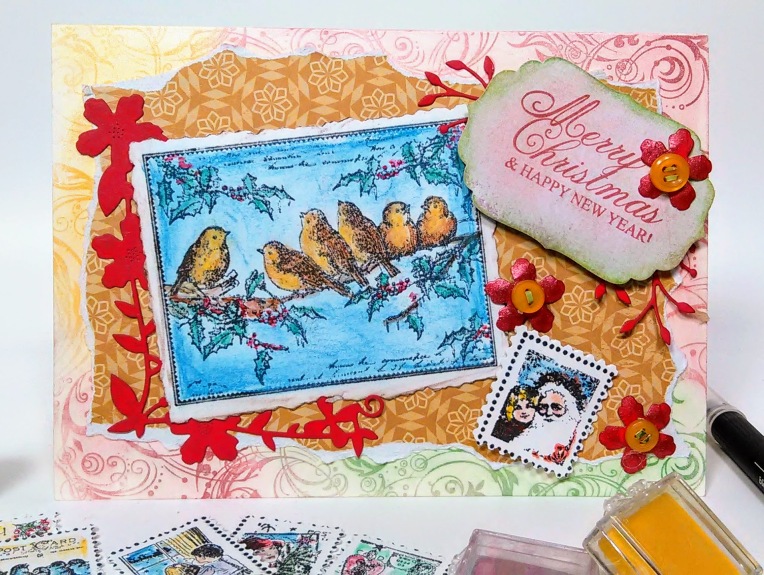
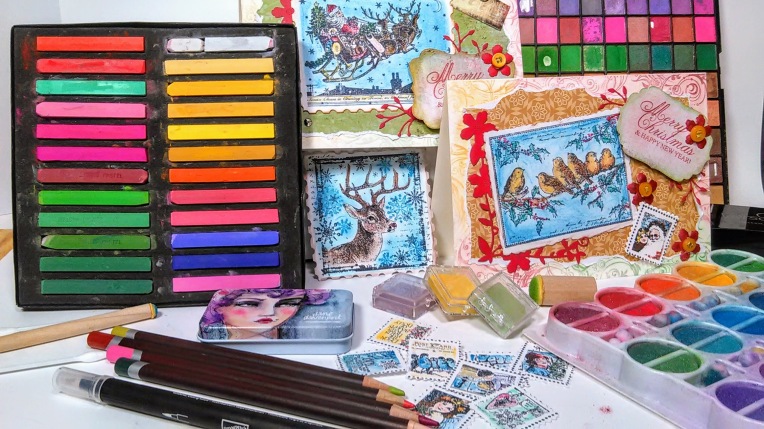
Hi friends! There are so many cool supplies coming out every day that we can easily be distracted from the gems we already have in our stash. Today I am going to share my top tips and techniques for using chalk. When I say “chalks” I am talking about soft chalky pastels, decorator chalks or even eyeshadow. I bet you have something in your house that will work for these techniques!
I will share techniques using inexpensive supplies from pencils, to pastels to eyeshadow and the neat thing is that for many techniques you can use any of them. I hope this helps you get more use out of what you have or choose the right product if you are looking to add chalk to your stash. Please note that colored chalkboard chalk is not pigmented enough for good results.
I love the “photo tinting” feeling I get using chalk to color these vintage stamped images from our sponsor Top Flight Stamps(Use coupon code thefrugalcrafter10 to save 10% on your order, also USA orders over $50 ship free!) Speaking of photo tinting you can print out photos in grayscale and use the dry techniques to tint them with chalks. It was one of my favorite Scrapbook techniques…I really need to do that again!
So, Are you ready to rock your chalk? Watch the video and get started!
Stamps from our sponsor Top Flight Stamps: Rememer save 10% with coupon code thefrugalcrafter10 at top Flight Stamps and USA orders over $50 ship free!
Instead of cardstock Smooth Bristol will allow more blending because it has a more robust surface.
In praise of vegetable glycerin! As you know from this very silly video I love to make my own supplies using glycerin. I use it to re-ink my embossing ink pads and to make homemade pigment ink. I also use it with water to rejuice my waterbased blending pens. It is useful in cake decorating and candy making as well as DIY beauty products. Also a little goes a long way and it is so useful! I had a viewer on YouTube ask if they could use a waterbrush instead of a waterbased blending pen for the brush technique. You can, however I recommend working on watercolor paper if you do as a waterbrush is going to give you more of a watercolor look at the extra water will pill ordinary cardstock. It is the glycerin in the blender marker that lubricates the tip of the marker and lets the media glide across the cardstock and that is why I recommend that method. If you don’t want to get a waterbased blending marker simply dip a pointed q-tip in the water/glycerin mix and use that, it will work the same. 😀
I hope you enjoyed this video. I worked really hard on it and I’d like to make more overlooked supply focus videos in the future so if you have any ideas on what supply to feature next let me know in the comments below. If you like this video I’d love it if you shared it on social media using one of the handy sharing links below. Thanks for stopping by and til next time happy crafting!
Hello friends! I hope you are having a good weekend! The sun is shining here in Maine and I have a list of home projects that I want to tackle but I think I will sneak down to my studio to get a bit of crafting in before the house wakes up:) There is no “perfect” time to create. You need to grab that time when you can get it so I hope you carve out a bit of creative play time today and if you need some inspiration try this tutorial and get a batch of Christmas cards done while you are at it!
You can use this design for any occasion though so make the kind of cards you want! What I like about this project is that it only uses 3 ink pads so if you have been on the fence about trying Distress oxide you can pick these three colors and see what you think. If you love them you can get more and if they are not your favorite you can use them up and move on. BTW this will also look very pretty with original distress ink too or you can use any dye ink and I have a tutorial here on how to make it look like distress oxide.
Video!
This video is sponsored by Rubber Stamp Tapestry. Use coupon code: FRUGALNOVEMBER17 – 20% off ALL STAMPS! Coupon expires November 30, 2017. Become a Peg Stamp VIP here, & get the deepest weekly discounts available
Follow along with the video to make these fun cards! Try this technique in other projects too. It’s fun and the more time you spend working with ink the better you get at it! Happy crafting!
Edit 10pm 10/27/17: If you are experiencing problems with the video quality please try again in the morning. I am having issues with YouTube processing but it should be fixed soon. When it reverts back to the original stream you may have to scroll in about 5 minutes to the tutorial but the picture will be clear. Thank you for your patience:)
Howdy friends! I am so happy to let you know we will paint live on YouTube at 12:30pm today! Here is the sample I whipped up this morning!
EDIT: Here is the live show painting:
This is a beginner friendly tutorial so don’t be shy, hey why not call a friend and paint along together! Let’s spread the love of painting!! I love that you can begin painting at ANY age, you can progress at 60 just as quickly as you can at 18 and learning new skills keeps your mind quick and supple. Heck, even if it didn’t keep your brain sharp at least you’ll know how to paint:) You can watch the live stream or the replay in the player below but if you want to chat live with other painters or ask questions to me or the moderators then you want to watch the broadcast at 12:30pm ET on the YouTube watch page.
I decided to use Sennelier watercolors today, but you can use any brand you like. I recommend if you are trying a new brand of paints to start with a small set (the 12-14 sets are the most affordable per color) or a couple of tubes in colors you need anyway as you can intermix brands with no trouble. The benefit of Sennelier, for me, is the ability to layer without mud. They are my favorite plein air colors (and my palette is very beat up and has sand embedded in some of the pans to prove it!) because I can splash the paint around quickly, but also build up layers of translucent paint without making mud. This painting is done pretty much in one layer so it really doesn’t matter what watercolor you use though, just have fun! Also, about the paper, I did my sample on Aquabee #140 100% cotton 6″x9″ watercolor paper. This is my “practise” paper and it is much cheaper than Arches, you get 50 sheets for under $14. If you are starting out or on a budget give it a try! It is acid free so if you make a masterpeice on the Aquabee it will last too! 😀 I will do my live painting on the Arches paper so if you want I can show them side by side at the end of the live stream and you can see the comparison. Use whatever watercolor paper you have. You can do this!
Supplies:
Sennelier watercolors: Pthalo Blue, Ultramarine, Carmine (or any pinky red), Light Red (or English red or any PR101 reddish-brown), New Gamboge (or any warm bright yellow), Sennelier Olive Green (or Sap Green from any other brand) and Naples Yellow (optional)
We will sketch and paint together today so there is no pattern available. I will also talk about composition and adapting a painting to suit your style, you are the king or queen of your painted scene!
Essential Tools and Techniques for Watercolor is a beginner course aimed at packing all the info you need to know to start your watercolor journey off on the right foot. You get 5 hours of video instruction and will compete 3 beautiful paintings during your class!
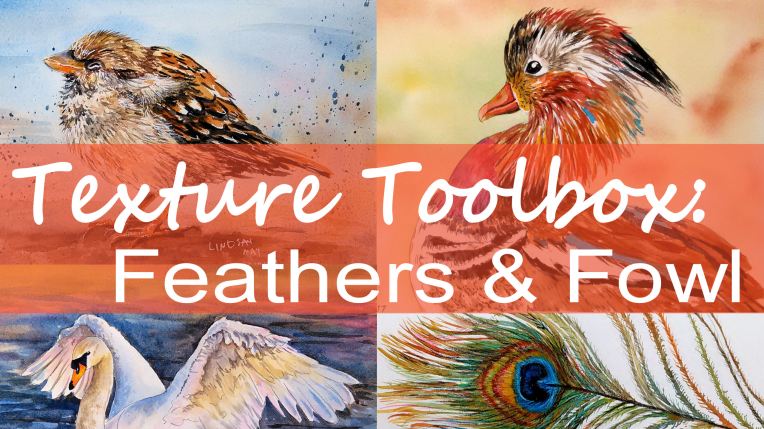
Texture Toolbox: Feathers & Fowl is the first in an intermediate series exploring specific subjects and textures and how to render them in watercolor. As a bonus we work on fixing mistakes in watercolor and I show you many ways to use reference photos to enhance your painting experience.
Make sure to use the coupon code TRYME if the discount doesn’t show up automatically to save 20%! I hope to see you in the free live painting lesson today and til next time happy crafting!
Oh, I almost forgot! The winners of the Jerry’s Artarama gift cards are:
Jean Arizona
Jaycee
Laurel Evelyn Hall
*Check your email for confirmation:) I replied to winners in the comment thread of the giveaway post too! Have a great weekend!
Hi friends! After falling off the Inktober bandwagon I finally did a sketch!
Watch the video to see the process!
This was my take on yesterday’s #inktober2017 prompt “Juicy” and I had fun rendering this sweet treat in inks. I began drawing with india ink in my fountain pen and coloring with inks. I did use some watercolor to expand my colors. They both worked fine so use what you have. Supplies below.
Fountain pen: Jane Davenort Inkredible pen, load the cartridge with fountain pen safe india ink as the inks that come with the pen are not waterproof) *note, this is the old style pen, you can get the white and gold one from janedavenport.com
Bleed proof white opaque watercolor (I love this thinned with water for gauzy colors with ink of for sharp opaque highlights used straight from the bottle)
First edition mermaid markers (from comparison at end of video)
All of the new Jane davenport products are available on her website (watercolors, inkcredible inks, new style pen etc) *And will be in Michael’s stores across us and Canada after November 10th
I snapped a photo of the mermaid marker in comparison. The colors are not perfect matches but some will do in a pinch. I have not run out of any ink in my mermaid markers yet but I have refilled my Beinfang Watercolor brush pens with these liquid watercolors and they worked perfectly (you can even mix these colors to get just the right shade) so that is another option.
If you want to see more of the new Jane Davenport products that will be out next month you can see my unboxings on my YouTube channel. The first box contained the inks I used today and more art journal/papercrafting stuff and the second box was more of the mixed media product stuff. I plan on doing a review of the new art media stuff so you can see what would add value to your stash and what just duplicates what you already have (and I think that this will be different for different people.) Let me know in the comments if there is anything in particular you would like to see me use first. Thanks for stopping by and til next time happy crafting!
Edited to add winner’s names: Jean Arizona, Jaycee, Laurel Evelyn Hall. Thanks for playing. Contest is closed.
Hi friends! I totally forgot to mention in yesterday’s blog post that Jerry’s Artarama is giving away $10 gift cards to 3 lucky viewers! All you have to do for a chance to win is visit Jerry’s Artarama to see what they have, then, come back here and leave a comment on this post and tell me what you would buy if you won a gift card! I will randomly pick 3 winners from the comments section on Friday and notify the winners via email (and probably on the live stream too:)