Hi friends! A little over a month ago I read (listened to) The Life Changing Magic of Tidying Up by Marie Kondo and it was the kick in the but I needed to get my home and my craft studio in order. I was feeling suffocated by all of the “stuff” that surrounded me. Up til now I’d shrug off the excess as “tools of the trade” and “this is my job so I need to keep it all” reasons excuses to keep so much. It wasn’t a problem until it started making me feel tired, overwhelmed and un-creative. It was time to clean up my act!

Don’t get me wrong, I still have a lot of stuff, I think everyone has a different amount of items that feels “right” to them and your amount might be more or less than mine and that is OK. I also spend about 40+ hours a week working in my studio because it is my full-time career so I will typically have more than the hobby crafter because I am using it for videos or classes I teach. The last thing I want to do is make anyone feel badly about how much they have, this isn’t a contest, I just want to share my journey and hopefully encourage anyone else who is in the same boat. With that, here is the in-depth video on how I cleaned up my act in the craft room!
If you want to jump to a specific part in the video here are the time codes when each subject is discussed.
2:45 BEFORE pan of room and overview of the mess
11:28 Punches & Deco Scissors
18:59 Dies
25:47 Mini paper pads and origami papers
29:46 Stamp & Die Sets
32:50 Embossing Folders
33:36 Background Stamps & Letterpress items
38:10 Ribbon (holy crap, there is a lot!)
44:10 Fabric & Sewing Supplies
57:09 12″x12″ patterned scrapbook paper
58:26 Cardstock
1:01:47 Embellishments (the hardest category!)
1:14:23 Glitter & Embossing Powder & Flock
1:21:26 String/twine/cord/chain
1:28:09 Watercolors (no discarding LOL)
1:30:59 Drawing/Inks/Random update
1:35:15 Stamps
1:42:35 Pens & Markers
1:46:06 Dr PH Martin Watercolors & Inks
1:48:40 Random Stuff, Packaging & Framing (under die cut bench stuff)
1:50:18 Large paper sheets and watercolor pads (too long:)
2:02:13 Jewelry stuff
2:05:15 Packaging detail
2:12:27 ALL DONE! Have a look at the clean and Tidy space!
12:17:43 Scary Discard area (not for the faint of heart!) *I have tidied that up nice and neat and it is ready for my friends to come take what they want:)
BTW, the glasses I am wearing at the end of the video are Ottoto frames from Glasses USA. I have wanted dark plastic frames since I saw Jennifer Aniston wear some in an Aveeno ad and I finally found some that look good on a pale face:) They are very lightweight too!

I am so happy with my craft space now, it is not perfect nor is it minimalist but it is just right for me right now:) Here are some after shots of the room. Honestly I was so disgusted with my stuff before the declutter that I only took video, it was cool to look at the before video to see the improvement because when you are working it can feel like you are not making progress so if you tackle and area in your home make sure to snap a before pic so you can see the results in full!
Details!
My desk is a hollow core wooden door (we took all of the sliding doors off the closets in your home years ago and replaced them with curtains and we saved the doors, they make lightweight but strong benches. The other 2 benches in my studio are also old doors 🙂 ) sitting on two 9 cube organizers.This gives me great shelf storage (I even have some inexpensive fabric bins to hold lightweight unruly stuff) on each end of the table and room underneath for rolling carts,shelves or drawers.

The one above is the one you see as you enter my space so I try to keep it colorful and pretty with often needed items in there. The other end of the table has stuff I use for teaching and cleaning and items I do not need to access as frequently.

I covered my table with white shelf liner. I really brightens up the place and I can put down paper when I am getting messy to keep it looking good.

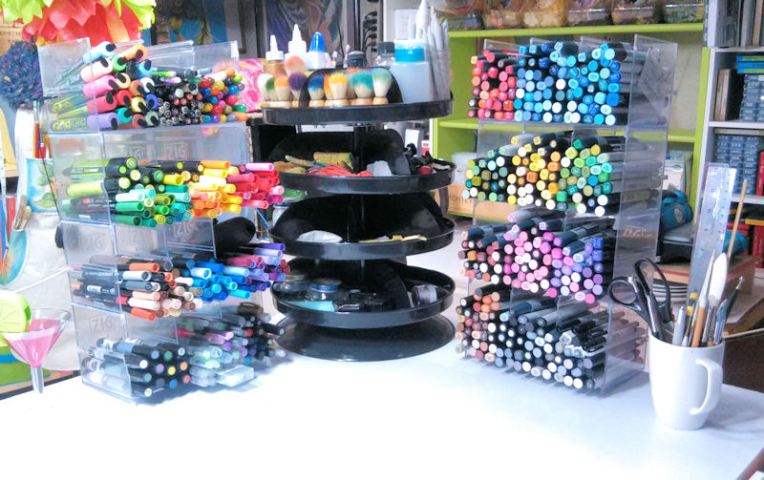
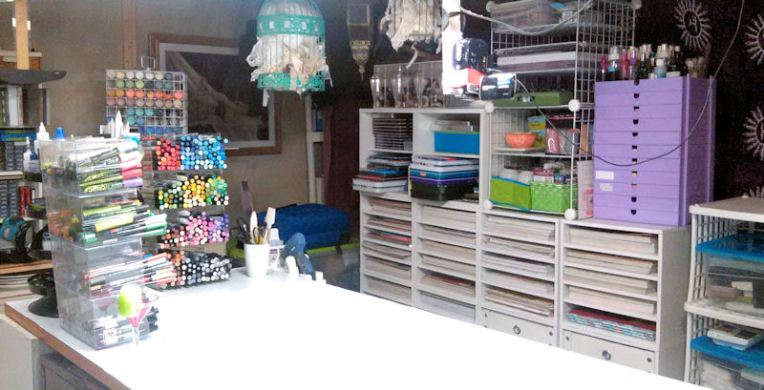
The markers are in a pen display rack a bought from a scrapbook store that was going out of business. I have the spinner rack for supplies I use daily. I have decided to organize my work table so it is easy to clean, instead of having everything at hand like I used too.
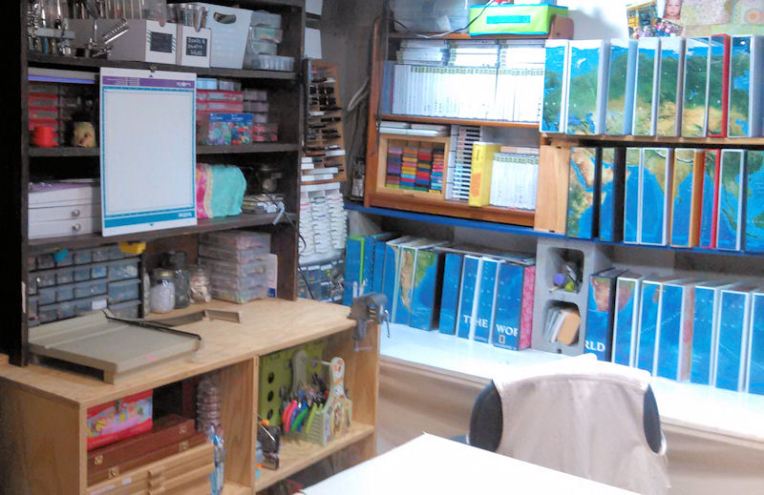
My unmounted stamp storage worked great. I keep all of my UM and cling stamps in binders (I recommend 3″ heavy-duty 3-ring binders.) Since I had a mish-mash of binders I cut up a map I loved and adhered it to the spines and I made unobtrusive labels with blue card-stock because text can seem like clutter.

Next to my stamp bench is where I keep jewelry supplies, my Brother Scan ‘n Cut2 and other stuff. I keep my Scan n Cut next to my stamps because I use it simply for scanning and cutting my stamped and colored images. This machine is why I have been able to resist most of the matching dies that are available for stamp sets now:) It has saved me tons of cash!
I started putting paper vertically to take up less space and make it easier to access! Also putting my wooden paintboxes and table easels vertically on a shelf made them take up less space and I can grab one without having to unstack a bunch of things. If it is easy to get at I will use it! Also in the picture below you can see my wood stamp shelf and my large sheet paper rack. I keep a sarong on it to keep dust away. I was able to get this rack (a poster board rack) from Rite Aid when they were going out of business but the closest thing I have seen for sale is a school art drying rack if you are looking for something similar.

I make use of clear plastic drawers under benches and stacked up (with wheels removed LOL) and you can’t beat it for cheap & useful storage! You can find them in different colors and with different depths, I like shallow drawers for embellishments and deep drawers for bottles of paints and mediums. A mix of depths is great to have! I might put paper in the front of the drawers to make them prettier but honestly it doesn’t bother me seeing what’s inside.

I also recommend these scrapbook cube organizers. I keep scrapbook paper flat here because the devided cubes make it easy to sort by topic and see what I have. You can get ones with drawers which are great for supplies you don’t want to get dusty. I put my ribbons in those drawers and I like it much better compared to on a shelf. I also like that they are pretty standard and modular so you can add to the configuration or change it as your needs change and budget allows. Since my basement is unfinished these cubes actually divide the space between my craft area and my husbands wood shop and they are sturdy so I don’t fear them tipping over, each cube can connect to the one under it with pegs. I still liked storing my lace in birdcages so they stayed, probably not the best solution in a dusty area but I love them!
My solid colored loose cardstock is in an old record (as in LPs) cabinet. I used Jennifer McGuire’s tip on using job ticket holders to store cardstock by color. It it easier to remove a color family and it keeps the edges and corners from getting dented. I have my neutrals I use for coloring and card bases on top in a letter sorter (actually, you won’t believe this but this is actually a sandpaper display that my parents no longer needed in their hardware store, talk about upcycling!) Also speaking about letter sorters, I used and upright one to help me sort and organize pattern paper during the purge and ended up keeping in and I put it on the shelf behind my manikin to hold 9″x12″ pads of art paper vertically, it works like a dream!

I keep my Big Shot, Dies, laminator and old Cricut machine in “die cut central”. I also have plastic candy jars with silk flowers in them. I scored them for 25 cents each at a party store going out of business, you sure can get some deals on shelving and storage when places go out of business, not that I would wish that on a store but they are keen to get rid of it. I have extra space here, I might make a “new product” or “Project in progress basket on this shelf but I am in no hurry to fill it up. Truth be told I have a couple empty cubes in here too!

You can see more of the room in the video but I realize it is long and my mess might give some people anxiety and that is NOT what this post is about. If you liked this post I would love it if you pined it on Pinterest or shared it on social media using one of the handy sharing links below, sharing is caring! I also wanted to let you know that I am now an amazon associate (they just let Mainer’s join yay!) so I looked up the storage products I used and linked to them. If you make a purchase after clicking one of my links I earn a small commission but it doesn’t cost you anything extra and I thank you for your support! I also want to thank Audible for sponsoring today’s video on YouTube and invite you to check them out if you like audio books, you can listen to The Life Changing Magic of Tidying Up by Marie Kondo free with a 30 day trial subscription. Thanks for stopping by and til next time happy crafting!
