Here we are in the second phase of the the tray table I am painting for the Maine Discovery Museum’s Charity Auction, to see part one click here. This step is done in well under an hour and will teach you a faux-finishing technique called marbleizing, lets take a look at what the table will look like when this step is finished:

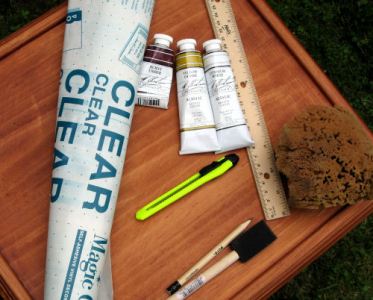
I wanted the table top to have a chess/checker board on the surface to add decoration as well as usefulness , how nice to be able to play a game of chess or checkers without dragging out a board! Here is what you will need for this step:

Step 1: Cut 32 1 1/2″ squares out of the contact paper. Mark out a 12″ square in the center of the table top and stick down the contact paper in the design of the grid.

Step 2. Mask off the boarder with painters tape.

Step 3. Set up your palette, I am using a disposable palette (a pad of this waxed paper) squirt out dabs of white, yellow ochre and burnt umber and mix them to make a dark, medium and light shade of brown, do not over-mix!

Step 4. wet the sea sponge and squeeze out all of the water you can, dab it in the paint colors and sponge over your checker board. Do not rub or paint may seep under the contact paper.


Step 5. Take a feather or thin paint brush and add in a few veins to the marble with strait burnt umber and white paint.

Step 6. Wash out your brushes and sponge with dish soap. Remove the painters tape and contact paper. Do not worry about any rough edges, we will fix those next time 😉

Thanks for checking out my progress on this table and thanks to M. Graham & Co. for donating the paint for this project. Til next time happy crafting!
Lindsay, this is just the coolest thing! You have done a remarkable job on this table!!
LikeLike