A “Best Day” Giveaway!

Howdy folks! Happy Monday! I am so excited today because Annette, the owner of About Art Accents, sent me an extra stamp set to give away to one of my blog readers! Here is a card I made with one of the images from the Best Day stamp set:

I used my stamping gear and a few small stamps to create my background and there was enough space in the center to stamp my couple. I wasn’t intending on stamping and coloring on this cheap Georgia Pacific cardstock but hey, it doesn’t look too bad for a 2 cent sheet of paper! I stamped the same flowers on a piece of masking tape, colored it and stuck it right on the card base.  I stamped a small double happiness on a punched stamp square and adhered it with skeleton leaves over the tape. Pretty simple…I wonder if this counts as a one layer card?


So do you wanna win a set of 9 stamps from About Art Accents? Great! Just leave me a comment on this post telling my your favorite About Art Accents stamp…that’s it…really, no strings attached:) Although if you do feel compelled to do a bit of shopping at About Art Accents you can use the code Lindsay10% to save 10% off your order! They have a lot of good stuff on sale right now too! BTW, here is what the winner gets, I’ll draw a name out of a hat next monday so be sure to leave a comment before then!

Good luck & Happy Crafting!

A Freebie! 50% Off Sale & a Quick Tip Video!

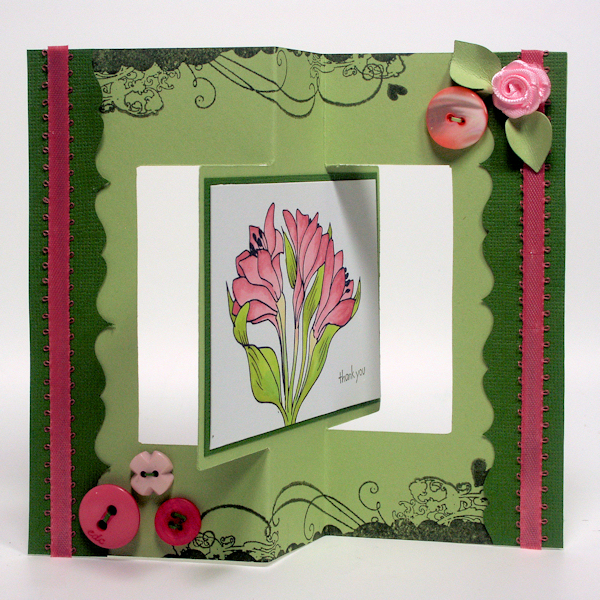
How’s that for a headline? It is true, I am having a 50% off sale now through Saturday at Lindsay’s Stamp Stuff. I have some cool new kits to check out as well as a free die cutting file so you can make this swing card! On this card I also used the Pretty Posies Digital Stamp Set on sale for $2!

If you want to see this interactive card in action then check out the video, there are some tips there too including how to use a regular paper punch to make seamless borders. I own very few punches but I still make them earn their keep!

Here is what the card looks like closed:

And all the way flat:

It is such a simple design but it holds a fun surprise for the recipient! The Free SVG kit also contains a printable file, I shared that back on this post along with a video on how to make it by hand with a paper cutter.

That’s all for today! Remember to visit Lindsay’s Stamp Stuff to snag your freebie and to save 50% on everything else! Thanks for stopping by and til next time happy crafting!

Shaker Box Tutorial & WOYWW

Happy Wednesday folks! A week or two ago a blog reader asked me to do a tutorial on making a shaker card. The shaker tag I had made was roughly slapped together (it looked fine from the outside though and that was all I cared about) but I wanted a more elegant method if I was going to show someone else how to make one…I know “Lindsay” and “elegant” are not commonly associated but I came up with a rather elegant method of making a shaker:


All the stamps are from About Art Accents, they carry the best Oriental themed stamps, use the coupon Lindsay10% to save on your order! This fun shaker card only takes 10 minutes to make and it is easy. Also I share several stamping tips in the video:

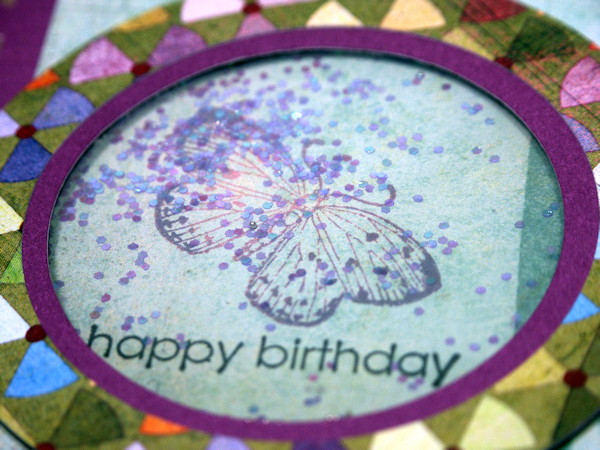
Here is a close up of the window:


You can use confetti, glitter, beads, buttons or small punched shapes in the window, be creative!

 Oh and before I forget, today is Wednesday (as in What’s on Your Workdesk Wednesday) so here is a pic of my desk after I made my card:


In case you are wondering I promptly cleaned it up after taking the photo! No, really! Thanks for stopping by and til next time happy crafting!

Video Tutorial: DIY Honeycomb Paper!

Edit: I created a SVG and a SCUT2 file to cut the file folder to make the glue jig. You can download it here. You can download a .cut file here for use with Design Studio, use layer 1 if you have George cart or layer 2 if you have Plantain Schoolbook. You can use a 12″x12″ mat, just let the rest of the file folder hang off the edge or use the 12″x24″ mat. Line the fold up to the 10″ mark so the slits will start 1/2″ away from the fold. See the video for an explanation of the technique before cutting the jig. 🙂

I love the look of honeycomb pop-ups on cards and tags. What I don’t love is the price. I have seen the Inky Antics Honeypop paper in a few online shops and it is $6 for a 5″x7″ piece of honeycomb tissue and, while beautiful, it is just too expensive for tissue paper (for me anyway) so I decided to try to make my own…and I did! Here is my homemade version:

It is easy to make, albeit a bit time-consuming. It take about 20 minutes to make a pad of tissue paper but it is something I can do while I watch TV (better than polishing off a bag of chips, know what I’m sayin?) and it saves me a bundle, it costs me about .30 cents to make vs. $6 to buy. See the video to learn how:

Here are some close up pics of the projects in the video:

This is a close up of the large pom-pom made with coffee filters I sprayed with ink and let dry before gluing.

Try it, you’ll like it! There is something magical about seeing that honeycomb paper the first time! If you have any questions just leave a comment and I’ll get back to you. Thanks for stopping by and til next time happy crafting!

A St. Patty’s Day Free Craft & $1 Retirement Sale!

Happy President’s Day! I know many people are off work today and many kids are on school vacation so it is the perfect day to share the craft I plan to teach next month at my free craft class at the local library. This craft is fun! Feel free to teach it to your childs classroom, scouts or home school group, that is why I am sharing it 🙂 Although if you know me in real life you can just bring your kids to my free class 😉


The most fun thing about this project is the Magic Rainbow Paintbrush and you can make it your self. Just take a 1″ foam paintbrush (they are on sale for 5 cents each at ACmoore this week!) and squeeze yellow paint on the cent and red and blue at the sides as shown. This needs to be tube watercolor, gouache, or tempera paint, I tried liquid watercolor and it was a mess, the colors blended together too much. Now spritz the brush with water. Then you want to work the paint into the brush by painting the brush back and forth on a palette, don’t flip the brush, keep the color lined up. Now you should be able to make a lot of rainbows, just give the brush a spritz of water when it dries out. You can let the paint dry up in the brush and spritz it with water when you are ready to use it again! You can make these in other colors too, oh the possibilities!


You can download the instructions and template for free here. They are in PDF format so no need to worry about sizing.

Since you are going to my shop anyway please check out my retiring products on sale for $1! The sale ends on Wednesday the 22nd so Don’t Wait!

Chic Calendar Scrapbook kitHoliday Sweets Party PrintablesHomemade Holidays Paper PackBowling fun PapersArcade Party PrintablesSweet Treats 2Strawberries & Watermelon StampsSchool Rules! stampsCrafty Tools & Puns StampsSew Pretty StampsBirds & Branches StampsPretty Favors SVGLayered Waterlilly Stamp & SVGPretty Primative Digital Stamp SetPeacock Digital StampSweet Stuff Digital Stamp SetRecipe Digital Stamp SetCoffee Talk Digital Stamp Set

Phew, that’s a lot of $1 steals! Don’t wait tho, they are only availble at MyGrafico until Wednesday during the Semi Annual Retirement sale! Thanks for stopping b nd til next time happy crafting!

A Kid’s Craft, a Freebie & a 40% Off Sale!

I was going to aim this craft to all of the teachers and moms out there but after I made it I have to say it was a ton of fun and I urge everyone to try it! I am teaching a craft program at the local library next week and I thought it would be fun to do Chinese New Year. I planned on the kids decorating “lucky money” envelopes, coloring dragon masks {for the preschoolers} and for the big kids we could make dragon puppets:

Wow, it was so fun to make the samples. The lucky money envelopes are freebies. I used the SVG in the kit to cut my envelopes from red paper but there is a printable version too if you do not have a die-cut machine. Also There is a full color printable with a Chinese dragon (2012 is the year of the dragon) on the back if you just want to print them and not have to decorate. BTW {shameless plug} Everything at Lindsay’s stamp Stuff is 40% off now through Sunday so after you snag that freebie be sure to have a look around at all of the new products I have added this month!

When I went looking for inspiration on making a dragon puppet I did an internet search and came across a cute template on the Martha Stewart website, well, there was no need to reinvent the wheel there!

Did you know you can cut PDF files with SCAL?

Oh yeah! I saved the PDF dragon template and imported into scal2 (click file-import-then pick the pdf file you want) and with a little tweaking (there is a rogue node on the dragon’s head, just drag it over to the node next to it and click union to make it one shape) I had a great file to cut! Note: I enlarged it and moved it around on my mat to make best use of space. I’d love to share the SVG but I don’t know if that would be cool with Martha.  😀 You can check out her template and instructions here.

I love how the body is jointed so it wiggles and moves when you hold the sticks. I made a few changes in my puppet: I added crepe paper party streamers, they fly wonderfully when you are using the puppet and the pleated crepe paper adds more bulk without weight. I used skinny sticks because I had no chopsticks and I added glitter, sequins would be nice too I think;)

Here is a look at the  Lucky Money Envelopes Freebie:

In the preview you see the color version of the money envelope, for my project with the kids I am cutting them from red paper and they can stamp Chinese characters with gold pigment ink. The stamps I used are from About Art Accents. I heat embossed mine, I think I will let the kids try that too as long as I have an adult to man the heat gun 🙂

And be sure to snag lots of goodies at Lindsay’s stamp Stuff for 40% off! Thanks for stopping by and til next time happy crafting!

Paper Storage YOU can make {for free!}

I never met a box I didn’t like. I have drawers full of tea-tins, chipboard boxes, plastic packaging and all sorts of little containers that are begging to be altered and up-cycled so it is no surprise when I unpacked my groceries last week I found more treasures that I couldn’t bear to part with. I go to Sam’s Club (A warehouse store) one a month to buy large quantities of groceries and such and the products come in really sturdy boxes. Look what I made with the boxes my soymilk and organic milk came in:

The boxes are made of corrugated cardboard and 3 half gallons of milk come inside them, after I put the milk away in the fridge I squirreled the boxes away to my craftroom and made the above magazine and 12″x12″ paper storage boxes. Talk about storage, I can store 4-5 large paper stacks in each or about 20 magazines and it keeps them nice and unwrinkled. Wanna make some? Check out my video tutorial:

In case you have slow internet (or just don’t want to hear me gab for 10 minutes straight) here is a brief summary. Cut down boxes at an angle. Cover raw edges and corners with tape. Trim and attach pattern paper to the sides and front and embellish. pretty groovy eh? And it didn’t cost you a dime!

Thanks for stopping by and til next time happy crafting!

ProMarker Giveaway {and a video too!}

****We have a winner: Congrats Carolyn!!!!********************

*****EDIT: Plese be sure if you are placing a link to this contest you leave a second comment so you get your second chance to win! Thanks 🙂  ********

Happy Monday {yep, it is a happy Monday!!!!} I am so excited because I get to give away a set of 12 ProMarkers to one lucky blog reader and you get to pick your set! They are introducing a new line of blending marker sets {that’s right up my ally} and maybe you will win one before you can even BUY them! There are 3 sets to pick from, each containg 12 beautiful juicy ProMarkers! Giveaway details below. Here is a project I made with Promarkers and Tria markers from Letraset:

Markers: ProMarker/Tria (Letraset), Digistamp (Lindasy's stamp Stuff), Button Dies and rubber stamp (SU!), PP (Basic Grey, K&Co), Ribbon (Offray, SewTrue), Other: Sewing machine/thread, doiley, skeleton leaves, white button

Want to learn how to color this? It is easy, check out the videos below to see how easy it is to color the brass needle holder image on my card (it’s in the Sew Pretty digistamp set from Lindsay’s stamp Stuff BTW} as well as how to color and  blend a rubber stamped image and a hand drawn image. Don’t be shy, give it a try!

Here is a close up of the card, if you love the button card be sure to check back later this week because I have a super fun handmade button tutorial for you, and yes, it is frugal 🙂

Give-a-Way rules…rules, no, how about “How to Enter”…yes, that sounds better:

Leave a comment and tell me what ProMarker blending set YOU would want to win if your name is drawn. You can see all of the sets here.

If you want a second chance to win simply post about this give-a-way on your blog or facebook (linking back to this give-a-way post) and leave another comment with the link {I will check;} and again your choice of sets. Big hugs if you do this, if we get a lot of response from this contest Letraset will let me do more give-a-ways, yay!

You have until Midnight March 13 to enter.

On Monday March 14 I will use a random number generator to pick a winner! I will then email the winner for their address so they can receive their prize. I can see your email when you sign in to comment so you do not need to post it in the comment box for the world to see 🙂

That’s it, easy peasy! Have fun, good luck 🙂 And til next time happy crafting!

Button, button…who’s got the button?

Well, today that would be you (check out the end of this post for a cute vintage button digistamp freebie!) I used said freebie on my project today too as well as stamps from the Sew Pretty set from Lindsay’s Stamp Stuff:

Every designer has her favorites and this set is one of mine, you get 8 sewing themed stamps in png and jpg format but what I really love about this set is how easy it is to layer them to create unique “still lifes” or montages that you can color as I did here. I simply layered the png stamps and erased bits here and there (in paint shop pro but photoshop or gimp will work just as well) until it looked right. Tip: When you create a cool layered layout save it so you can print it again!

I used my new favorite markers to color this and if you have not tried Tria markers by Letraset you are in for a BIG treat (my poor copics might be gathering some dust now LOL!) I really like it because I can use them with my ProMarkers (the ink is the same, the big difference is that Tria has replaceable brush, chisel and fie tip nibs and are refillable) and they blend beautifully even though I have a small collection. BTW you are going to want to keep your eyes glued to this blog because I will have a FABULOUS giveaway in a few days that will totally color your world (hint hint, nudge nudge, wink wink 🙂 ) You won’t want to miss that COLORFUL giveaway!

OK now on with the show. I used the Sew pretty set on my card, this set coordinates with the Sewing Stuff single and the Posh and Trendy sets very nicely:

Sew Pretty StampsSewing Stuff Digital stampPosh'n Trendy Stamps

And here is your freebie-now grab it while you can because I’ve got some sketching brewing in my noggin that coordinate well with this and it’s freebie status might be in jeopardy if I end up tossing it in with a fab new set…as in get it while you can, don’t say I didn’t warn you 🙂

To download click on the picture, then right click on the larger picture and choose "save as" from the drop down menu. Enjoy!

Are you ready for this weeks Dollar Deals? Remember these sets are on sale for $1 but only til next Wednesday so don’t wait!

Crafty Tools & Puns StampsPretty Primative Digital Stamp SetShabby Houndstooth PapersSweetTreat SVG

Be sure to check back tomorrow when I will have fabulous eye candy from the Lindsay’s stamp stuff design team! Til then happy crafting!