What is the difference between grades of paint?

Hi friends!  Today I have a video about the differences between grades of artist paint. I will be referring to watercolor because subtle differences are more apparent in watercolor (and I am the most knowledgeable about that kind of paint) but it will apply to acrylic, oils and other paints/pencils/crayons/pastels too! Have a watch (or listen, you can totally let this play while you paint or cook dinner or whatever else you need to do:)

Below is an overview of what I discussed in the video along with some recommendations that would be easy to find. There are other wonderful paints out there and I have lots of watercolor reviews on my blog and YouTube channel if you need more information. Watercolor comes in several different grades. You will find pans, tubes and liquid watercolor in all of the grades of paint.

Children’s grade watercolor paint: These are non toxic watercolors that schoolchildren are given to use. The are what a lot of people think of when they hear “watercolor.” Everyone has used these in some point of their childhood. Quality varies greatly in children’s watercolor sets from $1 versions of weak chalky paint to $3-$5 for an 8 color set of Crayola, Rose Art or Prang. I prefer Prang watercolors as they are the most saturated and you can purchase refill pans of colors in strips or individually.

Budget grade watercolor: This segment of the market has grown immensely over the past few years with decent budget brands manufactured in China and Korea showing up all over Amazon for crazy low prices. I also consider craft watercolors like Prima, American Crafts/Jane Davenport and Amy Tangerine in this category. This category offers paints that are “cheap and cheerful” and encourage play and experimentation as they are not too expensive to worry about wasting. The downside is that usually the budget lines of watercolor do not offer lightfastness of pigment information and if they do it can be hard to trust the information from a new company. Also these pant usually can’t be purchased open stock (but the Prima and Jane Davenport paints have replacement pans.) These paints will have lots of fillers and extenders and cheap dye colorants (usually) to make the quantity of paint for the price. My favorite budget watercolor pan set is this one called “Pretty Excellent” ($17 for 36 pans)  Other good tube sets are JoiArt ($10 for 24 tubes) and Royal & Langnickle. Royal & Langnickle makes awesome brushes and this $24 set has a large assortment of paints and Aqualon brushes. A new to the scene company Arteza has watercolor tubes with lightfast info (but their pan sets do not.) I have been using them a lot lately because I feel I was a bit harsh in my review and I must admit I am enjoying them more!

Student Grade watercolors: These are the introductory paint from companies who also make professional/artist grade watercolors. These paint offer reliable pigment and light-fast information. To reduce the costs they may use alternatives to pricey pigments like cadmium and cobalt they have additional fillers and extenders to bulk them out. The benefit to student grade colors is that you can start with an assortment set and them replace the colors as you use them up with paints from that companies artist grade line so you only end up buying what you will actually use and saving money in the long run. You can also buy student grade colors individually so you can choose exactly the colors you want and not be stuck with ones you wont use. Most big box art and craft stores will have displays to buy them open stock and all big online art suppliers sell them for about $3 a tube. Usually in student grade paints all colors will cost the same. Buying is sets cost less per color so compare before buying. My picks from this category are:
Cotman by Windsor & Newton
La PetiteAquarelle by Sennelier
Grumbacher Academy
And Van Gogh by Royal Talens

Artist grade (aka Professional) watercolors *Note there are no laws to keep any company from calling their paint artist quality, in fact you see that a lot with the budget brands so do your research before buying. Artists watercolors contain high quality pigments and just enough binder, humectant (A moisturizer agent typically honey or glycerin) and extenders to optimize the pigment and make it optimal for painting. Paints are available in tubes or pans and you will find a greater variety of colors in a companies artist range. Prices vary between color depending on how expensive the pigments used are, earth tones tend to be cheaper and cobalt and cadmium are more expensive. Typically there will be 5 price levels or series of colors. Paints can also be purchased in sets with pan sets being the most popular and my preference because you get the paints and a palette that you can refill. Artist quality watercolors do cost more per tube BUT in all reality you are paying for the pigment and you get a lot more pigment in tubes of artist quality paint where as student paint is more dilute. If you like to glaze many layers artist quality paint is best because it is the most pigmented and transparent. I recommend the same companies I do for student grade as they are easy to obtain worldwide but there are other nice paints out here.
Windsor & Newton Professional
Sennelier
Rembrandt by Royal Talens
Grumbacher finest

***And my favorite watercolor M Graham but I hasten to mention it because they do not carry a student line and I do not know if you can get them outside of the USA. I also like DaVinci and Daniel Smith (but also have no student range and I am not sure if you can get DaVinci outside of the US)…really, there are so many excellent ones!

I also wanted to mention my favorite watercolor brushes, Creative Mark Mimik faux squirrel brushes, this set is a fabulous value and I am considering buying a second set so I can have one upstairs at my paint table and down in my studio  LOL!

I hope this post was helpful and til next time happy crafting!

Make this palette for free!

Hi friends! I had an idea the other day for a DIY watercolor paper made with stuff from around the house. Best of all I can change colors as easy as can be:

This Marie’s set is just about the cheapest good watercolor paint I have ever found! It was $5 a set of 18 tubes at Ocean State Job Lot but most big art suppliers have it for about the same price.

Supplies for this DIY:

  • a magnet sheet
  • metal soda or beer bottle caps
  • adhesive if your container is not metal.

Directions: Cut a piece of magnet sheet (I get scraps for free at a sign/banner shop-they are leftovers from the car magnets they make) to fit your container and adhere it inside magnet side up. Arrange bottle caps on the magnet. Fill bottle caps with paint. You can an add or remove caps easily because they are just held in by magnets. You might need to replace them occasionally if they rust. (I only mention this because I’ve seen old rusty metal bottle caps outside in the dirt before.)

Not bad for a cheap palette, eh?

The brushes are the Real Value line from Princeton Art & Brush Company and they are excellent for the price, the set I demonstrated cost $6 at Ocean State Job Lot but, again, you can probably find them online.

I hope this us useful to someone! Happy crafting!


You asked for it! {a very long painting tutorial}

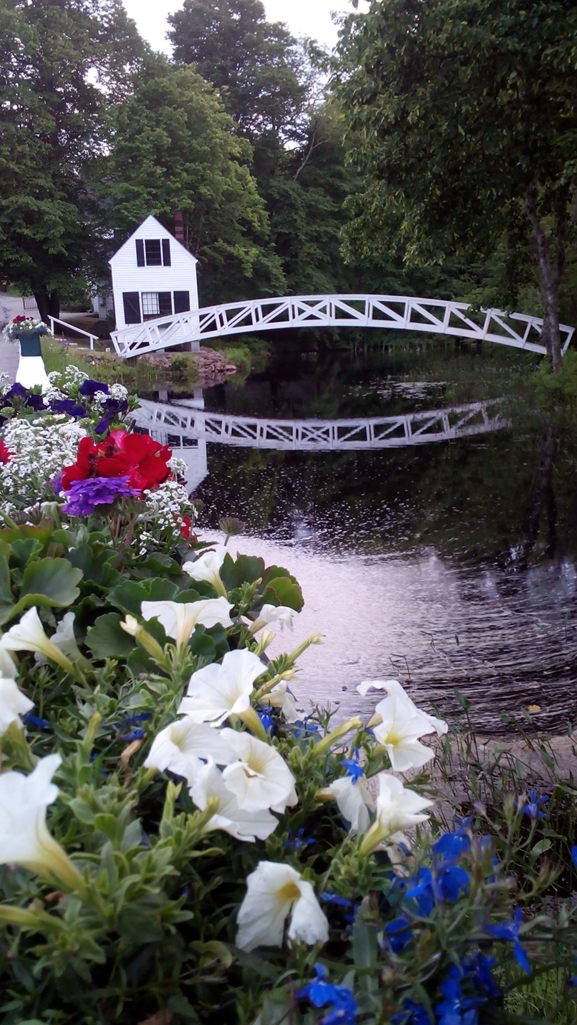
Edit: My good friend and expert Cindi told me that this painting is of a bridge in Southwest Harbor, just “up the road a piece” from Somesville. Thanks Cindi! (and you CAN get there from here! LOL-Maine joke!)

Hi Friends! I have to thank reader Jamie Evens for requesting this tutorial and allowing me to use her beautiful photograph she took of the Somesville bridge for today’s very long watercolor tutorial. Today I will show you paint this lovely scene from my beautiful state of Maine!

DCF 1.0

Watch the video for a relaxed step by step tutorial. I had several viewers on YouTube who said they enjoyed the longer video because as beginners it helped them understand the process of completing a larger painting better. I hope you find it useful too!

Supplies for this tutorial:

  • Art Masking Fluid (also called liquid frisket)
  • Soap and a cheap brush
  • Watercolor paint, below are the colors I used, you can use these or similar colors:
    Cad Yellow light or Lemon yellow
    yellow ocher
    magenta or alizarin crimson or rose madder
    ultramarine blue
    sap green
    permanent green light
    burnt sienna
  • Brushes: 3/4″ flat wash, #10 round, #5 filbert, #12 flat You can go up or down a size and be fine though:)

Here is the photograph by Jamie that I have posted with her permission. Thanks again Jamie!

Somesville Bridge photo by Jamie Evens copyright 2014 used with permission. Click on the photo to see a larger image suitable for printing.

If you have any questions feel free to leave a comment and I’ll try to help you out. Please use the hints and techniques I shared with you in the video to paint your next watercolor. Nothing is more difficult to paint than anything else, just break it down into small steps and go for it and most importantly have fun! Thanks for stopping by and til next time happy crafting!


Use watercolors instead of ink pads! It’s fun!

Hi friends! If you are a beginner stampers the expense of buying inkpads in all different colors can be quite intimidating and expensive! Well, today I am going to show you how to stamp with watercolor paint to make this card:

DCF 1.0

I will also share frugal tips on making cards in batches like this:

DCF 1.0

To make three cards you will need:

  • 3 sheets of 8.5″x11″ white cardstock
  • 1 sheet of 12″x12″ patterned scrapbook paper
  • 3 A2 envelopes
  • Stamps (this is the Chicks set from Local King Rubber Stamps)
  • Watercolor paints
  • An embossing folder and label die cut and machine or cutting tool of your choice.

Watch the video to see how it’s done:

I used my new KOI watercolors but you can use any brand, even your children’s! If the paint does not want to stick you can rub the stamps with an eraser or if you are using clear stamps a viewer told me that you can ink the stamp first in clear embossing ink and then the paint will stick. I have not tried it but it will probably work! Thanks for stopping by and til next time happy crafting!

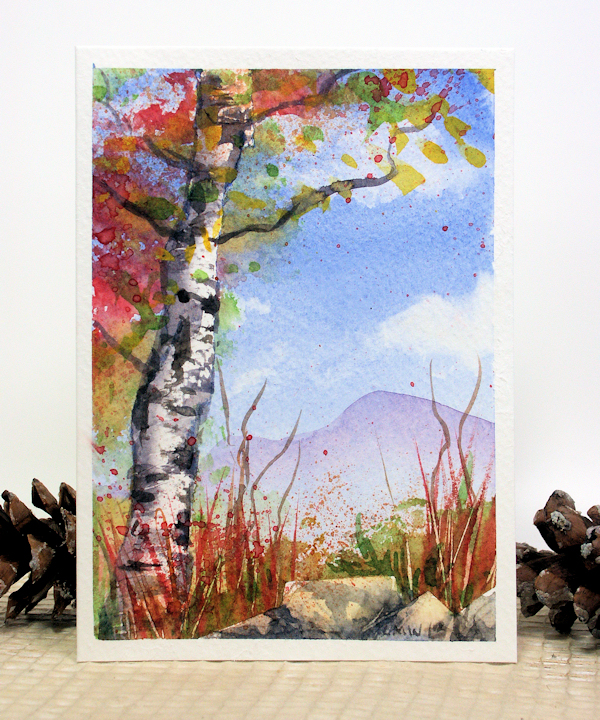
Let’s Paint Blue Skies and Birch Trees Today!

Hello Friends! I have to say that this has been one of the most beautiful Autumns I can remember, crisp blue skies, colorful foliage and warmer than usual temperatures. Our family trip to the White Mountains in New Hampshire last weekend inspired this hand painted card.

DCF 1.0

I used watercolor paint, a 140# Strathmore watercolor card, painter’s tape and 1″ and 1/2″ flat brushes and a #6 round but you can use any soft brushes you have that are similar in size. Don’t forget my favorite tools: an old cut up credit card and sponge too! Watch the step by step video to see how easy it is!

I hope you give this painting a try and if you have any questions or suggestions you can leave a comment:) Thanks for stopping by and til next time happy crafting!
Stamping with Watercolor Paint {use what you’ve got!}

Howdy friends! Today I have a quick, fun technique project for you that will have you making cards in minutes. Feel free to substitute supplies I used for ones you have on hand. You can use ANY watercolor paint for this. I use Gel Sticks on the card base but if you don’t have them try watercolor crayons, oil pastels or even kid’s crayons. It’s not about having the most resources at your disposal, it’s about being the most resourceful! Here is the video!

Here are a couple close ups of the quick cards from the video.

DCF 1.0 DCF 1.0

You can do this! You don’t need hours to create something worthwhile. Use those little snippets of time and make something wonderful! Thanks for stopping by and til next time happy crafting!

Buy new or make do? {I think you know the answer!}

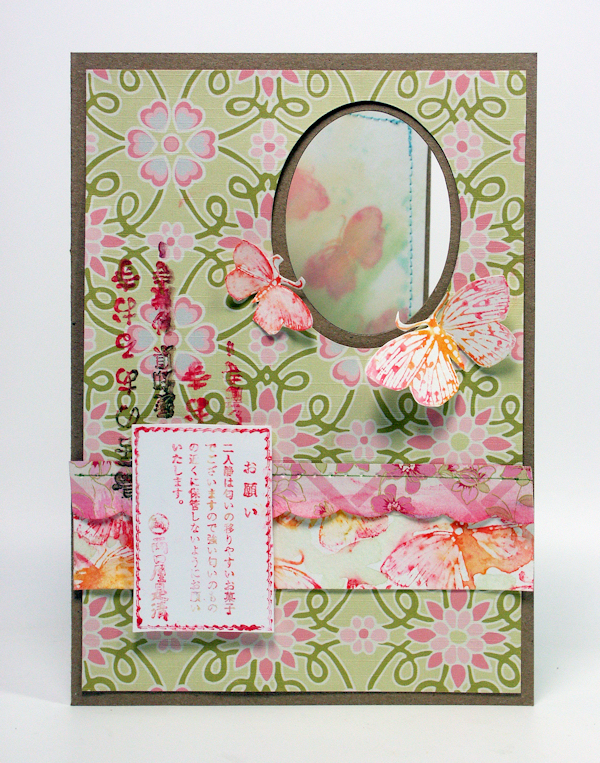
I have been drooling over the new Tim Holtz Distress markers since I saw a video of him demonstrating them at CHA. I really WANT them but I don’t NEED them with all of the supplies in my craft room. So I was brainstorming a way to try some of the techniques that he does with the markers with something else. I have other brands of water-based markers and while they are great for coloring the rubber and stamping with they don’t blend like watercolors (or the new TH markers) but then I remembered my well loved watercolor crayons! I love the result! BTW if you do not have watercolor crayons you can use watercolor paint and a brush to do the same thing!

If you want to learn how I made this card and stamped with the watercolor crayons check out this video. You might want to click on the fullscreen button to see more detail. Please note, I moved my water bucket out of the way but I still dipped my crayon on the water each time I colored with it. I just didn’t think it was fun looking at my nasty water bucket for the entire video 🙂

I used the sketch at Oriental stamp Art to make my card. BTW, if you want to join a wonderfully supportive stamping group and you happen to like Asian art you should check out the Oriental Stamp Art Yahoo Group. I love the window, it is a fun touch, I love how it reveals a surprise on the inside. I stamped and blended with my watercolor crayons and then stitched a layer of vellum over the inside panel, filled it with glitter and stitched the rest up. I used double stick tape to adhere the panel to the inside of my card so the stitches wouldn’t show.

I hope you enjoyed the video and you will see what you can do with the supplies you already have:)

BUT, if you are itching to spend some money you can check out the 50% off sale I have in my shop now through Saturday (nice segue huh?) Thanks for stopping by and til next time happy crafting!