Let’s Draw then Color with Cheap Markers {that look expensive!}

Howdy folks! You know how it is, you browse the galleries and shops online coveting the lovely new stamps that have been colored in with the most expensive of markers. Then you came to your senses and decided to visit my blog because you know I’ll show you how to do it cheaper and what’s more you will have a one-of-a-kind creation that others will try to copy. Today we will draw a cyclamen flower (you CAN do this, it’s easy!) then I am going to show you how to color it beautifully with ANY alcohol markers and to prove my point I am using Sharpies. You will need a colorless blending marker that is alcohol based, any brand is fine but it must be alcohol based if you are using alcohol markers. If you don’t have one it will be hard to get the colors really light. Most large craft stores have the Prismacolor brand markers and they work great, pick up a clear one (retail $4.50) with your coupon and you will be all set. Ready? Here we go!

You can do this technique with watercolor markers and a waterbased blender pen too but you don’t want to keep going over the paper or you will damage it. If you are using waterbased markers blend it once and leave it. So, do you feel like you can draw this flower? I did it upside down so I KNOW you can do it right side up:) Just think of everything you could draw and ll the money you could save on stamps…OK…I seem to remember something about a pot calling a kettle something or other…well, we don’t need to give up our stamps but it is a nice option don’t you think? BTW another great thing about alcohol markers is that you can color over ink-jet printed images and they won’t bleed, there are millions of free coloring pages online or digital stamps you can buy (in my shop for instance, shameless plug) so you can skip the drawing and get to the fun of coloring.  😀  Either way, you do not have to spend a lot to get the look you want. Thanks for stopping by and til next time happy crafting!
Who wants to win some stamps? {and a Copic coloring video tutorial}

***Breaking news! Since we have had so many comments just hours after posting the giveaway Annette and Barry, the owners of About Art Accents/Art Neko, are letting me pick 2 winners! Leave a comment people! Good luck & Merry Christmas!***

Oh my goodness, I have so many Christmas projects yet to blog, what’s a girls to do? Hey, I know, I’ll give away some stamps!

DCF 1.0

Since I was a slacker very busy crafter this month I forgot to giveaway some Christmas stamps from About Art Accents so the totally awesome, completely understanding owner said “go ahead Lindsay, post the giveaway and we will give away a surprise bundle of goodies” since my readers will need Christmas stamps in a week like a hole in the head. I like surprises and if you have a look at the About Art Accents website I’m sure you will love whatever the prize is. Just leave a comment and you are entered to win, it’s as easy as that! I’ll pick a winner next weekend!

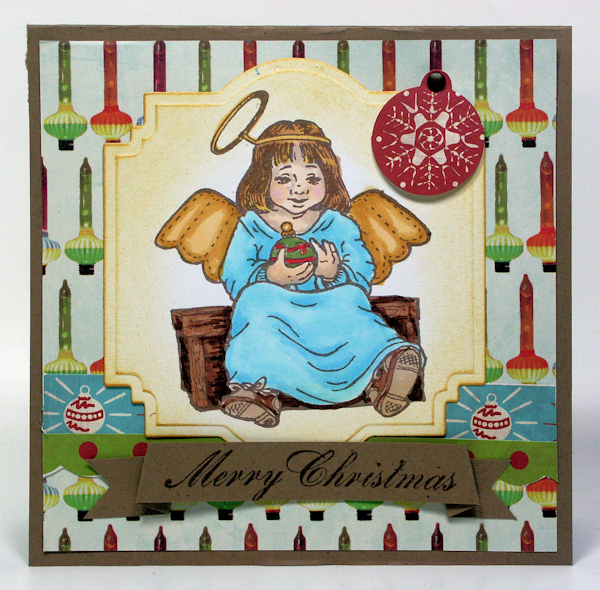
I had a request for a Copic coloring tutorial and as you know I mix and match supplies so here you have an alcohol marker tutorial using Copics, Promarkers and Prismacolors. Look, they all play nice together, so you can try a marker or two from different brands and see what you like best and you won’t have wasted and money because they can be used together. The angel stamp I used can be found here and it is on sale for $4.90 (regular price $7). The papers I used to make the final card can be found at Oriental Trading Company.

Sometimes I forget how much I love coloring with markers. A tip is to stamp out a bunch of images and keep them in a bag with your markers (clear cosmetic bags are great for this) and you can take them with you to color in front of the TV, on trips, or wherever you might be. It is an easily portable project and the more you color the better you get!  That’s it for me tonight, leave a comment for a chance to win some wonderful non Christmas stamps from About Art Accents and til next time happy crafting!

Pressed Flower Fairy Cards!

Happy Monday folks! It is a quiet day here as my kids are enjoying one of their last days of summer vacation. there is a lot of lounging going on! I took advantage of this downtime by printing my summer photos and playing a bit in my craft room. I made this card with the flowers I pressed in the microwave last week:

DCF 1.0

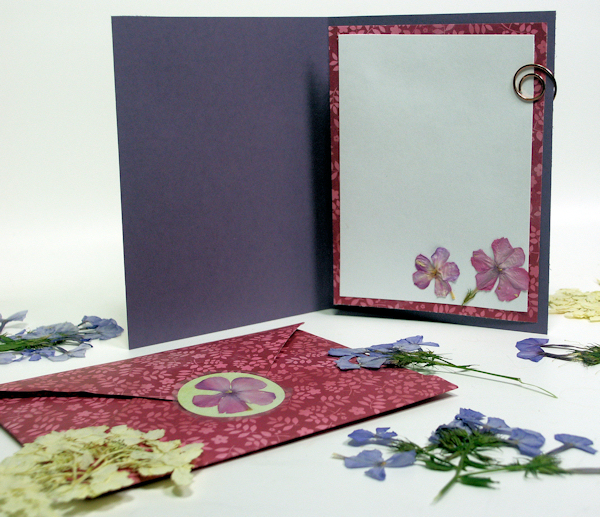
I’m afraid if I put the flowers away I will forget about them so I plan on using them up! They were so quick to press that I can make another batch when I get more flowers.  I made the envelope with my Kreate-a-lope and i used the leftover paper and a panel of white to make an insert because the purple cardstock i used is kinda dark to write on. Also I clipped it inside because that way the card can be reused!

DCF 1.0

I made an envelope seal to match my project, it was really easy! Take a 3″ long piece of clear packing tape and gently pick up a pressed flower with it, then press a punched circle of paper behind that, trim around the circle leaving a 1/8″ border of tape (so it will be sticky on the edges) and stick it on your envelope to seal it shut! You can make a bunch of these in advance and store them on waxed paper if you like! Another idea is to lay your flowers on your scanner and scan them and print them on sticker paper or labels and you will have custom envelope seals without having to use up your flowers!

DCF 1.0

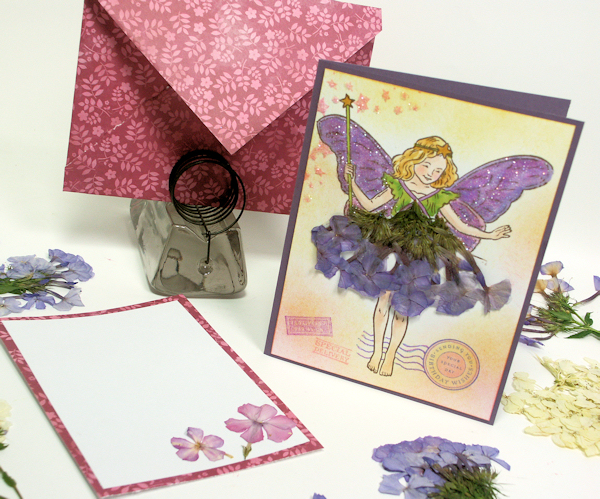
Here are the steps I used to make the card. I might do a video on this, if anyone is interested let me know. First I inked up my fairy stamp, except for the skirt, and stamped. The fairy stamp is the Christmas Fairy from Crafters Companion. Then I recommend you color the fairy (I actually stuck the flowers on first but it will be easier if you color first!), i used Promarkers and Copics. Then ink the background if you like. Add drops of clear glue all over the back of your flower, little drops, and press it on your card. Add clear glue where you want glitter and then sprinkle on transparent glitter. I stamped stars around the wand because I stuck my inky finger on there and have to hide the boo-boo but I like it!

DCF 1.0

You can use glitter glue if you prefer, I am stickle-impaired so I used dry glitter.

DCF 1.0

Well, that’s it! I think I will try and motivate my crew now and hit the grocery store. Fun Fun! At least I was good and cleaned before I played in my craft room (the rest of the house that is, the craft area is a hot mess!) so I’ll be able to come home to a clean house! 🙂 Thanks for stopping by and til next time happy crafting!
WOYWW: A Winner & A Sewing Nook!

Howdy folks and happy Wednesday. Over the weekend I promised that If I didn’t clean up my craft studio that I was going to post photos on What’s on Your Workdesk Wednesday (I also invite company over when my house is trashed because that lights a fire under me to clean it up!) but luckily it did not come to that, in fact I tore the room apart to make room for a sewing area:

DCF 1.0

Isn’t that cute! My sister gave me the sewing table, she found it at an antiques shop, it was the iron base of an old treadle machine with a thick board on top. I have wanted it in my craft-room since I received it a year ago but I just could not figure out how to fit it in without getting rid of anything else of course 😉 But I documented the process (so technically you DO get to see the messy room LOL) in 3 steps and I am thrilled with how it came out. Here is my 4 minute renovation video:

And yes, I made the poncho! OK so I know a lot of you are tuning in to see who won the stamp set from About Art Accents, well… drum-roll please…..

Sharon Hannifin

Congratulations! I will email you for your contact details so check your spam folder if you have not received an email from me yet;) Thanks to all who played along.  After making that first card last week I decided to make a dozen and use one of my favorite About Art Accents stamp sets: Flowered ATC Trading Cards, it is great for those who like to color with alcohol ink markers because the detail is amazing, and it is on sale for $16.99 (regular $29) each stamp is 2.25″x3.25″, that’s a lot of rubber!

DCF 1.0

I plan to sell them at the spring fair I am vending at next month. I thought they would be great for Mother’s Day but I did not want to limit my customer base so in each card package I include a Happy Birthday  Thanks and Happy Mother’s Day sentiment and 2 foam squares for sticking them on. That way there are 3 occasions the cards can be used for. I am selling them for $3.

DCF 1.0

I think they look nice and tidy in their clear envelopes!

DCF 1.0

Well that’s all for today. I hope I inspired you to cram more junk…er, I mean look for alternative storage space in your craft space! If you want to check out more crafty desks visit Julia’s blog and til next time happy crafting!

DCF 1.0

AAA Giveaway & A Question for You!

EDIT: This giveaway is closed, check back every month for a new About Art Accents Giveaway!

Well, I spoke too soon. I officially have a cold. I am stuffy and cranky and even the dog wants no part of my company which is just as well. I am holed up in my craft room with a cup of tea, Netflix on my Kindle and my markers (neener-neener). OK that is all the self-pity I can muster, on with the show!  Lookie what I colored. It was fun AND I get to give away this stamp by About Art Accents! All you have to do is leave me a comment and I will draw a name next Monday.

I am a curios sort though,  so,  I have a question for you (since you are commenting anyway): What tutorials would YOU like to see on my blog? Be specific or be general. What crafty stuff do you want to learn more about. Let me know and I may do a tutorial on it. That’s it, no strings, just leave a comment and good luck! You will also get the smaller matching stamp as well. The stamp is deeply etched red rubber. I just used a bit of double-sided tape to attach it to my rock-a-block and got a beautiful impression. I find that when I use a curved stamp mount I rarely need cushion on my stamps saving me storage space and money. I love that the stamps from About Art Accents are so deeply etched that I can still get all of the detail without the cling-cushion.

This is an easel card, it stands up like this for display but folds flat to mail in an ordinary envelope. I tried to keep the embellishments to a minimum so it would not be too thick to mail.  I colored the fairy with a combo of Promarkers, Copics and Spectrums, they all play nice together LOL! In fact, I’m thinking of just mixing all of my markers up in one rack or bin by color, marker intergration…a big marker party, Copics, Trias, Prismacolors, away with original packaging! Can’t we all just get along?

Well then, I’d better stop before I start considering resorting my paper by pattern instead of color…that’s just nonsense. Til next time happy crafting!

And don’t forget, leave a comment on this post to win stamps from About Art Accents! If you want to do some shopping there use the code Lindsay10% to save 10% on your order!

Fancy Coloring with Bics and Sharpies!

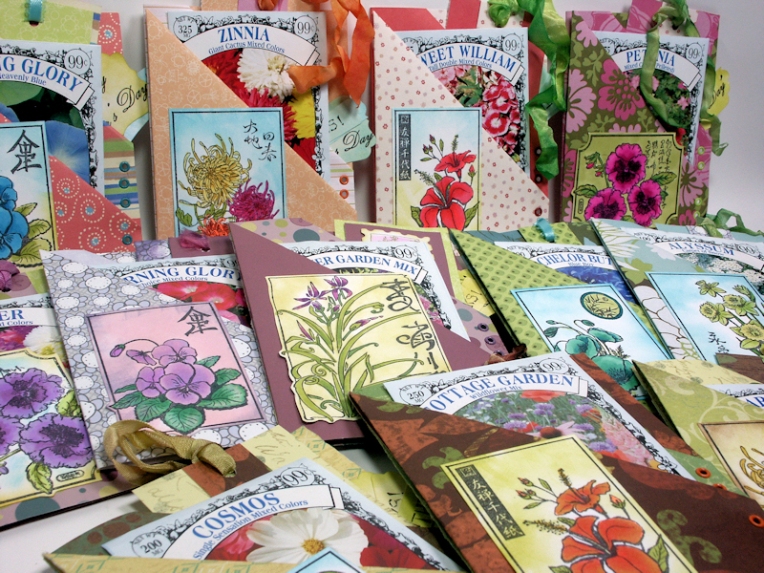
Are you frustrated by the price of art markers? Buying a set of Copics can send even the spendiest of crafters into sticker shock so today I am going to show you how you can blend with inexpensive Sharpie and Bic Markits. These markers are about $1 each (less in a multopack or if on sale!) so they are a great way to get your feet wet without breaking the bank. On these tags half were colored with Copic markers, and the rest with Bics and Sharpies, can you tell which is which? Don’t mind the watercolor poppy tag I demoed the other day (oops!)…how’d that get in there? BTW the stunningly gorgeous stamps I used are by About Art Accents-save 10% with coupon Lindsay10% AND the set is on sale too!!!


So what are you waiting for, check out this video and see just how to blend with the cheap markers!

The bottom line is that the ink in the expensive art markers and the cheap office supply store variety is basically the same, but the range of colors are limited so I recommend that you buy a multipack of Bic Mark Its or Sharpies and then splurge on a clear blending marker and maybe a few pale shades of markers so you can expand your color range. You can snag my printable cross-reference chart (Bic markers/Prismacolor/Copic) so you don’t buy doubles. Also I recommend you hand color these charts so you really see what the color will be. Here are the images I colored in the video, not bad for cheap markers eh?


Thanks for stopping by and til next time happy crafting!

You’ve Got a Friend in Me {WOYWW & 2 Video Tutorials!}

I had a pretty busy day yesterday but I managed to sneak down to my studio to play a bit:


I love anything Wizard of Oz themed! I’ve had this set from Crafty Secrets for quite a while, uninked, and I had to remedy that! I decided to do a video on the chevron resist background and also one on how I colored the image since I get asked for coloring videos a lot. Up first is the background video:

To be honest I scorched the sample in the video, there was smoke coming from my paper but it did not show up in the video LOL! The resist was fine but not as bold as the one on the rectangle card. It wouldn’t be one of my videos without some mishap! Now here is a video on how I colored the image, you will learn a gradient blend and how to get the look of metal.

Here is a close up of the coloring:


And here are my cards:


And since it is What’s on Your Workdesk Wednesday here is my messy post videos desk:


Well, that just about does it! Thanks for stopping by and til next time happy crafting!

A Tee-rific Father’s Day Card!

OK, I know I did not invent the Tee-rific dad pun but I thought it would be a fun idea to do with the kids at the library this month especially after buying a bag of 200 golf tees at Mardens for $3, talk about your cheap embellishments!


When I saw the golf tees I remembered that I had a golfing dog stamp form a Viva Las VegaStamps grab bag I bought last year and the card came together easily! The pattern paper was a freebie from Cardmaking and Papercraft magazine, you can download it free from their website, it prints great!


How to:

  1. cover a 5″x7″ card with pattern paper.
  2. Stamp and color golfer and adhere to card.
  3. Cut a scallop strip of paper and adhere where shown.
  4. Stamp and adhere sentiment with foam tape (I used tiny letter stamps to make my words, you could also use your computer/printer)
  5. Punch a 1.25″ circle from white and emboss with dots folder, smudge with ink and adhere.
  6. Adhere golf tee as shown.

Easy Peasy! Thanks for stopping by and til next time happy crafting!
DIY Pull-Strip for Cards & WOYWW!

I have been having the brainstorms this week! I loved the look of the cards the Papertrey Ink design team had made that had a pull away strip (think of the pull strips on cardboard ice-cream boxes you use to open them) and I really wanted to try that technique. The PTI girls used a die which I don’t have. I am picky about dies and almost only buy ones that are thick and can cut a variety of materials such as foam, burlap, mat board, metal etc, so I was not really interested in buying a die for such a novel purpose. The good news is that you can replicate this look many ways. Here is my attempt at it:

I am quite pleased with the results. In case you are wondering the seed packet and flower stamps are from Papertrey and the pointing finger is from one of those old Making Memories magnet mount stamp sets and the letters to spell “pull” are from a $1 wood peg mout Studio G set. Here is a close up of the pull tab:

There are so many ways to make the pull strip.

  • You can use a perferator wheel on your paper-cutter to cut two parallel lines and connect them on the pull end.
  • You can use a cutterbee perforating bug (this is the method I wanted to use but I could not find my perforating wheel!) and proceed as above.
  • You can use a Basic Grey Notch and Die tool to make 2 series of strait notch lines and connect then at the pull end with the tab notch.
  • You can use an x-acto knife and a metal edge ruler to cut two lines of slits and connect them at the pull end.
  • You can make a template in SCAL2 (or snag my free one here) so your electronic die cutter can cut it for you. For an explanation on how to make your own custom templates in scal2 please check out my screen shots:

The file I designed will cut 4 cardfronts for a 8.5″x11″ paper, if you are using a smaller cutter like a Cricut Personal just delete the bottom two designs and use a half sheet of paper. I am using SCAL2 and a Cricut Expression and the oval end perforations did not cut all the way through but I think it has more to do with my finicky Cricut than the cutting file 🙂

***FYI SCAL3 does NOT work with Cricut Machines****

Now Let’s put it together! You want to decorate the cardfront with the strip first. Then you need to stamp your sentiment on the card base. For placement I centered my cardfront on the card base and made little pencil marks on the edge at the top and bottom of the strip. Then I stamped my sentiments.  Put a strip of adhesive on both sides of the pull-strip, this will keep the card from tearing when the strip is removed.

Since it is What’s on Your Workdesk Wednesday I snapped a pic of mine:

I hope you try this technique it is so much fun! Thanks for stropping by and til next time happy crafting!