Hi friends! Today I have a simple project from our grandparents generation that will save you time, money and most importantly keep a bit of trash out of the landfill. Reusable food wraps! I think these would beexcellent craft fair and gift ideas too!
I have been unhappy with the amount of disposable packaging in my home recently. When my town stopped the recycling program I realized that I wanted to change my habits so less ended up in the trash. Plus I am too frugal to buy something I am just going to throw away! Here are some of the steps I have taken so far:
- Buying products in glass jars (then washing and saving the glass jars so I can use them as food storage)
- If I must buy in plastic I go for larger tubs (like the kids yogurt) which can be washed and used for craft storage or donated to the school’s art room. *My mom is the queen of reusing plastic containers, she saves meat trays for paint palettes and plastic containers to send leftovers home with friends. My brother-in-law gives her a hard time about it but I think it’s great!
- I purchased some silicone suction lids which work great for leftovers and you can reheat items with them on! They are easier than foil or plastic wrap because you just lay them over the bowl and they cling. I also got some silicone stretch lids which I don’t like as much as they kinda want to pop off unless the bowl has a lip on it. They worked pretty well on plates tho. If I have a rounded over full bowl of food these work better because than the suction lids where the bowl can’t be filled over the rim.
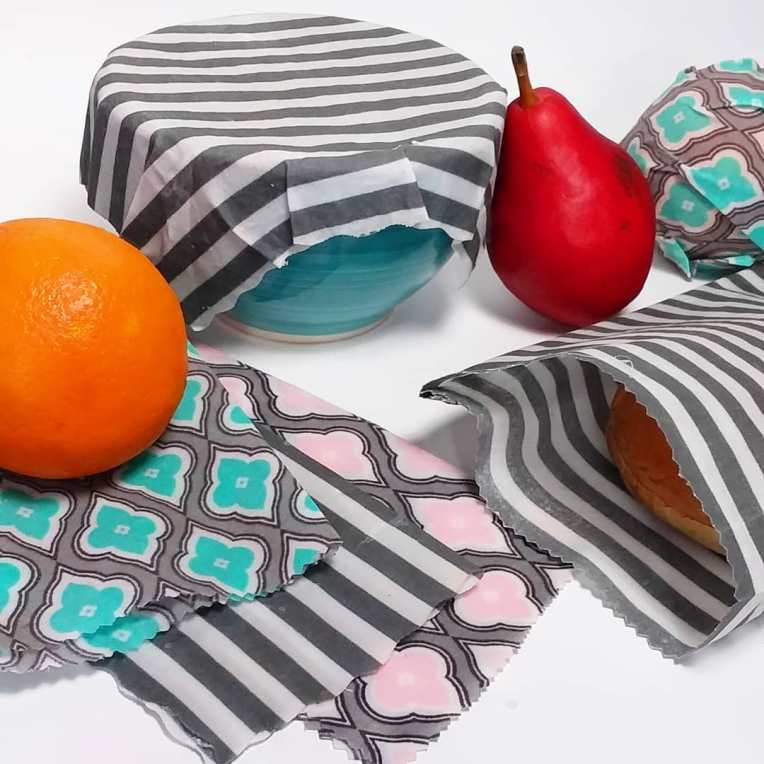
- And now I am trying waxed fabric wraps! I saw them on Amazon to buy but couldn’t justify the $18 price tag so today I’ll show you how to make them!
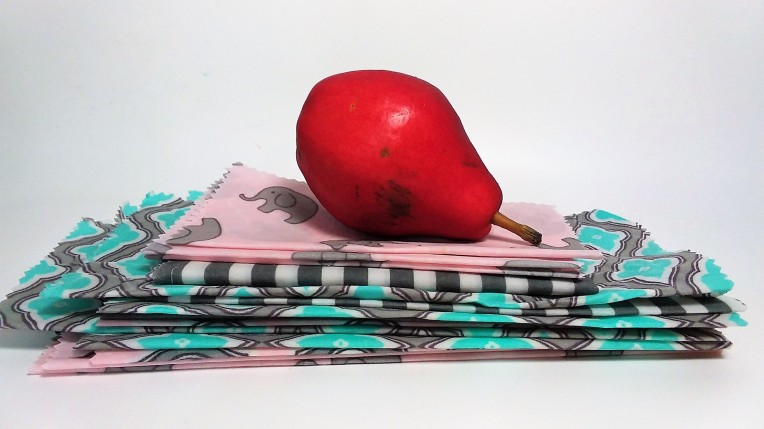
Look how little space they take up!
The video contains real-time instructions. Each set only takes a few minutes to make. The instructions are in real time so you can see how long it takes to melt the wax and how the fabric should look.
Supplies (affiliate links used)
- 100% cotton fabric (I used some fat quarters I had on hand but you can get it by the yard or recycle old clothing)
- Beeswax pellets (Leftovers can be used in homemade lip balm recipes!)
- Parchment paper
- Iron
- Pinking shears
*I placed a teflon mat on my craft table to protect it but you might want a cookie sheet under your parchment paper to contain any wax that might seep out especially if you are working on an ironing board. If you are working on a table I’d also place a folded towel under the cookie sheet so the heat won’t damage your table.
Directions:
1. Wash and dry your fabric, press if desired.
2. Cut fabric to desired sizes with pinking shears. A fat quarter cut in quarters will give you four 9″x11″ pieces minus a bit of offcut when you trim off the frayed edges after washing. You can make these in whatever size meets your needs (and fits your bowls and dishes!)
3. Place a piece of fabric on parchment paper. (see note about using a cookie sheet above) and sprinkle with wax pellets. Cover with another piece of fabric ideally the same size. Cover that with parchment paper and press with a hot iron to melt the wax.
4. Look at the fabric for any “dry spots” and add more wax if needed or reposition the fabric so it will sop up extra wax. Replace the parchment paper and repress.
5. Separate the fabric pieces and set aside on a piece of parchment paper to cool. Repeat for the remainder of your fabric using the same parchment papers.
Wait! Don’t toss that used parchment paper!
You can use it to protect your work table after your next messy craft project or use pieces of it to help start your next campfire. Or, since parchment paper is biodegradable and compostable you can mix it in with your compost as any leftover beeswax is compostable too.
Remember after about 150 washes your fabric wraps may be used up, when that happens cut them into smaller pieces and compost them! I really enjoyed making this project and using the wraps in my kitchen. I got a few more “thumbs down” on this video on YouTube than usual (I always get a few no matter what the video is about) and made me a bit confused but Oh well, you can’t please everyone. I wish people had to give a reason why they hit the dislike button, for instance:
- I don’t like this type of project.
- I don’t like Lindsay (I only subscribe so I can dislike a video as soon as it’s posted.) *Sadly, I think the few dislikes that appear on my videos seconds after they are posted are because of this because the video couldn’t even have been watched yet. LOL!
- I tried it and didn’t like it.
- I sell these and now people can just make them for cheap.
I hope you like this project but if you don’t you can let me know why or wait patently for tomorrow for something different:) Thanks for stopping by and til next time happy crafting!

I think we should all take note of this, what a wonderful way to save on packaging, we all need to do something, however small to help our poor planet….Thanks Lindsay, I always get your post but never comment until today, brilliant idea…x
LikeLike
I thought this was a great video! Going to try it with gulf wax since I have that on hand. Thanks!
LikeLike
That would work but if the wax feels too hard you can add a bit of mineral oil to soften it
LikeLiked by 1 person
Hey Lindsay. I don’t know why anyone would ever give you a “thumbs down” You always have great ideas and take so much of your time to bring these ideas to us in your great, well-explained tutorials. Anyway, I think this is just another great idea, although I only saw your instructions, but plan to go over to youtube now. Thank you so very much for sharing your projects and tutorials with us. God bless you always!!!
LikeLiked by 3 people
It is so funny that you made this video! In the past week I have been YouTube scouting for a recipe to make these and I thought of YOU! Great minds think alike.
I personally love the fact that you are environmentally counscious and are willing to show us how to be too.
Don’t let the “dislikers” get to you, you have a huge following and thousands of admirers! Thanks for all your tutorials you do for us.
Have a great day Lindsey,
Kat
LikeLiked by 3 people
This is great! Thanks so much!! Going to look for fabric right now! I think I even have some bees wax pellets!!👏👏👏
LikeLike
My daughter has me into reducing reusing recycling. Do these keep your food fresh? I feel like a lot of air would get in there.
LikeLike
I guess it would depend if you need something sealed up 100% or mostly covered. I’d probably go with one of my silicone lids for rice or pasta that I didn’t want to dry out but for wrapping a sliced orange or apple these are perfect. I would use this to cover a bowl of fruit or veggies with no problem. No more air will get in as copared to foil but it is not as air tight as plastic wrap.
LikeLike
We have been making these for some time now. We haven’t had one lose it’s wax yet but I hear you can rewax them without a problem.
LikeLike
I think this is a great idea.
LikeLike
I really like this idea. When you hand wash them, can you use soap? I would also love to hear your husband recipe to cure wooden cheese boards. I have one that was handmade from a relative and it’s getting dried out but couldn’t think of anyway to condition it while keeping it food safe. Thanks for these great videos.
LikeLike
Of course, this is so much better than foil or pastic wrap.I have done well with recycling paper and cardboard at our water treatment needed for the digester but no other recycling offered here. Since I make jams jellies soups, etc that go in jars that I may give away I recycle as many of the jars as possible. I had 2 months without garbage pickup and only produced two large black bags of stuff for the landfill.Thanks for all you do for us. Which video tells how to rejuvinate markers and Calligraphy pens that dried out. Arizona air sucks them dry!
LikeLike
another great video share. i think its wonderfull you bring lots of difrent ideas.and you care so much, we should all be alittle more aware of things like recyling.its a good thing all round not only for the enviroment but for the pocket too.
thank you again
LikeLike
I’m a regular reader and watcher Lindsay and while I would never give you a ‘thumbs down’ I often miss giving you a ‘thumbs up’ as well as the videos just roll on….. I shall improve 🙂 This is a much appreciated how-to and I am keen to give it a go especially as these wraps are so very expensive here. (NZ) So, hello and thank you! Pauline
LikeLike
I’m so glad to know these are so easy to make. Not sure if I will jump in and make them yet. I did feel the ones for sale were way too expensive. Thank you for always thinking of better ways to do things and your happy cheery attitude. 👍🏼👍🏼👍🏼
LikeLike
Ooh, I was trying to figure out what to do with some fat quarters I was given as a gift… I was thinking of making it into bag linings, but considering I’ve been making a lot of Bento lunches lately… This might be a way to make those cute wraps to protect the bento box… hm… need to see if my beekeeping friend has extra bees wax after making candles. because I’d rather use organically sourced if I can and would only cost me going over and helping to make candles which is ALWAYS a fun day.
LikeLike
Great information! I would also think Inktense or Neocolor I would work great also as they are permanent or any permanent marker for that matter :).
LikeLike
I think it is a great DIY idea except I don’t really get how they would be used. They don’t cling so would fall off a container. They aren’t air tight around an object or container. Don’t they “krinkle” and wax flakes off. And what about washing them…how to? Isn’t the old fashioned Gulf wax not supposed to be used around food? I have lots of questions but apparently many of you think this works well. What about in a hot climate….won’t the wax ‘melt’ on other items? And so on…..Is there a site that answers these questions and makes this a really usable idea?
Thanks
LikeLike
They don’t fall off they stay securely and they won’t melt in warm climates, they will just seal better, I wouldn’t keep them in a hot car but in a home in norma even warm climates that will be fine. Canning paraffin such as gulf wax is totally fine, in fact food grade paraffin is used in many foods such as chocolate and is used to seal fruit to retain moisture. Beeswax is even more natural.
LikeLike
Great idea, thanks!
LikeLike
great idea! to save money and the planet and create something cute of the kitchen -that’s a big thumbs up
LikeLike
How do you clean these?
LikeLike
warm (not hot) soapy water, then rinse and let dry.
LikeLike
I’ve never seen anything like this before, but what a great idea. I may have to give this a try. Thanks for sharing this idea and tutorial with us.
LikeLike