Spooktackular Stamps and Freebies!

Man, I love Thursdays! I get to see all of the awesome projects the Lindsay’s Stamp Stuff Design Team has created for the week and I get to do my favorite thing: Share some freebies! (And it really makes my day when someone Leaves a comment or buys something from my digital stamp store too!) I have been playing with my brand new stamp set called “Creepy Crows“, take a look:

Stamps, Envelope Templates: Lindsay's Stamp Stuff, Markers: Bic Mark its, Prismacolor, Chartpak

When DT member Tracey asked me to make a crow stamp for an ATC swap she was in I said “sure, I’ll make one to go in a Halloween I was working on…” one stamp turned into seven and I gave it a kit of its own, its called Creepy Crow and it was done with a dip pen and bottle of ink so it has a bit of an old gothic feel to it. This is my favorite stamp in the set, it is a journaling spot and it is big, it is available as a png and jpg as are all of the stamps in the set for ultimate versatility!

Stamp: Lindsay's Stamp stuff, PP: Karen Foster, DCWV, Ribbon: Wal-Mart

Here is the set:

Creept Crow digital stamp set: Lindsay's Stamp Stuff

And here are the freebies:

Download the ATC envelope templates and cutting files and this digital stamp below.

Download the October 31st Circle digital stamp here for JPG and here for PNG.

Download a printable template (pdf) here (print this on cardstock for a template then you should be able to get two envelopes from an 8 1/2″x11″ sheet of paper.

Download a cut file for use with a cricut, the George cartridge and Design Studio here.

Download an SVG file to use with your cricut if you have SCAL software. Check the keep proportions box and set the width to 7″. With SCAL you can make this envelope any size you like, have fun!

Now lets see what the rest of the Lindsay’s Stamp stuff DT has been up to:

Diana Stout

Katt

Leanne

Margie

Lisa

Tamara

Janet

Melissa Craig

Kim

Tracey

Row

Ellen Smith AKA “Tink” September Guest DT

Thanks for Stopping by and till next time happy crafting!

Note Cards with Envelopes Freebie!

Happy Tuesday Y’all! I spent a lovely morning out shopping and lunching with friends, it’s a beautiful warm fall day and I have some freebies to share. Does it get any better? Here is a set of thank you notes I made to send out to my daughters’ friends to thank them for their lovely birthday presents.

Stamps: Stampin Up, Templates: Lindsay Weirich (See downloads below)

You can make nine note cards form 3 sheets of 12×12 paper. Pick 3 colors that go well together so you can mix and match the layers, I used pastel shades of pink and mint and white. Below you can download the SVG files to cut with your cricut if you have scal software.

Download the Bracket shape SVG here. Use it in blackout mode at 3″ for the layer, weld two together at 3.5″ still in blackout mode for the note card.

Download the petal envelope SVG here. size it about 7″ wide to fit the note card.

Or if you want to mail it in a rectangle envelope use this Envelope SVG, you can shorten this envie to make it square as well, it’s up to you.

Here is a printable template for the rest of you;) I used the other envie temp because it uses less paper;)

Thanks for stopping by and till next time happy crafting!
Were off to see the wizard, and hop with Creative Cuts too!

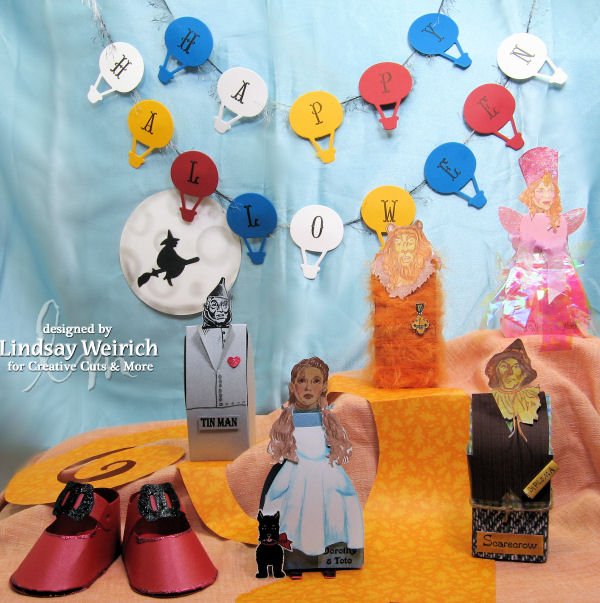
Yahoo, it is time for another blog hop with Creative Cuts and More! If you just hopped over from Steph Zerbe (what an awesome project!) you are in the right place! If you are starting here make sure you hop over to the Die Cut Diva blog (where you can get a coupon for 15% off!) so you don’t miss any of the fabulous prizes! This month’s giveaway is a Halloween castle album kit, be sure to sign up at the Die Cut Diva blog for your chance to win! This month out theme is Halloween and I wanted to do something a bit out of the box with Creative Cuts and More’s Dress and Tux boxes, there not just for weddings anymore!

Die Cuts: Creative Cuts and more, Stamps: (dog) Pink Persimmion, (Title) Inkadinkado, All others: The Stamping Ground
Die Cuts: Creative Cuts and more, Stamps: (dog) Pink persimmon, (Title) Inkadinkado, All others: The Stamping Ground

That is a lot to get into one photo  so here are the favor boxes closer up:

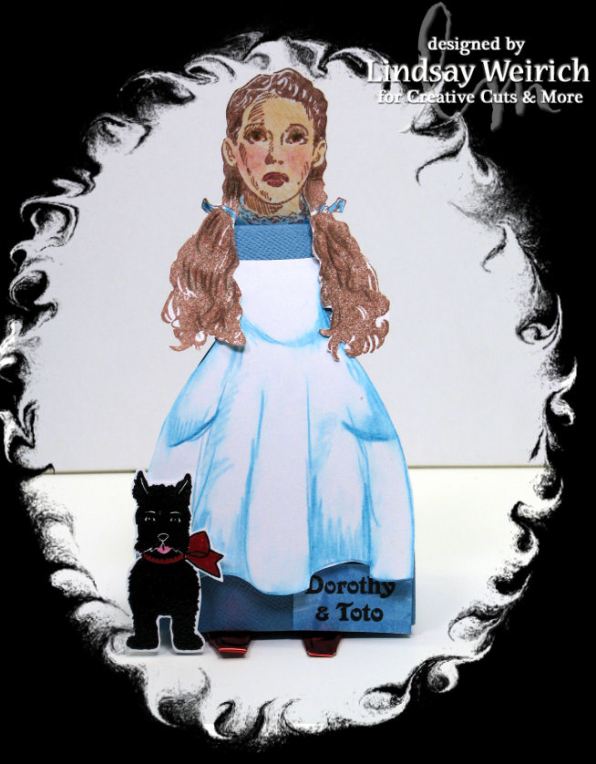
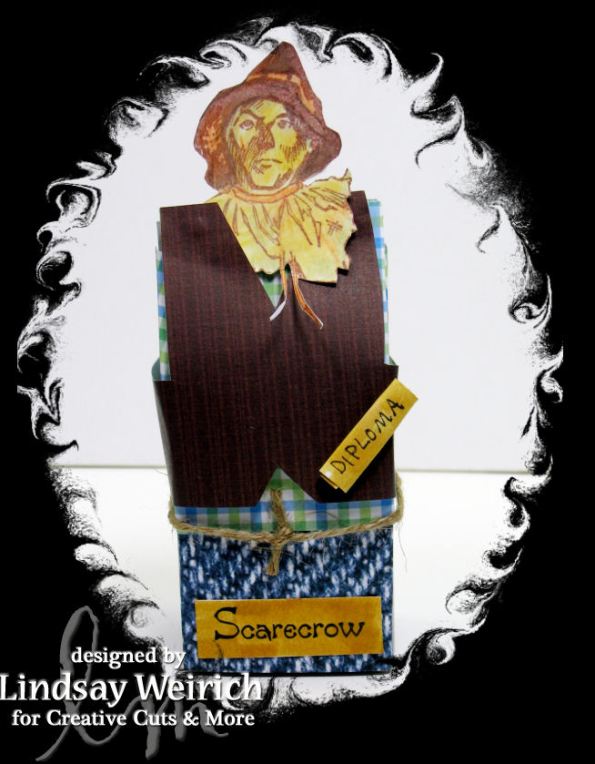
For Dorothy I used the dress box in blue and hand-drew an apron, cut out and added it with stamped elements.
I'll get you my pretty, and your little dog too! For Dorothy I used the dress box in blue and hand-drew an apron, cut out and added it with stamped elements.
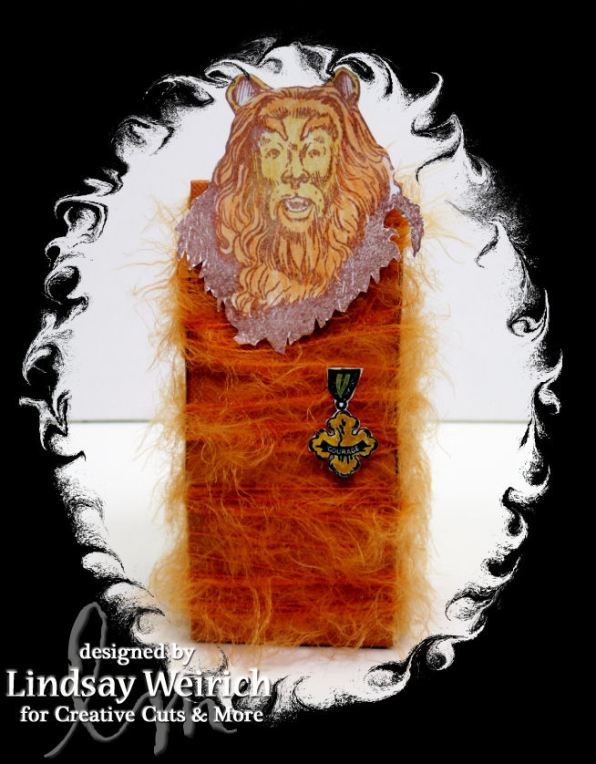
I used a rust colored tux box wrapped with fluffy yarn to make the cowardly loin.
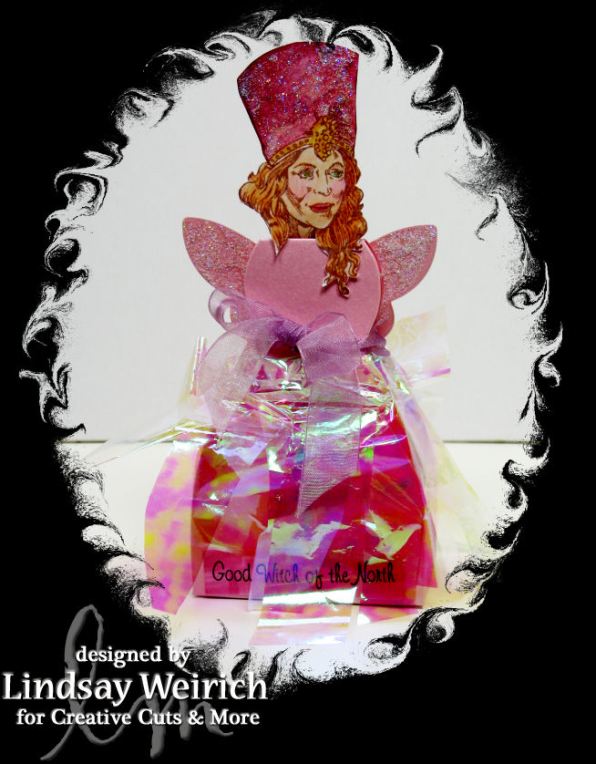
Are you a good witch, or a bad witch? Glenda is my favorite! I used the Angel diecut and trhe dress box cut from pearly pink cardstock to make her! Did you know the actress who playes Glenda was 51 when she played the part, I'll have whatever she's having!
Are you a good witch, or a bad witch? Glenda is my favorite! I used the Angel diecut and the dress box cut from pearly pink cardstock to make her! Did you know the actress who plays Glenda was 51 when she played the part, I'll have whatever she's having!
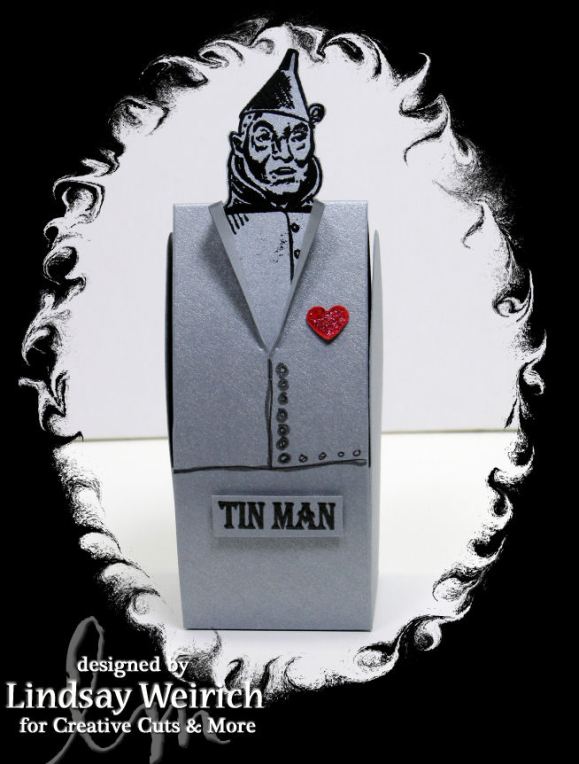
Oil Can! Here is the tux box again. Tip: when stamping on pearlessect cardstock besure to heat emboss it to prevent smearing!
Oil Can! Here is the tux box again. Tip: when stamping on pearlessent cardstock be sure to heat emboss it to prevent smearing!
If I only had a brain...Why does this sonk keep playing over and over again in my head?
If I only had a brain...Why does this song keep playing over and over again in my head?
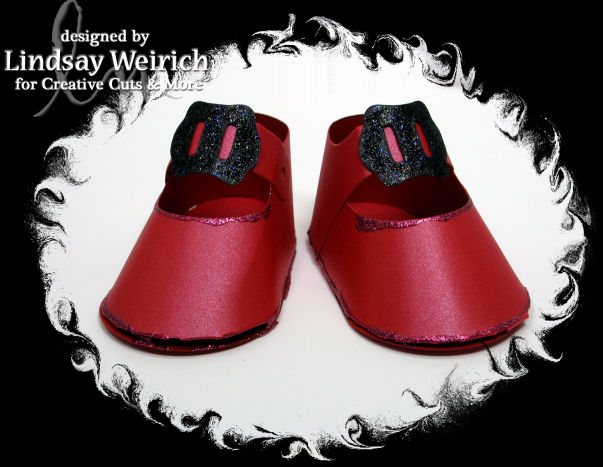
Don't forget the ruby slippers! These were cut from Metallic red cardstock, I stickled the buckles and glued them on.

Here are the Die Cuts I used:

Dress box

Tux Box

Witch

Buckle #01 set

Baby Shoe

Angel

Hot Air Balloon

I also used Stickles Glitter Glue on the shoes and Glenda boxes.

Now that you have seen my project check out Jen’s fabulous creations! Thanks for stopping by and till next time happy hopping and crafting too!

4 Shared has been Hacked!

***update*** The problem is fixed 4 shared was only out for a few hours, darn hackers!******

Just a quick note today, The website that I store all of my freebies on (4 shared) has been hacked and if you visit the site you will be redirected to another site called abcjardens.com, whatever that is. I Hope it gets fixed soon. I just want to let everyone know that my free templates and cutting files are unavailable at the monte (As are a lot of other peoples!)

Have a great Sunday folks and be sure to stop by tomorrow for the Creative Cuts & More blog hop, til then happy crafting!

Mmmmm, Cupcakes!

Happy Saturday folks! My kids have all signed up for soccer this year (holy cuteness batman!) and their first practice is today and the twins are having their fifth birthday party today! Boy it is going to be busy! I just had to sneak away for a minute and share the cute cupcake wrappers I just added to the Lindsay’s Stamp Stuff Shop:

Digital Stamps/Cupcake wrapper template:  Lindsay's stamp Stuff, Markers: Bic Mark its
Digital Stamps/Cupcake wrapper template: Lindsay's stamp Stuff, Markers: Bic Mark its

They are so easy (you could even let the kids color them) I simply printed the sheet on white cardstock (you get 3 wrappers plus scalloped decorations to a page) colored them with my Bic Mark its and added a bit of yellow chalk in the background of 2 of them. So simple! You get the happy birthday cupcake wrapper sheet and a blank sheet incase you just want to print the templates on pattern paper for faster wrappers both fo a $1!

Thanks for stopping by and til next time happy crafting!

2 sketches 4 you and a request

Howdy folks. I got a chance to play with this weeks sketch from 2 sketches 4 you and made this card with my new Coffee Talk stamp set from Lindsay’s Stamp Stuff.

Stamps: Lindsay's Stamp Stuff, Coffee word paper (freebie on yesterdays post), other PP: DCWV

Be sure to check out yesterdays post and grab this weeks digital stamp and card kit freebies!

I know stampers have some of the biggest hearts in the world, my friend Erin (a fabulous stamper) asked me if I would put up an announcement on my blog asking for cards for a girl in the hospital. Her name is Paige and she is one of Erin’s neighbors. Erin has set up some blog candy for everyone who sends a card, check out her blog post for details.

Thanks for stopping by and til next time happy crafting!

Coffee and freebies, what more could a girl want!

Hi folks, I have some exciting news for you, from here on out every digital stamp I design will be available as both a jpg and a png file! When you purchase my new Lindsay’s Stamp Stuff stamps you will get both. For more info on PNG files visit my tutorial page 😉 I have a free digital stamp for you today to coordinate with my new Coffee Talk set in both png and jpg formats for you to try out. Speaking of free Lindsay’s stamp Stuff is sponsoring Inspirational Card Sketches this week where you could win $10 in LSS stamps! here are some cards I made with my new set and the sketch:

stamps: Lindsay's Stamp Stuff, Coffee word paper (another freebie, dowload below!) other PP: DCWV
stamps: Lindsay's Stamp Stuff, Coffee word paper (another freebie, download below!) other PP: DCWV

But I couldnt Stop there!

Holy Freeebies batman! Both stamps and pattern paper are free from me today!
Holy freebies batman! Both stamps and pattern paper are free from me today!

The above card I made with today’s freebies. You can snag the Coffee jitters border stamp and the coffee word pattern paper from this blog post but to get the “Espresso my thanks” stamp you need to join either my Yahoo group or the Lindsay’s Stamp Stuff group at Card Universe (I swear it’s easy and we are a fun crowd to hang out with;)

stamps: Lindsay's Stamp Stuff, PP: DCWV
Stamps: Lindsay's Stamp Stuff, PP: DCWV
Stamps:Lindsay's Stamp stuff, PP: DCWV, Word paper freebie cut up and adhered.

Whew, I went to town making card with the new Coffee Talk set, it has 9 stamps in both png and jpg formats and a printable sheet of all the images for only $5!

Coffee Talk Digi-stamp set in PND and JPG format $5 at Lindsay's stamp stuff!

And now for the freebies:

Download the Coffee jitters border  PNG file here and the JPG file here.

Download the Printable “Coffee Words” card kit here.

Download the Card Kit for free, link above.

Don’t forget to grab the freebies because they are not in the kit 😉 Also don’t forget the check out the fabulous Lindsay’s Stamp Stuff Design Team!

Diana Stout She has joined the team full-time YAY!

Katt

Leanne

Margie

Lisa

Tamara

Janet

Olena

Melissa Craig

Kim

Tracey

Row

Ellen Smith AKA “Tink” September Guest DT

Thanks for stopping by and enjoy the freebies, till next time happy crafting!

Madame Butterfly (and a freebie!)

This week over ar Oriental Stamp art they challenged us to make a geisha themed card, as soon as I read the challenge I wanted to make this:

Stamps: About Art Accents, Cardstock: SU!, GP, Tissue paper: Dollar Tree, Watercolors: M Graham, Ink: Versafine

I spotted some pretty holographic tissue paper at the dollar tree and it reminded me that I bout some a year ago(and never used it, oh the shame!) and it could be perfect for iris folding. So I stamped the pretty geisha from About Art Accents with onyx black versa fine ink, heat set it and watercolored it with my M Graham watercolors. The Versafine ink is so cool, it gives great detail, it’s waterproof and your colors won’t run into each other because the oil in the ink resists the water so you get a clean professional look! After the paint dried I used an X-Acto knife to cut out the fan portion of the design. I cut 1″ squares of pink, green and clear holographic tissue paper (you get 3 20″x20″ sheets in a pack at the good old Dollar Tree) and folded them in half and taped then to the back, covering the hole, of the stamped image. I placed a scrap of white cardstock behind the iris folding because the tissue paper (which is actually a thin plastic mylar) is transparent and I wanted the colors to shine brightly. When you hold the card she appears to be fluttering her fan due to the light interference on the tissue paper, how cool is that!

The tissue papers are folded behind the fan cutout

I mounted the stamped panel on fuchsia a 1/2″ larger and used a butterfly corner punch on it, then I wrapped some metallic pink embroidery floss around the card.

For the base I used So Saffron cardstock and stamped the Painting is Poetry stamp and the small black butterfly using my mixed berry kalidacolor inkpad. To cut the base I used my Cricut and SCAL software. I welded a 5″x10″ rectangle from the basic shapes menu to the scalloped fan border I designed because I wanted it to look like an oriental fan.

Download my scalloped fan border svg file here.

I had such fun making this card! Thanks for stopping by and til next time Happy Crafting!