String Storage Solution! {video tutorial}

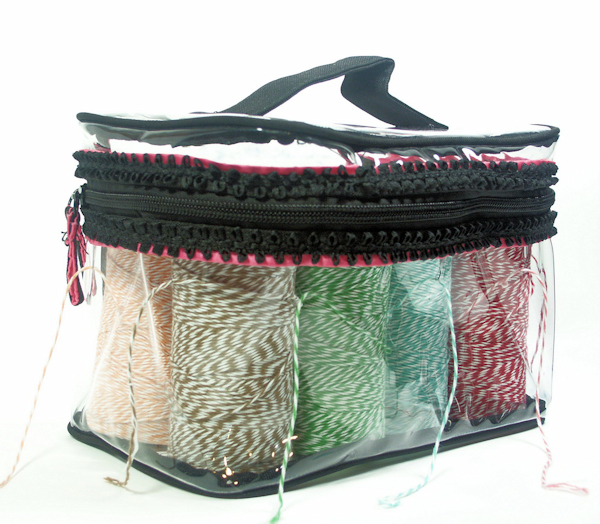
Happy Black Friday everyone! I did not go out into the madness but I cheered on all of my girlfriends who kept me updated on facebook…vicarious Black Friday shopping is probably more my pace anyway. I do intend to check out some Cyber-Monday deals if my kids ever tell me what they want for Christmas LOL! Today I have a storage tutorial for you. I have made a  storage bag for the luscious newbaker’s twine I got from Papermart but this would also be great to get all of your holiday wrapping ribbons and string in order too!

Here is the video:

You can use this method to store any ribbon, yarn, string or fibers. Just punch more holes as needed! Be sure to save the bags that bath sets (we always seem to get some of these as Christmas gifts don’t we?) curtains and blankets come is because the plastic is thick and the zippers are sturdy and best of all the bags are clear so you can see your ribbons and trims! Speaking of ribbon, string and trims be sure to check out the wonderful selection at Papermart. I have realized that if they sell it it will be the cheapest place to get it. Sometimes the quantities are large but you can always split it with your stamping friends, I do that a lot!

Thanks for stopping by and til next time happy crafting!
Let’s Make a Ribbon Shelf!

It’s easy and inexpensive too! I made this shelf {and the video} yesterday and it only took about 20 minutes and two of my favorite craft materials: Foamboard and hot glue:


You will need 3 dowels 3/8″x48″, a 40″x32″ sheet of foamcore {foamboard}, a hot glue gun and glue sticks, a saw for cutting the dowels, a yardstick, x-acto knife and pencil and white acrylic paint.

Watch the video to see how it’s done:

I kept the dowels a bit longer than my box because I wanted to hang my ribbon scraps from them. I wind up short lengths of ribbon on little paper bobbins and put them on a large binder ring sorted by color. I can hang the rings off the end of the dowels for more storage! You can download a bobbin template (printable & SVG) for free here.

Now my ribbon will stay organized and dust free and I have some room to grow my stash if I wish (or I can just make another ribbon holder!)  Here is the cutting diagram from the video if you want to print it out:

This project qualifies for the following challenges: DDH Challenges, Happileigh Scrappin, Make it Monday, Woodware USA, Cheerful Stamp Pad , Emerald Faeries, I Did It Creations, Crafty Catz, Inspire Me Fridays, Peachy Keen Stamps Let’s Face it Fridays, Tellen’s Place, Paper Romance, Shelly’s Images, Crafting for all Seasons, Creative Belli, Penny’s Paper-Crafty, Truly Scrumptious and http://toptiptuesday.blogspot.com/ 

 Thanks for stopping by and til next time happy crafting!