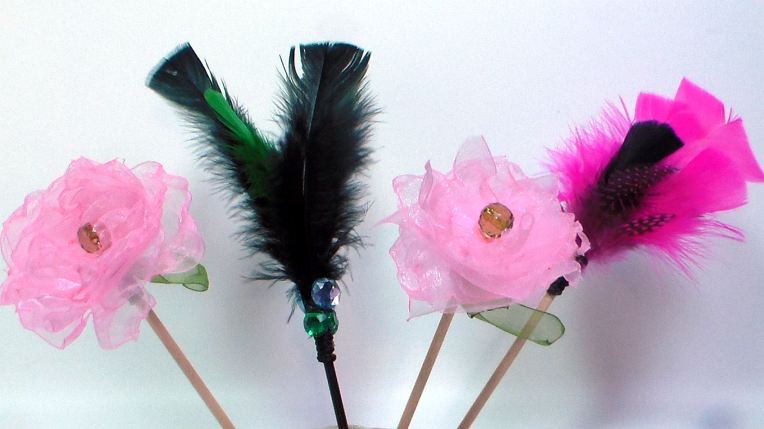
DIY Hairsticks! Easy to make and fun to wear!

Hi friends! Today I will share a fun hair accessory that is inexpensive to make using supplies from Papermart!

SAM_1410

Watch this video to see how to make and use them:

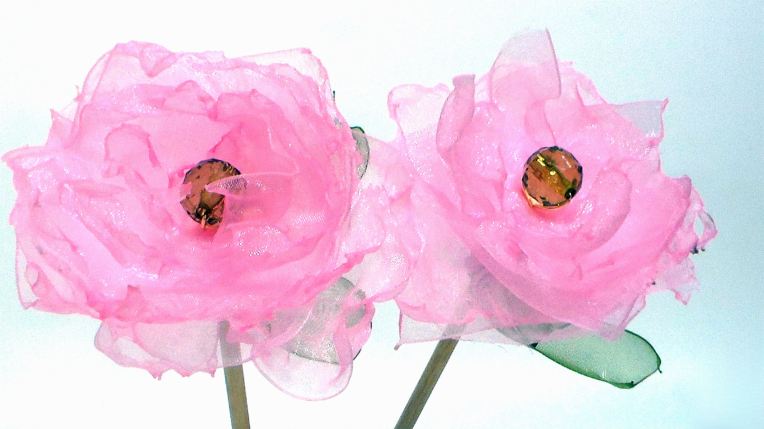
Supplies for the Organza Ribbon Flower Hairsticks:

  • 2 3/4 organza ribbon in pink and 7/8″ wide in green
  • scissors
  • wire
  • cute bead or button
  • wire cutter and needle nose pliers
  • skinny dowel
  • pencil sharpener
  • fine sandpaper, waved paper, awl and a small saw or cutting tool
  • hot glue

Directions:

  1. Prepare the hairsticks by cutting a small dowel into 6″ long sections. Sharpen one end with a pencil sharpener and sand smooth, buff with waxed paper.
  2. Wrap 2 3/4″ wide organza ribbon around your hand 4 times and cut. Cut through the folds on each side of the ribbon so you have 8 squares of organza. Stack them up randomly so they do not line up and make a hole in the center with an awl or needle. Cut a 4″ piece of wire and slide a bead or button in the center and pull the wire to the back and securing with a small twist. Push the wire ends through the hole in the ribbon. Holding the flower by the wire make a few snips in the organza and gently heat the flower over a candle. Make sure you move the flower so all of the layers get curled.
  3. Wrap the wire ends around the blunt end of the hairstick and the add a bit of glue and wrap a foot of 7/8″ wide green organza ribbon over the wire, tie the ends in a double knot to secure.

feathersticks

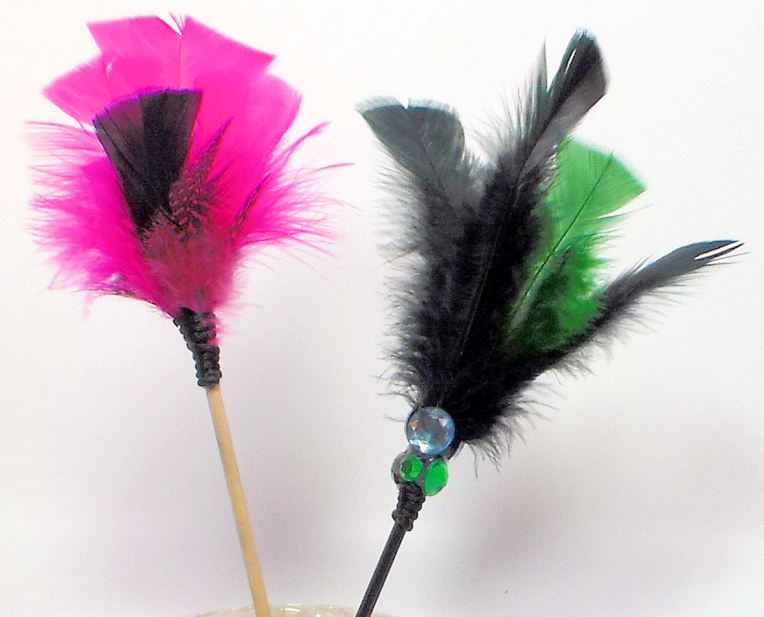
Directions for the Feather Hairsticks:

  1. Prepare the hairsticks by cutting a small dowel into 6″ long sections. Sharpen one end with a pencil sharpener and sand smooth, buff with waxed paper.
  2. Select feathers for hairsticks. I used a combination of turkey and guinea feathers from Papermart. Hot glue the ends of the feathers an inch from the blunt end of the dowel.
  3. Place a thin bead of hot glue along the area where the feathers are glued to the stick then tightly wrap rat-tail cord around the base of the feathers until they reach the bare dowel. This gives the hairsticks a neat appearance and keeps the feathers secure.
  4. Embellish with beads and rhinestones as desired.

SAM_1408

I hope you enjoyed these projects and til next time happy crafting!
School Vacation is Almost Here! {Got Crafts?}

Christmas vacation starts tomorrow! Are you ready? Today I am going to share a project that will keep the girls entertained this vacation. A couple of weeks ago the folks at Sunshine Shoppe Supply asked me if I’d like to try some of their products.  They have a wide assortment of hair bow supplies and cute jewelry kits for babies, kids and adults. I knew my girls would love making some headbands for their friends this Christmas so I grabbed  a DIY Shabby Chic Headband Kit and a small sampler of Diamond Mesh sheets.

DCF 1.0

I no sooner had the supplies laid out and my girls dove in!

DCF 1.0

I chose the peacock collection but they have several other colorways to choose from and they are all on sale right now for $8.99. The kit makes 6 headbands!

DCF 1.0

My girls are pros at crafting so they used a hot glue gun but if your kids are not as graceful with glue I recommend a thick quick setting cold glue such as Helmar 450 or Aleens Thick and Tacky glue. You might want to let them dry on waxed paper in case the glue seeps through though.

DCF 1.0

I think my girls did a great job, the only downside was that we ran out of supplies too soon, the girls wanted to make more!

DCF 1.0 DCF 1.0

One other note, we cut the diamond mesh easily with scissors to add a bit of bling to the bands, the mesh was not in the kit but it was very affordable, the 6″ pack is on sale for $8.95 and a little goes a long way! The girls also added some handmade clay buttons from my stash to their creations.

DCF 1.0

With the long school vacation coming up I’m sure your little girl would love a headband or jewelry kit from Sunshine Shoppe Supply! It would also be a fun project to make for a birthday party or playdate.

DCF 1.0

I want to thank Sunshine Shoppe Supply for sponsoring us today and I do hope you check out what they have to offer. In addition to crafting kits they have bulk wholesale supplies perfect for folks who like to sell their hair bows. There are some beautiful, unique stuff worth a look! Thanks for stopping by and til next time happy crafting!

DCF 1.0

Video Tutorial: Ric-Rac Roses!

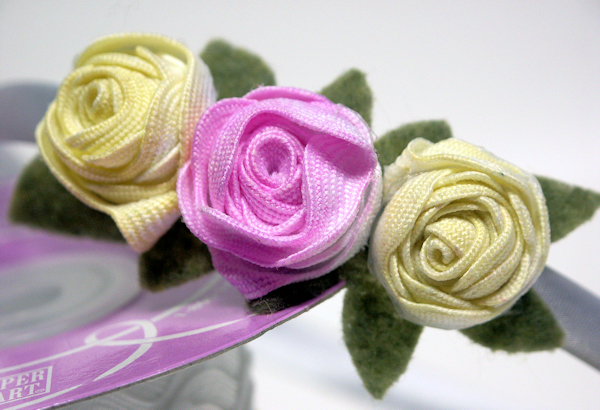
Howdy friends! Do you have spools of ric-rac in your craft room waiting to be used on the perfect project? Well here is that project! After you get the hang of making these you will want to buy ric-rac in bulk so you can make a bunch! I used the large ric-rac trim from Papermart.

DCF 1.0

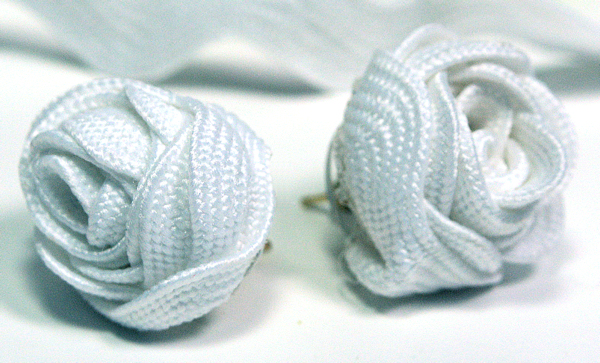
I get it in white so I can dye it whatever color I want. The headbands, hair clips and earrings are great craft fair items. I love that the earrings can be glued to post back or clip-on earrings making them a prefect little girl gift!

DCF 1.0

Ready to make these? Check out the video to see how. Don’t worry if the ric-rack unwinds on you the first couple of times, you will get the hang of it.

I hope you enjoyed this quick craft! Please check out our sponsor, Papermart,  for the materials I used in my video and other great products too! If you have any questions leave a comment and I will get back to you. Thanks for stopping by and til next time happy crafting!

DCF 1.0