2″ headpins (I used 13 for my design but you can use more or fewer)
2 jump rings for attaching clasp (more-one for each headpin you use- if you want to use them to attach your headpins for more movement in your necklace.)
A variety of small beads such as seed beads, E beads, bugle beads and any small leftovers in colors you like.
Tools:
2 pairs of round nose pliers (I recommend a 3-in-1 plier because it has a wire cutter)
Wire cutter if your pliers’ doesn’t have one on it.
Nylon jaw plier for straightening bent headpins (or put a piece of thick cloth in your pliers to use for straightening your headpins)
Directions:
Add clasp to 20″ piece of chain. You can cut your chain to length with wire cutters.
Bead your longest headpin. Make a right angle bend after the last bead and trim the leftover wire to 1/4″. Use the round nose pliers to curl that into a loop for hanging. This is your center fringe dangle. Continue making the dangles that will go to the side by repeating the pattern but subtracting a bead for each subsequent dangle so you end up with a tapered length row of headpins. *see photo below.
Attach the headpins to the chain by opening the loop on the headpin and hooking in to the bottom edge of the chain.
Tips: start with the middle (longest) headpin at the midpoint of your chain and work out from there. Make sure to attach all the headpin to the same (bottom) edge of the chain or the necklace will want to twist. Use jump-rings to attach the headpins to the chain if it is easier for you or if you want more movement in your necklace. Feel free to use all the same beads for a simpler look.
This is how the headpins will look when you have them all beaded before attaching it to the chain.
I hope you like this project and til next time happy crafting.
Hi friends! Today we are going to make some fun boho style jewelry!
This casual style of this kind of jewelry makes it perfect for everyday wear, and you can be as funky or understated as you like. Best of all you can swap out cords, chain, beads or clasps to your liking. Watch the video and see how fun and easy it is to make boho style jewelry!
This video features products from our sponsor Antelope Beads. Use coupon code boho20 to get 20% off your order or click this special discount link. Offer expires 8/5/2019
A handy supply list for all projects can be found here.
You don’t have to have a lot of time, supplies or money to get started making boho style jewelry. You can always start with the supplies you have and add a few items to your stash and go from there. If you do want to pick up some new supplies, please check out Antelope Beads. You can save 20% on your order with coupon code boho20 now through August 8th, 2019. I hope you enjoyed these fun projects and til next time, happy crafting!
Hi friends! I have been having so much fun with jewelry making lately! And I have a lot of project ideas to share today! This blog post is sponsored by Solid OAK Inc. They have gorgeous jewelry making supplies and great prices, and they are giving my blog readers 20% off their orders of $10 or more with coupon code FRUGAL20 through 8/31/18. They also offer free USA shipping over $50 (after discounts) or a USA $5 flat rate shipping below that amount. They do ship worldwide and international shipping rates apply. First up is a project that has gotten a lot of attention from my Instagram followers today: A watercolor locket and travel journal!
When you open the locket you have paints and a small mixing area and the back of the watch charm is another mixing area.
I used white duct tape for the mixing area (my hand cutting skills are remedial LOL!) but you could also use white nail polish for that!
Think of all of the fun to be had here! I though with this project it would be easier to show you how to make it in a video rather than writing, so check out this tutorial on making the watercolor palette and watercolor book!
White duck tape or white nail polish for making the mixing areas
As for the 4 colors I picked to go in my minimal palette, I went with Phthalo Blue, Hansa Yellow Light, Quin Magenta and Burnt Sienna as I can mix what I need from those.
This next project was fun and I learned a new way to make a bracelet!
I have typically shied away from stringing projects with small beads because my eyes would get so strained, but I recently discovered the magnifier in my “third hand” tool was perfect for helping me see the tiny bead holes. All of the instructions for this bracelet came in the box with all of the supplies for $10… you can’t beat that! Since I didn’t design it I am not sharing a tutorial. Besides, I couldn’t explain it as well as the instructions in the kit.
A clip board held my project taut so I could easily wrap the strings and beads around the main cords. This triple wrap bracelet kit contains everything you need to make this bracelet along with really detailed instructions (that I am saving to use with some of my stash!) The only other thing I needed was nail polish to stiffen the ends of the thread so I could bead without a needle. It took me about 3 hours to make this bracelet while watching TV. I am going to use bigger beads and maybe only do one wrap when I try it again with stuff from my stash. One change I made was adding this charm to the end of the bracelet, and I did trim my cords because I have a small wrist and there was too much excess (and I am keeping this bracelet for myself!)
Slide chain through antlers and secure the charm in the center of the necklace with a jump ring.
Attach clasp to chain ends.
Slide the beads you want to use on headpins and make simple loops. Attach them to short pieces of chain from 1/4″ to 1/2″ long and then attach those dangles to the chain between the antlers so the beads dangle under the dear head.
I hope you give these projects a try, and visit our sponsor Solid Oak Inc for your jewelry supply needs! Remember to use the coupon code FRUGAL20 for 20% off your order over $10 now through 8/31/18. Oh, one more thing, I also wanted to let you know that they are hosting a social sharing contest through the end of the year, people can post their projects made with Solid Oak products on social media for a chance to win one of three $50 gift certificates! All the details for the contest are here.
Hi friends! Creativity is a funny thing, the more you use it the more you have! If you don’t create often it can be hard to think of things to make when you sit down to craft. I am like that with jewelry if I haven’t made any in a while but I had the urge to play with beads the other day so I decided to get inspired from a kit! The necklace and earrings below can from the “Jaded” Annie’s Simply Beads Kit-of-the-Month Club. Everything I needed was right in the kit so I grabbed my 4-in-1 pliers (they send you those pliers, a bead mat and beading guide booklet for free when you subscribe to their kit club) and I sat on my porch on a beautiful summer day and beaded this! By the way this video is sponsored by Annie’s Simply Beads Kit-of-the-Month club! Click the link to get first kit for $9.99 (that’s 50% off) and the three free gifts I mentioned above! Use coupon code “FRUGAL”.
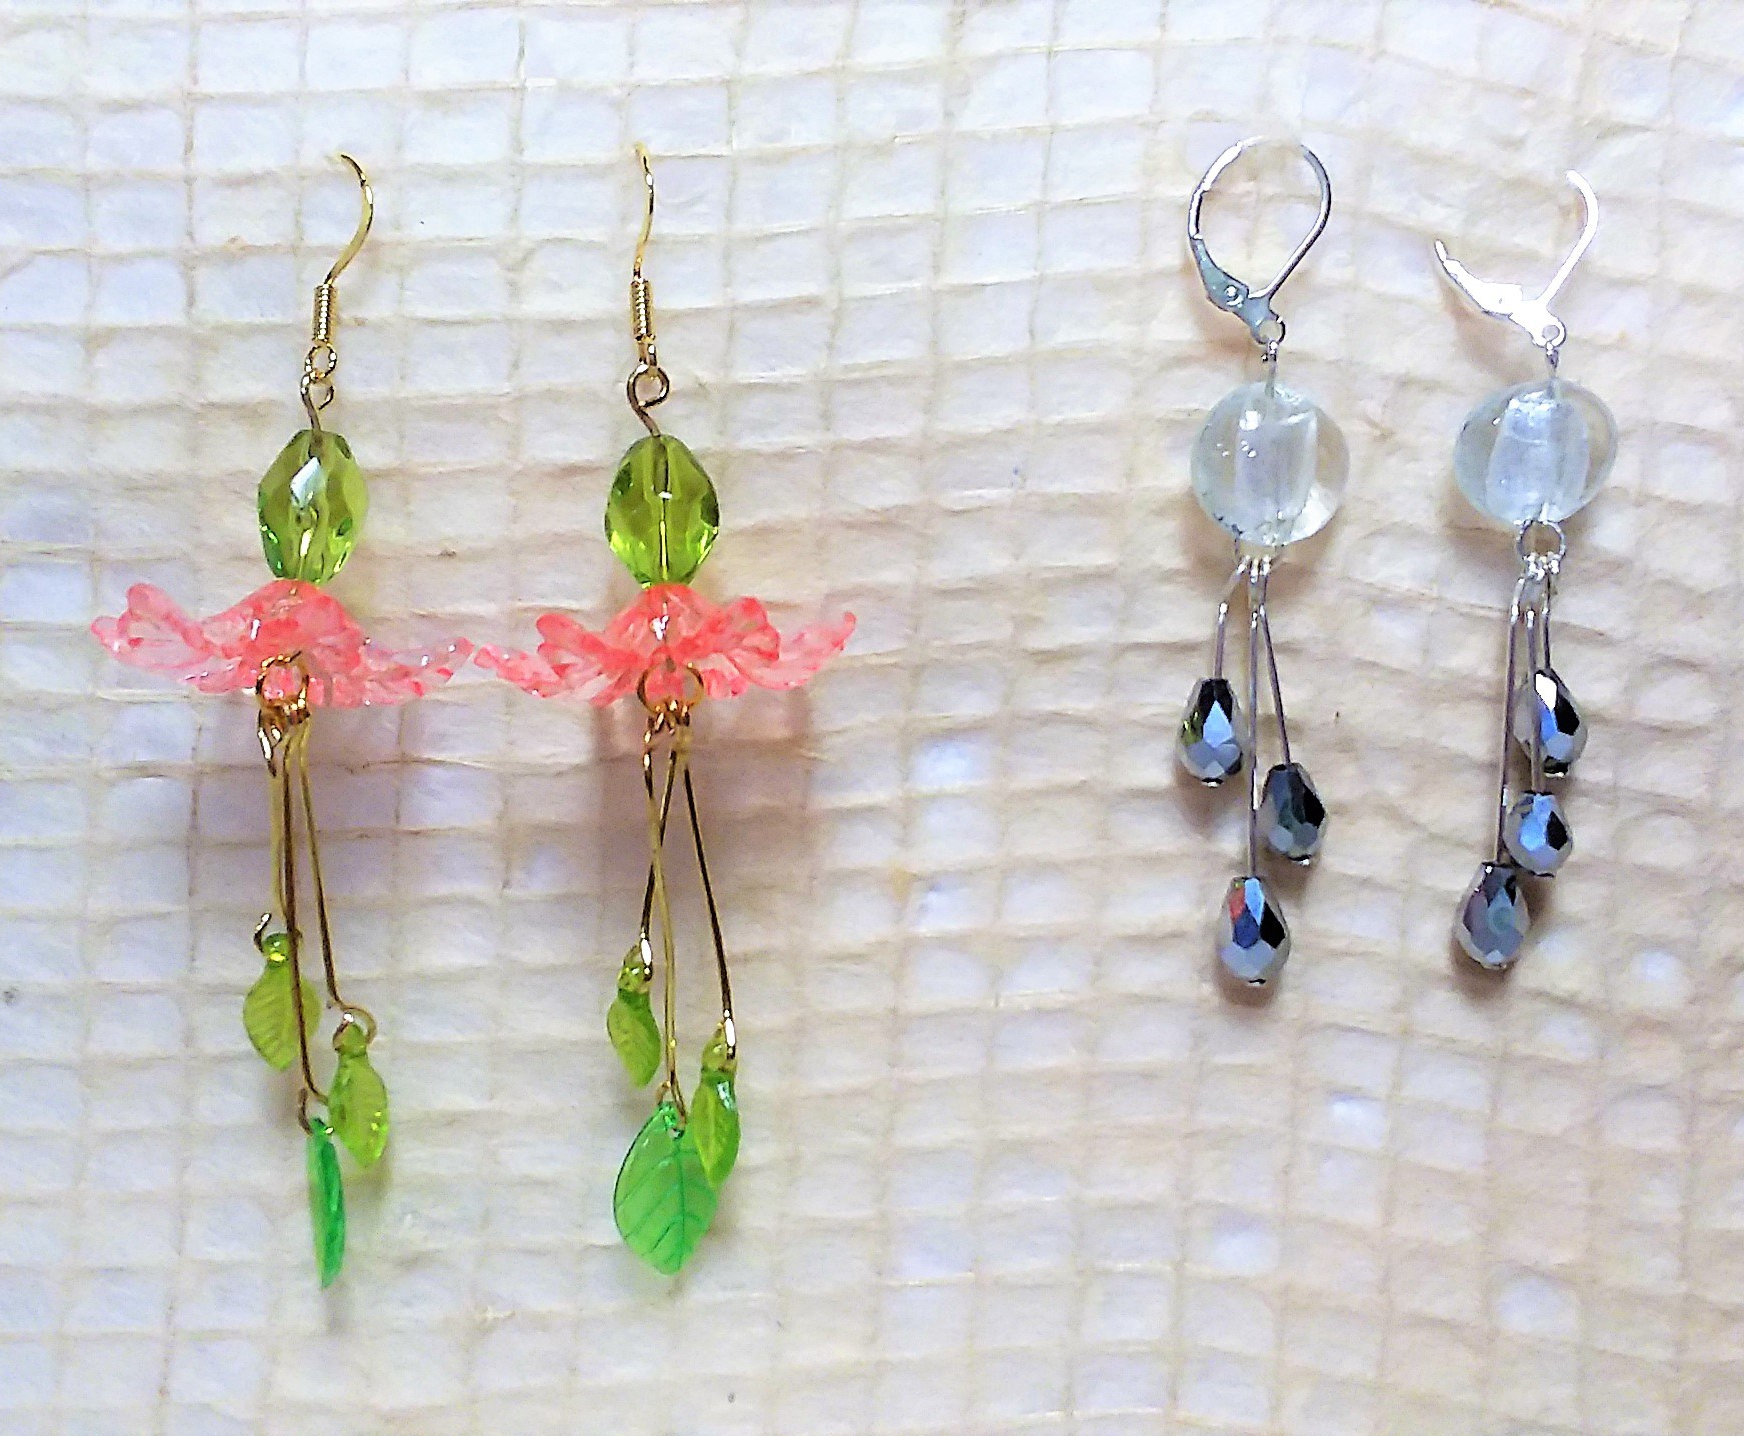
After making this project I decided to dig through my bead stash and come up with something similar using the basic layout of the pattern in the kit and I made this:
I like sparkly, chunky, glass beads in crazy colors so I went with those! I kept my earrings rainbow themed but didn’t put the on the chain because I thought my chunky chain would be too heavy. I also had a kit with 5 pairs of earrings that were great for quick fun projects and gifts and I also decided to use them as a jumping off point to create more earrings with my stash. Watch the video and then grab your beads to see what you can make!
If you would like a beading kit delivered to your door every month consider the Annie’s Simply Beads Kit-of-the-Month Club. You will receive all of the supplies to make beautiful projects each month for $19.99 plus shipping and handling. If you don’t like a kit you can send it back within 21 days and owe nothing. Sign up today and get 3 free gifts: 4-in-1 beading pliers, a velour beading mat and a beading guide as well as half off your first kit! Just remember to save all of those patterns that come with your kit to use with other supplies in the future, it’s the best way to get the most value of your Annie’s Simply Beads Kit-of-the-Month Club subscription. I hope you try some of the projects I shared with your bead stash and if you need any help with basic beading techniques you can refer to my basic beading techniques video here. Thanks for stopping by and til next time happy crafting!
Hi friends! I decided to do a craft fair in my town for old home week. If you are local it will be this Saturday from 9am-4pm at the public library, I’d love to see you! With that in mind I was thinking about cute things I could batch up to sell in addition to my watercolors and cards. I came up with these using some supplies I got recently.
I love how I can use up that really precious paper I have been hoarding. I think this would be a fun birthday party craft as well as people of all ages and skill level can make them. In today’s video I’ll show you how to make these sweet charms and also hand dye the ribbons for a fun vintage flair!
Sponsored by Lava® Soap. Visit their website to learn more and find a store near you. For money-saving coupons click here. Follow Lava Soap on Facebook for more tips on how to clean up after craft projects.
Directions:
1. Collage pressed flowers on to scrapbook paper (if desired) and glue tile over image, let dry.
2. Soak ribbon in hot water with table salt mixed in (about a tablespoon to 4 cups) squeeze out the excess water and apply a few drops of ink and work it into your ribbon. After the ribbon dries you should rinse it out to remove excess dye and let it dry again. It will end up much lighter so keep them in mind as you are adding color.
3. Trim excess paper from tiles.
4. apply a coat of clear glue to the back of the tile (on the paper) and glue on the bail and let dry.
5. Cut ribbon to 30″ lengths and add to finished tines. Tie ribbon ends together to make a secure knot and trim ribbon. You can add a bit of glue or fray check to ribbon ends to prevent fraying if desired.
I hope you enjoyed this project and til next time happy crafting!
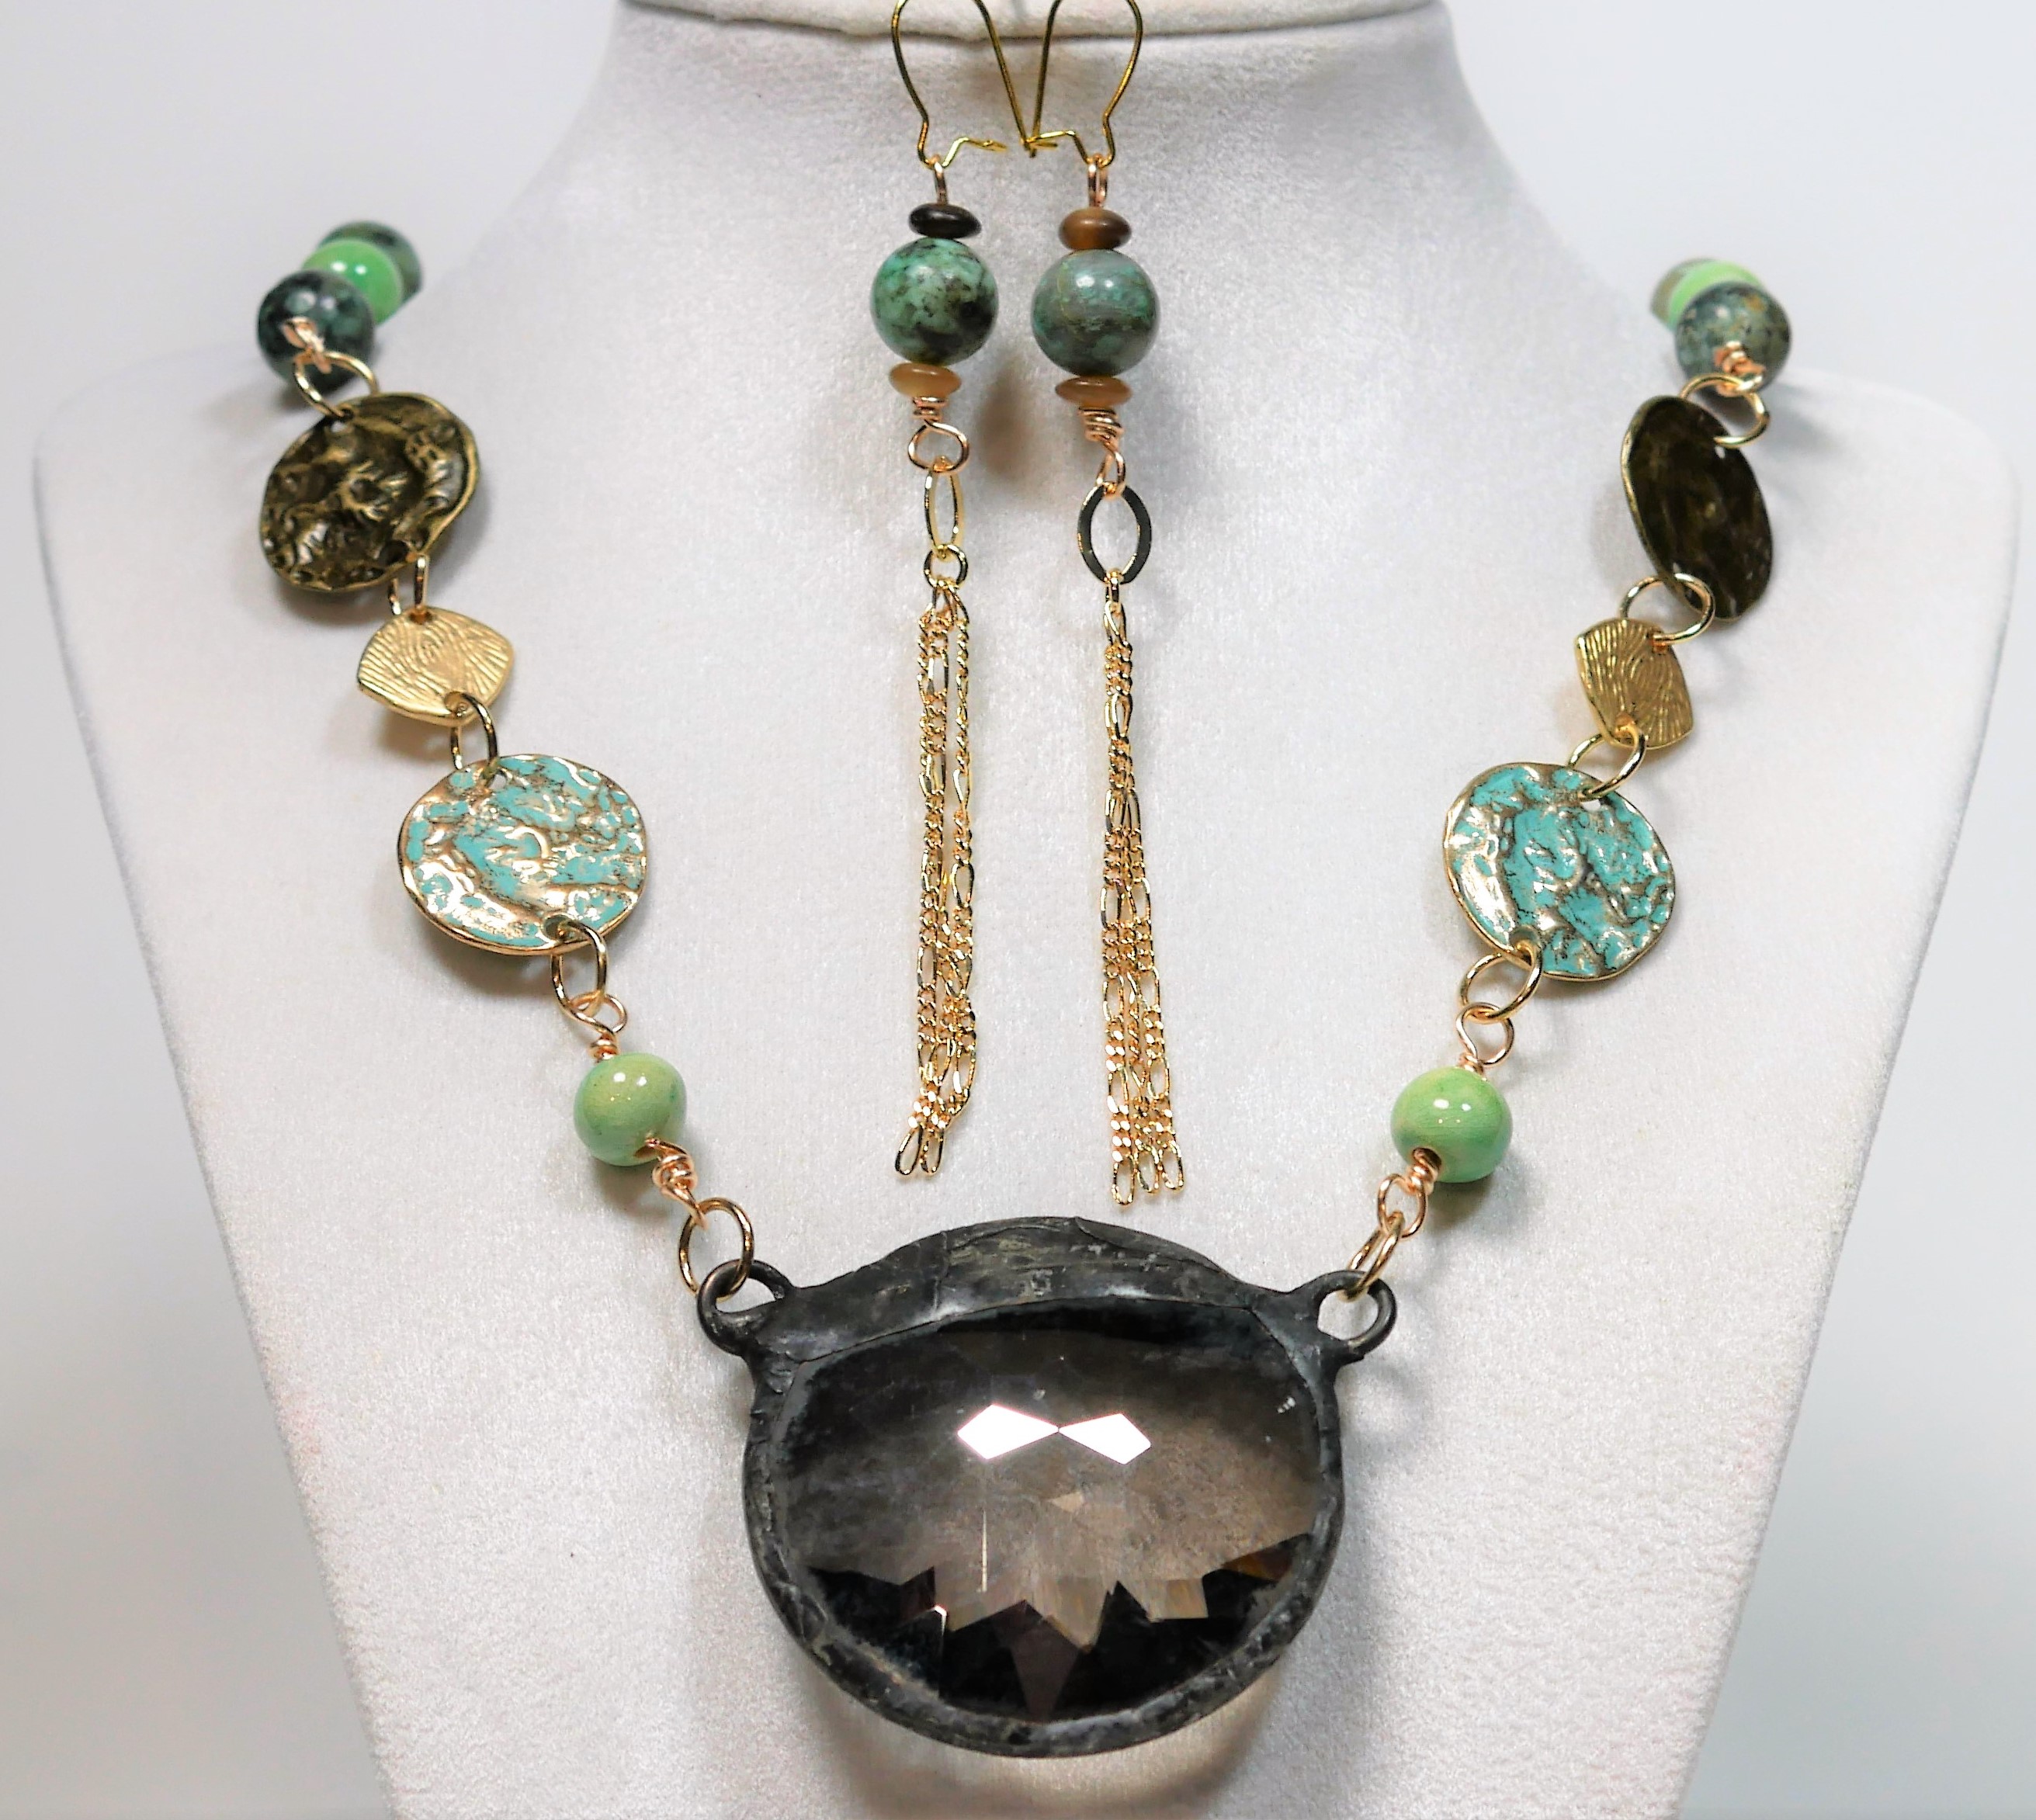
Hi friends! I have had the supplies to make this design in a basket on my table for months!
I love how the center pendant and 1 3/4″ length difference between strands gives this necklace a “Peter Pan” style collar look. It is sweet and bold yet casual enough for everyday. I used a mix of glass and acrylic beads to keep the necklace light and comfortable. All of the large faceted beads are acrylic and the rest are glass and stone.
This is the type of project that’s perfect for using up odds and ends from past projects. Since I store my beads by color it’s fun to rummage through my “bead soup” and pull beads that will work together. You can make this necklace using any kind of pendant you like and use colors that you prefer. It is the perfect excuse to dig out your beads and play! Watch the video for full step by step instructions and helpful tips!
Beading board (or a towel to lay out your project so the beads don’t roll away)
Directions:
1. Cut 2 pieces of 24″ beading wire. Add one wire through the pendant and string on a crimp tube bringing it close to the pendant and crimp to secure, repeat with the other wire.
2. Slide a large hole bead over both strands of one wire then separately string beads on each strand of wire. Make sure one strand is 1 3/4″ longer than the other. Your short strand should be around 16″-18″ if you want the peter pan collar look or longer if you prefer. Secure each strand with a crimp tube.
3. Repeat for the wire on the other side.
4. Add toggle clasp.
Other Tutorials you might like based on this technique (Slide show of linked projects below): Multi Strand Necklace (double strand connected at clasps), Triple strand necklace (Funky tutorial with DIY hot glue beads), Multi Strand Bracelet, Continuous Loop earrings (make with scraps of beading wire you cut away) and if you need more help with basic techniques you can check out my basic beading techniques video that has a time-stamped index so you can jump to the technique you need.
This slideshow requires JavaScript.
I hope you give this fun necklace project a try! I love saying “Oh, I made it!” when someone asks me about a piece of jewelry I am wearing beause that lets you inspire others to create! Let’s spread some craftiness and til next time happy crafting!
Hi friends! Today I have a fun tutorial that might help keep you inspired and motivated!
There is a big trend for women to choose a word to represent their goals for the year. Challenges like “one little word” have helped people live more intentionally and today’s project can help remind you of your significant word. When Chico’s reached out to me with their goals of empowering women of all ages I was excited and came up with this project.
Dapping Block (optional-used for making metal curved)
Directions:
Tape metal stamping blank to anvil and use metal stamps and a hammer to stamp your work onto the blank. If desired shape your blank using a dapping block.
Add permanent ink or acrylic paint to the letters and wipe of the excess.
Use jump rings to attach the metal pieces to chain, earring wires or other metal blanks to create jewelry.
I hope you enjoy this project and til next time happy crafting!
Hi friends! I am so excited to share this video with you today! I compiled the most used techniques that you will need to make almost any beaded (strung) jewelry project in today’s video! I wanted it to be like a class that you can return to time and time again. That’s why I also included time stamped links to each technique in this blog post. You will be able to jump to the technique you need to know. I hope it is helpful to you!
I know this is a long video but I didn’t want to sacrifice techniques just to fit it into a short YouTube friendly video length. I do have a favor to ask though, if you like long, in-depth videos such as this please watch, like and share it. That way YouTube will see that content like this has value. Thanks so much! And now on to the video!
*Please note this video is a beginner introduction to jewelry making and does not cover bead stitching. If it did we’d be here all day LOL!
For your convenience I have time-stamped the techniques in this video for easy future reference. I hope you find this helpful and if you have any questions let me know in the comments!
#10 How to attach crimp beads: 33:00 How to attach a crimp bead with any pliers and use a crimp cover. 35:52 How to attach a crimp bead with crimping pliers
I want to thank our sponsor Annie’s Simply Beads Kit-of-the-Month Club! I really enjoyed putting together the jewelry set I was wearing today. Join now and get 50% off your first month and 3 free gifts! Use coupon code “FRUGAL”.
Would you like to see more jewelry projects on my channel? Let me know what you want to learn in the comments below and til next time happy crafting!


 or clear flat backed marbles
 or
or 


 or other


 or acrylic paint (optional)
 (optional)


 (optional-used for making metal curved)

")
