Hi friends! I tried a fun new surface yesterday and I thought I would share it with you during today’s live stream because I think some folks might find it very useful. Aluminum panels have many advantages. They are lightweight, double-sided (a smooth shiny side that would be nice for mounting art, pop art, vinyl transfer or silk-screening and a rough side that grips paint and primer beautifully), archival and easy to frame. That said I found this surface took a little getting used to. I did this painting directly on the brushed aluminum side.
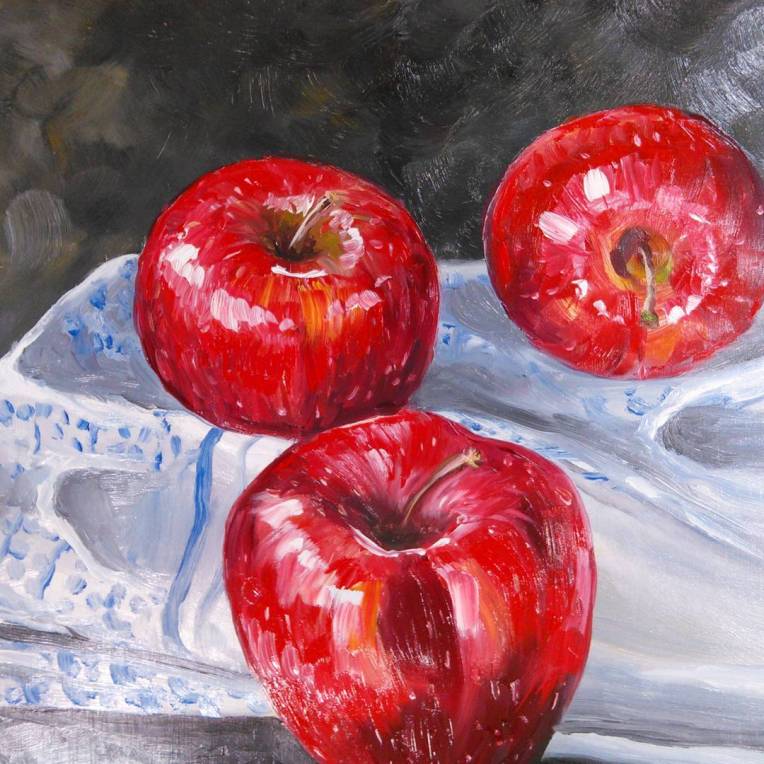
For today’s live demo I have primed another panel so we can see the difference between primed and unprimed. Because the surface is slick you can’t afford to waste many brushstrokes or you will have an oily muddy mess on your hands. To be honest I think this surface is much better suited to acrylics if you are not priming first (yes I said “better for acrylics” don’t be shocked) so I am looking forward to working on a primed version next because I like a smoother surface to paint on and these are lighter than wood panels. I also think it would be really fun to use one of these panels with alcohol or India ink. I will have one panel left after today so let me know if you would like to see that. Here is the reference photo I used to paint the apples.

You can watch the live broadcast or reply in the video player below but if you want to chat live with fellow “frugalites” or ask me questions as we go be sure to watch on the YouTube watch page.
Tutorial Sponsored by Jerry’s Artarama! Use coupon code: frugal20FS49 for 20% off $49 + Free Shipping (Excludes: Sale, Super Sale, Egift Cards, Buy It Try It’s and Vendor restricted items. Look for the green coupon eligible icon on the product listing.
Supplies:
- Oil Paints: Charvin Extra Fine Oils I used the Plein Air Set of 14 Item # 84328 and added napthol red and alizarin crimson because the red that came in that set was a bit milky. Sets can be found here and you can use a coupon on the set I am using too:)
- 11″x14″ AlumaComp painting panel *Note: For the practise piece I did not prime my panel but I did prime the panel for the live lesson as I felt it could use a bit more grab if painting alla prima (all in one go) if you are letting layers dry between painting there is no need to prime it.
- Jerry’s Worlds Greatest Gesso
- Mimik Hog Synthetic Brushes
- Black Swan Synthetic Red Squirrel Brushes *Softer brushes like these are a must on a slick surface!
- Oil pastels (just a few for sketching on the panel if desired)
- Brush cleaner (I like this one)
- Silicoil brush tank (I just got this, it gently cleans my brush really well and makes my brush cleaner last longer too)
- Reference photo by Roberta Sorge on Unsplash
Edited to add more notes about painting on Aluminum panels…
The primed aluminum panel worked a lot like a gesso board or primed hardboard panel with the advantage of being lightweight. I think to take the most advantage of the unique surface I’d use it unprimed with a permanent transparent media such as alcohol or india ink. I think either side would be fun to experiment with and yield beautiful results. I found painting directly on the unprimed surface a bit frustrating as I was trying to complete the painting all at once and I felt like my paint was sliding around. I’d recommend in working in layers and allowing drying time between them. If using oils I recommend Lukas 1862 as they dry to the touch overnight.
A note about the Charvin Extra Fine Oils…
These are a very high-end paint and a bit more spendy than I usually use. They are made in small batches and triple milled for a smooth buttery consistency and the color load is robust meaning you get lots of color in a small amount of paint. The paint is made with poppy oil rather than linseed oil (they say to reduce yellowing but the kit I got has a bottle of linseed oil in it which seemed odd but I did not need it on the silky smooth surface of the AlumaComp board) and it uses high-grade pigments with a range of 205 colors. The tubes have hand-painted swatches of the color at full strength which can be deceiving as the rose in my set looked black straight from the tube but turned into a lovely mauve as white was added. I can see how it would be a useful deep shadow color in floral paintings. I wasn’t familiar with some of the colors in the landscape set I received from sponsor Jerry’s Artarama but I found them to mix well and perform as expected for an artist grade oil paint. I think they are a bit pricey for beginners but someone who has experience with oils will enjoy and appreciate the subtle differences in quality in these paints. *Charvin also makes an extra fine acrylics line as well.
What do you think of painting on aluminum? If you want to give it a try I recommend starting on a small panel to see if you like it before investing the time and money of a larger one incase you don’t care for it. It’s growing on me but it was pretty aggravating at first getting use to the slippery surface (kinda like going from driving a big pickup truck in 4-wheel drive to a sports car on an icy road LOL!) Once you get used to it you can see the possibility it holds! Thanks for stopping by and I hope to see you live at 12:30 on YouTube, til then happy crafting!

I’m having a hard time hearing you.
LikeLike
Canât download todayâs lesson. Said it wasnât formant correctly
Sent from my iPhone
LikeLike
These are absolutely gorgeous and so realistic Lindsay. And, I can’t wait to try some of the stamps you designed.
LikeLike
Loved it Lindsay you are so talented and I learn such a lot by watching and listening to you on your video tutorials, thank you. :O)
LikeLiked by 1 person
Years ago I reclaimed cookie tins and made flowers for the tops out of soft drink cans( coke etc. ) I painted them with Delta CreamDecor Perm Enamel. I also used roof flashing Aluminum. They turned out great.
LikeLike