Hi friends! I was so pleased with the way this card came out and I am so excited to share the technique with you!
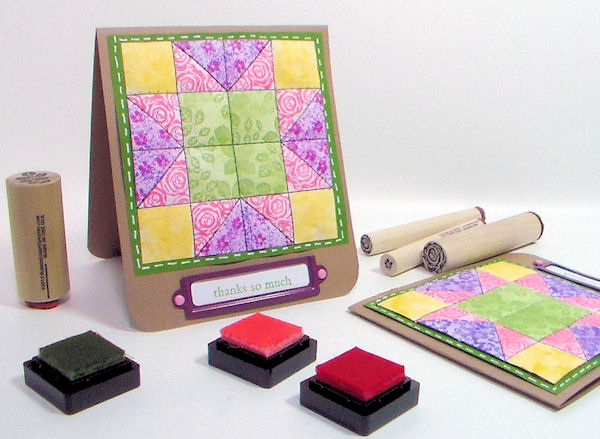
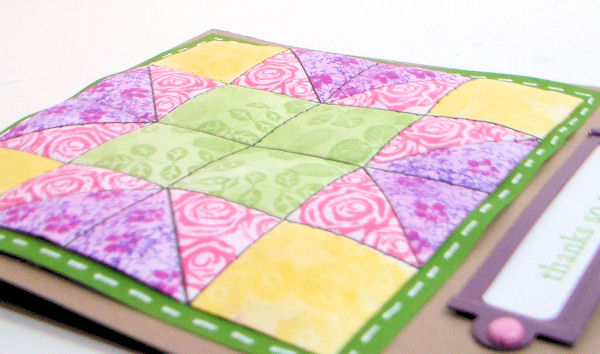
What I really love is how each section of the “quilt” puffs up and the whole stamped quilt panel is one sheet of regular white cardstock!
You can use any small stamps for this but the stamps I am using are by Rubber Stamp Tapestry and they have a coupon for 20% your order of $10 or more mounted (aka peg stamps) with the coupon code QUILT through July 10th! They have so many fun sets and single peg stamps to pick from. What I love about the website is that they tell you if and what set any single stamp is from so you can avoid buying duplicates or get just the one stamp you want rather than a whole set.
Watch the video to see how I made this!
This technique is so much fun and you can recreate any quilt block you want using the steps I showed you. You can even print out free quilt block templates from the internet if you don’t want to draw them but I promise it is easy.
Supplies:
- Small Stamps (I am using stamps from our sponsor Rubber Stamp Tapestry) Sets I used, Brambly Rose, Retro Sundress, Between the Paving Stones, Dogwood Forrest, Aunties Strawberry Garden
- Ink (memento, Aletenew, any dye ink is fine)
- Ink blender sponges or brushes (I have Color Dusters)
- Cardstock in white, green and kraft (or accent colors that you prefer, you need white though)
- Hot glue
- Foam mat (AKA fun foam or a mouse pad)
- Piercing tool (you can use a thumbtack or paper piercer but I like the piercing bug from EK Success/ScorePal)
- Grooved scoring board (optional)
- Ruler
- Black waterproof pen (Micron 03)
- White Gel pen (optional, I like the uniball signo)
- Ball end stylus (or something round like a bead or marble you can emboss with)
- Bone folder/scoring tool
- Post-it notes
Follow along with the video and have fun! I hope you give this tutorial a try, it was a lot of fun to make you you can use any quilt block design you like! Thanks for stopping by and til next time happy crafting!

Happy early birthday. ..i love this idea cant wait to try it..tfs
LikeLike
I ordered 6 Peg Stamp Sets after watching your flower pot video. They arrived in 3 days. I can’t wait to try the flower pot and quilt projects using my new stamps.
LikeLike
I picked up some peg stamps at an estate sale that were beach related. I think they would make such a cute boys card like this. Thanks for the idea.
LikeLike
Love this Card!! Thank You for sharing your secrets!! Will certainly be trying this in the very near future. 🙂
Happy Birthday!!
LikeLike
An early Happy Birthday to you! Thanks for sharing this technique xx
LikeLike
Very pretty card. Love the color and texture.
LikeLike
Excellent piece you always come up with great ideas. Happy birthday on the 10th.
LikeLike
Very cool! I got my order from RST a week or so ago but haven’t had time to play with them until this weekend…gonna celebrate a day off on the 4th by stamping. 🙂
I’ll also add an early Happy Birthday…your energy and creativity are fantastic…thanks for all the inspiration, tips and hints.
LikeLike
have fun and happy 4th of july!
LikeLike
Thank you for sharing. This is a perfect way for me to blend two of my favorite crafts
LikeLike
Okay, I did it! I finished my first quilt card! Thank you, Lindsay, for this idea! I love this technique! I am posting a picture of my card on my blog later today (after I photograph) but I am quite proud of the results, for my first try. I did not use Color Dusters, but i used Tim Holtz ink applicators for the background inks. They were a little wet, but I let each layer dry and it all worked out. Thank you for the idea!
LikeLike
Wow! That is so clever! especially if you’re not a natural quilter. thank you for sharing
LikeLiked by 1 person
Thank you for the video and all the tips.
LikeLike