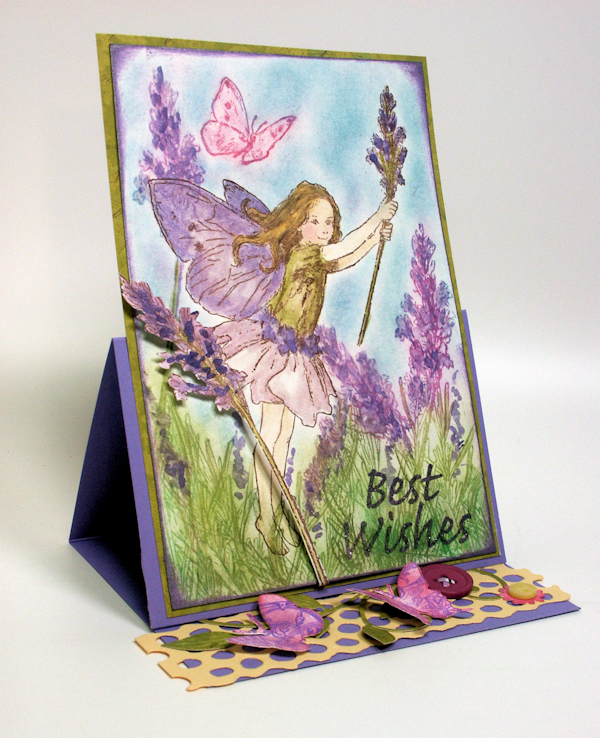
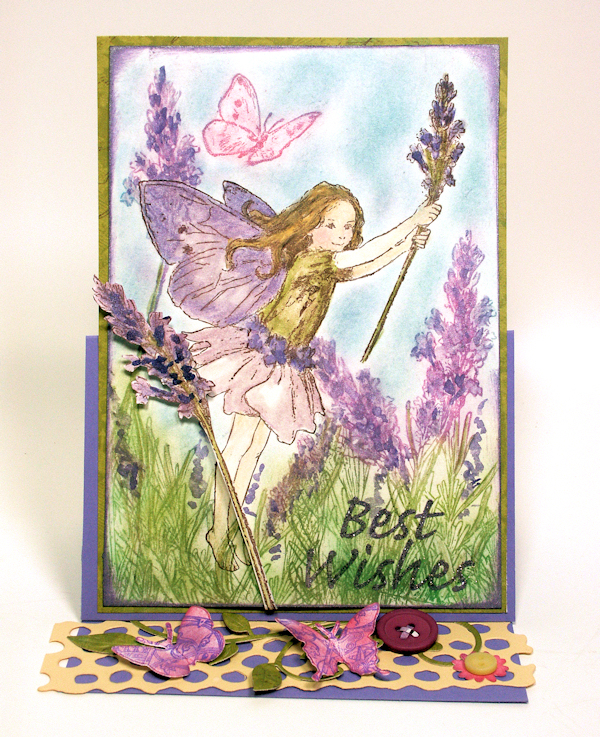
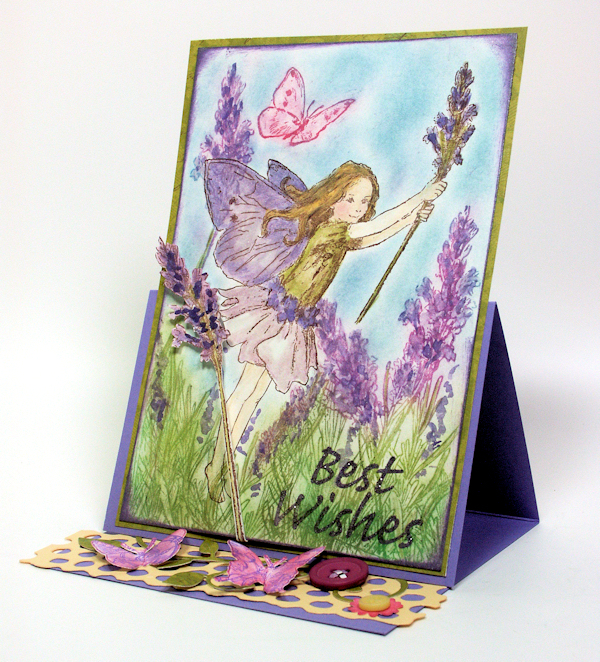
Hello friends! I hope you are having a nice Friday! I feel like I have been bouncing from project to project this week but I have to tell you I love it! I’ll be starting my Mixed Media art Journal series on my blog tomorrow, I’m calling it Mixed Media Fun and each video will explore a specific technique or supply. I hope you check back for that! Today though, I have a couple tutorials for you on how I made the stamped panel for this card:
I love the Flower Fairy stamp collection from Crafter’s Companion, I bought EVERY unmounted stamp set they offered on sale at Custom Crops a couple years ago and I am so glad I did because you can’t find them all anymore! There are a few (probably the most popular ones) sets of cling mounted flower fairy stamps available directly at Crafter’s Companion but they don’t have the massive amount of stamps that the original unmounted sets had and they are more expensive because they are mounted. But it is an option if you are looking for something similar and missed the boat.
In the first video I will show you how to color the fairy using watercolor pencils and a blender pen:
I love the way she turned out but I did not like the white background so here is how to stamp a background without masking. You will need a clear embossing inkpad (or glycerin and a make-up sponge) chalk pastels and a pom-pom or Q-tip to apply the chalk, have a look.
You can get the set of chalk I used here at Custom Crops along with other color sets and the last time I checked they were on sale!
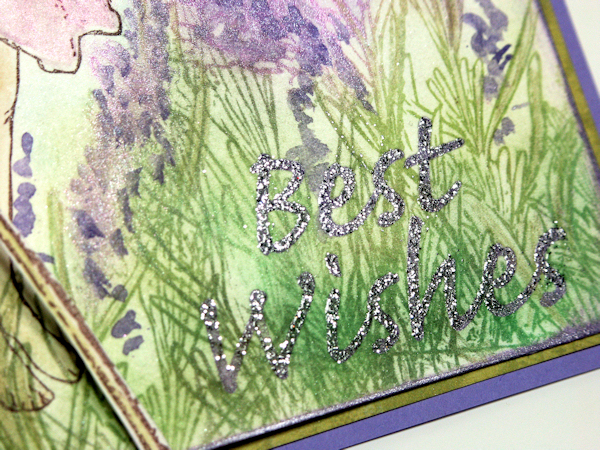
I stamped the sentiment right on the background with purple metallic ink and then used embossing tinsel (OK show of hands, who has been stamping long enough to remember embossing tinsel, turns out it ages very well since I bought mine 8 years ago at a yard sale LOL!) to give it a bit of bling.
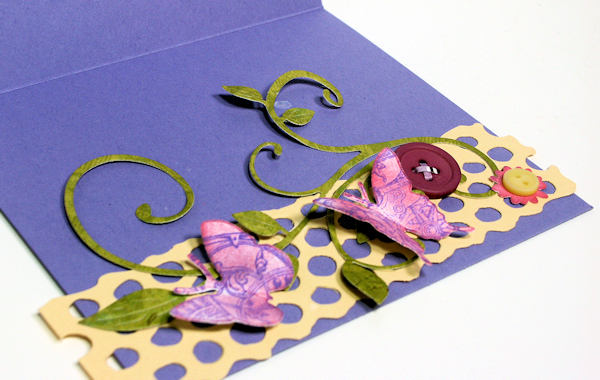
I decided on an easel card because I wanted a little bit more space to decorate and the floor of the card gives me that opportunity.
I decorated it with orphaned die-cuts that were sitting in the use-it-or-toss-it-basket, don’t we all have one of those? I hope you try these techniques and if you do share it on the facebook page, I’d love to see it! Have a great night and til next time happy crafting!
❤ it!
LikeLike
Hey Lindsey, I love the card!!! Not fond of CC but love the card. I am more interested in the place called Custom Crops? They have a phone number in my area (code) and I wanted to get more of the skinny on them. Can you e-mail me some 411 on them. I did call them they were closed. Thanks, Donna
LikeLike
Sure, I’ll drop you a line, I’ve ordered from them for years and they are great. I’m not sure if they have a retail store, I think they are in Utah.
LikeLike
The card turned out great. Wondering which die made the leaves–love the way they ‘scroll’.
LikeLike
Cheery Lynn Dies
LikeLike
Thanks Lindsay for showing us how to use our pastels with sticky ink. Beautiful fairy card.
LikeLike
I’m a bit confused about the blender pen. Is this the same as the colorless pens used to blend alcohol markers? I thought that you could only use water to blend out watercolor pencils.
LikeLike
blender pens for watercolor contain water and glycerin but blender pens for alcohol markers contain alcohol. I like the Stampin Up blender pens best but there are other brands. Most water based marker brand have a blender available.
LikeLike
Wonderful job as usual. Love your work and ideas. I do remember embossing tinsel, as a matter of fact I have some.lol Hugs
LikeLike
I love Flower Fairies – this is so pretty!
LikeLike
Great videos Lindsay. I also love Fairies and grabbed almost all of the flower fairies which actually were my very first stamps.
Just ordered my blender pens from Stampin Up, wow 6.95 for shipping and the 3 pen set was only 9.95. Oh well, glad you said they lasted a long time.
You stated in your pencil video you cant color faces well with the Derwent Inktense pencils so what did you use for the flesh tone?
LikeLike
I used derwent watercolor pencils in light flesh, light pink and raw umber:) I recommend picking up a few flesh/earth tones to supplement the inktense line:)
LikeLike
I got a set of those blender pens a couple of years ago. My set has nibs on each end. I figured that the tips would last longer if I used them for certain colors. So I labeled them one is for reds/purple’s The next is for yellow’s/oranges and brown’s the other end. Then Blues on one end and greens on the other. I use them for everything from my watercolor pencils, and my Stampin’ Right markers to my Bic markers.
Thanks for your great videos. Jess
LikeLike
I really enjoyed watching you create thus fairy card Lindsay. I’ve never used chalks before, but now you’ve inspired me to give them a try with embossing ink. BTW You’re so dang clever to use different sized pompoms as inexpensive chalk applicators! Thanks for the great tips! Where can I buy the pompom holder with the long handle? It looks like an alligator clip attached to a wooden brush handle.
LikeLike
that came in my Pebbles chalk set but I think you can buy them at the craft store, maybe by Lowell Cornell or Royal brush? Or get one of the clips from the jewelry section used to make hair feathers and attach it to a small dowel:)
LikeLike