I’m usually not drawn to cutesy images…until I saw these adorable Halloween stamps! They screamed for my faux Copic technique (you can read the tutorial here: part 1, part 2) I thought they would made nice treat boxes for Halloween. Until then they will serve as a decoration. I’ve got 3 kids so I won’t actually put candy in them until October 31!

By the way the Prismacolor blending marker works on colored pencils too. And they are still on sale for $2 at jerrysartarama.com!

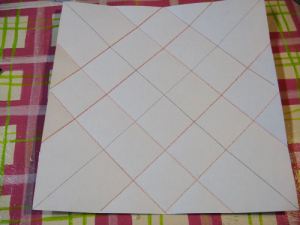
Lets Make the box! For the bottom of the box you will need a 12″x12″ piece of paper but any size square will work. Draw diagonal lines from corner to corner.

Fold the corners in to the “x” in the middle, unfold.
Fold each corner to the opposite fold.

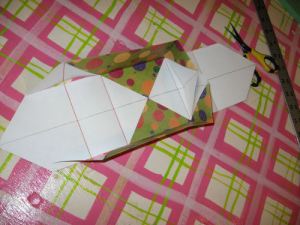
Make 4 cuts as shown.

Rub a glue stick in the center square (with an “x” in it) and fold up flaps as shown.


To make the cover take a 6″ square of paper and score it 5/8″ for each side.

Trim edges with deco scissors. Make 4 cuts as shown. Fold on score lines and glue flaps to the inside edges of cover. Use double stick tape or wet glue on the cover, a glue stick wont cut it!

This is easy after you do it a couple of times. The box takes 5 minutes to make including the cover.
Make a bunch to give to all your little goblins this year! It works as a gift box at Christmas too, just change the stamps and paper! Until next time, Happy Crafting!


Super Cute! Thanks for the tutorial!!!!
LikeLike
Very Cute Lindsay!! Love them!! Hugs…
LikeLike
These are adorable … thanks for the tutorial!! Congrats on the design team … looking forward to getting to know you better and be inspired (already am) by your designs!!
LikeLike
These are so very cute! I must try them! Thanks for the great tutorial! Have a great weekend!
LikeLike
Those are sooo cute! Love them!
LikeLike
So cute, thanks so much for sharing your creativity with us. I love your blog, you are so creative!
LikeLike
I love your site and all the wonderful “frugal” solutions you offer. Thanks so much for sharing your talent with us.
LikeLike
Your first “until next time, happy crafting”! Love it and the box is great too!
LikeLike
P. S. – Always like hearing that phrase from you ! You’re happy when you say it and it brightens many a day!
LikeLike
wow, you are digging into the “moldy oldies” LOL! I am glad you are enjoying the vintage tutorials:)
LikeLike