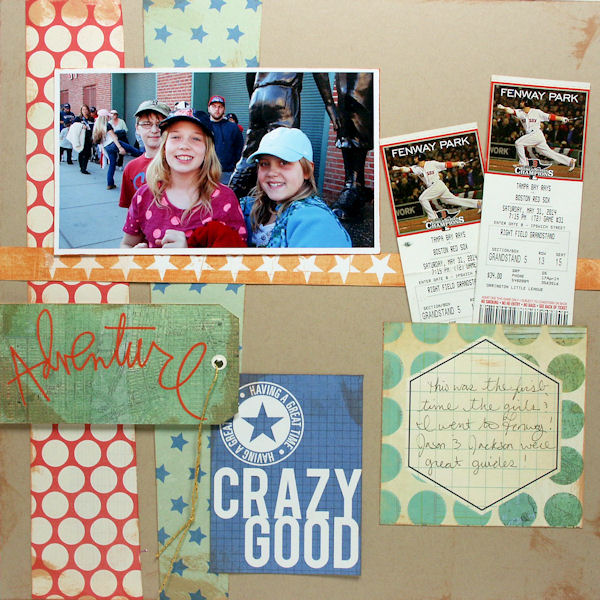
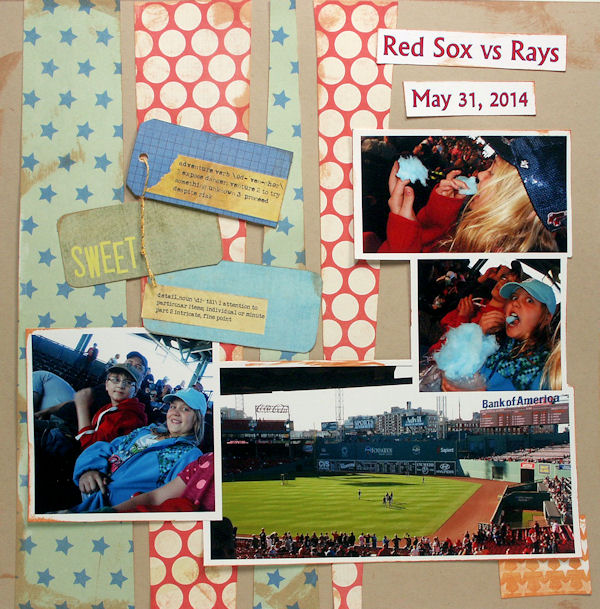
Hi friends! I wanted to do a bit of fun scrapbooking yesterday and thought that I would turn on the camera when I did. Little did I know that the these of the video would be scrapping with only paper and photos and tips for using both. I made this 2 page layout in under 30 minutes:

Meaningful pages do not have to take a lot of time or cost a lot of money to make. In fact I think using the supplies you have on hand is best for 2 reasons: Less choice so it is quicker and less money because you shop your stash. If you are about to do some scrapbook shopping keep my tips I share throughout the video in mind so you can make wise pattered paper choices. I’ll type more tips out for you below as well. I hope you enjoy this chatty video:) Grab some photos and it will be like we are cropping together!
Since I talked so much (and so fast, sorry about that guys) I wanted to write out my tips and specific items I mentioned in case you wanted to find out more. First, here are the supplies I used on the page:
- 2 sheets 12″x12″ cardstock (kraft colored)
- 2 sheets patterned paper (stars and dots from a $5 CratePaper/American Crafts 12″x12″ pad on sale at ACmoore)
- 3 sheets of patterned paper from a Heidi Swapp/American Crafts pad (also a $5 deal at ACMoore)***This paper I refer to as “embellishment paper” because it contains a lot of elements that can be cut out to use as journal cards and embellishments. (not to be confused with the embellishment paper that Making Memories used to make) I save all of the unused parts of this papers for future layouts, it is really handy because it coordinates with the other papers in the pad. Look for paper pads that have these “embellishment papers” in them because they make scrapbooking cheap and easy!
- X-Acto knife and metal ruler/scissors
- Dry Adhesive & foam tabs if desired
- Brown ink pad if you like the look of inked edges.
Tips for embellishing with patterned paper:
1. Use a natural background like kraft, black or white.
2. Choose papers with patterns of different scale, notice the star print is small and the dots are medium.
3. Choose paper that has journal blocks, cards, banners and tags that can be cut part giving you many ways to use one sheet.
4. Save leftover scraps from your project together in a page protector and you have a future layout ready to go!
Tips for photos {I print mine from home!}
1. I use generic HP02 ink cartridges (6 color set is $5 on amazon and works as well as the $40 HP ink) and Canon Pixma paper, also purchased on amazon for about $12/100 pack 8.5″x11″
2. Print your photos in a collage. I used Paint Shop Pro to arrange these because they needed corrections (they were taken with a low-end camera phone) but for most printing I use the free ipiccy online software.
3. Print dates and titles in leftover areas of the page (if you have any) not only will it help you remember but it is also another page element for no extra cost!
4. If you are printing at home you can use dye based ink to ink edges or rubber stamp on your photos BUT avoid using photo-polymer stamps on your home printed photos because they may bond with the slick photo paper.
5. Store your photo collages in 8″x11″ page proctors (cheap at the office supply store) right in your scrapbook until you are ready to scrapbook them, that way they are organized, you can still flip through and enjoy them and if you never scrap them it is not the end of the world. You have them printed, yeah you! You win the day!
6. This is an organizing tip. Download photos every month from your phone, camera, tablet and Facebook (download any photos you are tagged in and want to keep, they will not be the best quality but they are memories and you should print them, they will look OK if kept under 4″x4″.) Then print out a bunch of photos at a time every couple of months OR upload them to a photo lab to have them printed. You can even have them uploaded to Target or Wal-Mart and pick them up in an hour. There is no excuse, you can do this:)
Biggest tip!!! Don’t worry about being perfect, just capture the memories and have fun. There is no wrong way. Your way is perfect! Thanks for stopping by and til next time happy crafting!


