If you are a parent you are probably asked to provide “on-demand” coloring pages for you brood on a daily basis. Thanks to the wonders of the Internet you can find any character they would like with a quick Google search. So I thought to myself today “Hmmmm, I wonder if I could take these free coloring pages and convert then to SVG files so I can cut them with my Cricut using SCAL software.” And guess what? I can, and I’ll show you how to do it too! Also if you want a layered “Hello Kitty SVG file you can grab one at Candice’s blog, but I just needed a simple outline so I had to make mine myself.)
I wanted to make name badges for my kids backpacks for the first day of school so I asked them who they wanted on their badges. Lila wanted “Hello Kitty”
Note: If you have Cricut markers you can save yourself a lot of time, aggravation and paper. I’ll explain when we get there. By now you know me, I like my aggravation:-)
Step 1 Find a coloring page. Type “free__________coloring page” in a search engine and choose from millions of images.
Step 2 Right Click on the image and “save as” and save it somewhere you can find it like the desktop.
Step 3 (only do this if you need to remove unwanted elements from the page such as extra characters like in Ariel or the rest of Spiderman’s body.) Open up you image editing software (I use Paint Shop Pro but Photoshop will work too, if you don’t have either try GIMP software, it’s free, it’s good I hear although I’ve never used it) Use you selection tool remove anything you do not want in the image. I like the Lasso tool but use whatever, you can even take away stray marks with the eraser tool. Save the image.
Step 4 open Inkscape (also a freebie) and select the “Arrow” in the upper left colum of tools. Click on your image. Click on the Path menu (top center of workspace) then click “Trace bitmap”. A window will open, click update and you will see your image in the window. Click OK and close the window. Now you will see your image with resizing arrows in a box around it. Click path, the “Object to path”. Now Save it and make sure it is saved as an SVG file. Such as Ariel.svg
Step 5 Open SCAL and under file click “import SVG” choose your file and it will appear on the SCAL/Cricut cutting mat. Resize and hit “Cut”.
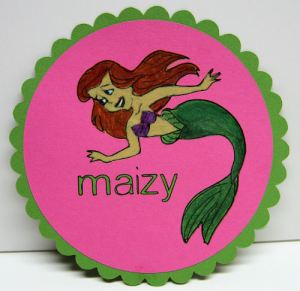
That’s all there is to it! Now about the markers. Some cartoons are very detailed and the Cricut can cut them but it’s a pain to glue and stick tiny little cut out features, So I reccomend using a marker before you cut. For example on the mermaid (I freehand drew it but it would look much better had I done it with a cricut marker) put the marker in the blade holder in the cricut and click “cut”. Take out the marker and put back the blade. Under the Properties box in SCAL change the style to blackout then press “cut.” You will have a perfectly drawn and cut image. Wish I thought of that first!

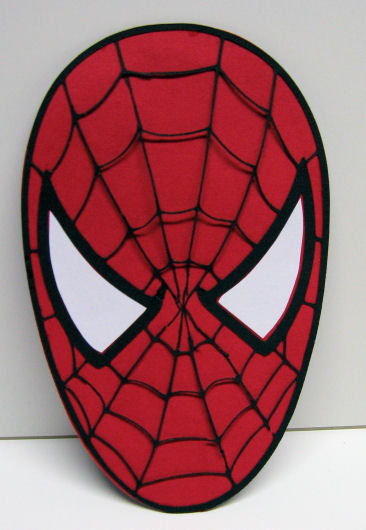
To finish I used chalk to color hello kitty, colored pencils and metallic watercolors to color ariel and a sharpie to fill in the web on spidy. I used a 3-M gloss laminating sheet to laminate them and added eyelets with my Crop-A-Dial and string. This is the most impressed my children have ever been with my crafting! Happy Dance! I hope you enjoyed this tutorial and happy cutting!


Wow Lindsay…these are really cool! I love them all…especially the kitty!
LikeLike
You could have used vinyl to make them and not have to worry about adhering them, Also transfer tape is the answer to all those little tiny pieces. I sell it on my website, http://www.texasCutters.com , but let me warn you, both vinyl and transfer tape are addicting. I use the tape for all my paperpiecings now. For step three, you do not have to go to any other program other than inkscape, as once you trace the bitmap, and create your path, you can break apart and then delete the paths you do not need. The new .47 version of inkscape the eraser tool would do this in just a few clicks, thus saving a entire other program. For step 5 and using the pens, use the “load Last” button so your mat will return to the original starting place so that your cut will match up with your pen markings. Vinyl is fantastic for all things that need labeling, try doing an entire sheet of names, so you have them at hand should you need to label something. It will even go in the dishwasher on Air Dry. I labeled my daughters swim fins 2 years ago, and she is an open water lifeguard on Galveston Beach, and while there are a few tiny bubbles on it, it is not ripping, nor pulling off, and they have been in sun, surf , heat and salt water at least twice per day each day she worked in the summer. Oh,and be careful, it seems like you are hooked now!
Happy cutting
Bibi
LikeLike
How fun!!!
LikeLike
These are so cool! Love them all!
LikeLike
Thanks Bibi!
LikeLike
Thanks so much, Lindsay. I was having fits with this until I finally read your tutorial. You’re awesome. Thanks for the work you did to put this on here! {{{hugs}}}
LikeLike
Is there a way to layer a drawing? By that I mean, Hello Kitty has a bow and outfit. Can you isolate those two things so you could cut out of a different color of paper. Thanks..
LikeLike
yes patty, if you open the file in inkscape and you trace the bitmap then go under path and choose break apart I think it will work. Otherwise you can open it in Paint shop and used the magic wand to select each part and pull them apart so when you oen it in inkscape you will trace all of the seperate parts KWIM?
LikeLike
Thank you so much …. I have been playing with the cricut and and was becoming a little frustrated trying to do this. Your instructions seem pretty easy…. Thanks
LikeLike
Thanks so much for this info… Now does ANYONE know how to post a SVG on a blog so that others can download it? I see all the time that people place a SVG on their blogs with a button under it so that you can download it and use it yourself… Does anyone know hwo to do this?
LikeLike
Hi Christina,
Sign up for a 4shared account, it is free and you can house tons of files there:) That is where I put my freebies.
LikeLike
Thank you so much for these instructions. I have a corporate client who wants me to put their logo on wine glasses for their new waterfront condo development. Because of your tutorial, I was able to download the logo,(and Inkscape, which I’d never heard of), buy SCAL and follow the directions to make the vinyl stencil image I need to etch the glasses! I was banging my head against the wall until now. Thanks again! I’m so impressed 🙂
LikeLike
Hi Lindsay,
I did this last night thanks to your instructions and it worked perfectly! I was wondering though if there is a way to cut out a black out of the coloring page or figure that I downloaded?
LikeLike
Hi Maria,
Thanks for the sweet comments. There is a way (or a couple of ways I should say:) to do this. If you want a blackout (silhoutte) of the image try selecting the shape in scal and changing the box from “normal” to “Blackout shadow”, that souls remove all of the details on the inside of the design, or, if you are using scal2 then click object (at the top of your screen next to file, edit etc.) and choose break abrat from the drop down menu then you can take the whole design apart to paper piece. You will also have that outline/sihloutte shape.
OR you can simply use a paint bucket tool in a graphic program to fill in the areas you want to be solid in your design then convert that image in inkscape like you did with the first coloring page. There are many ways to skin this cat LOL!
Good Luck!
Lindsay
LikeLike
You’re site is fabulous! Thanks for teaching us SVG stuff – you rock!
LikeLike
Oh my… too tired to edit… that should read “your site is”…. sorry!
LikeLike
I am having problems every thing looks fine but when i reopne it in scal i have a black box
LikeLike
Linda, it sounds like the image did not get traced. When you are in inkscape and open the file make sure you click on the arrow tool and then click on the image so you see a box around it, then click path and click trace bitmap. When the little window opens up click OK (for somereason the preview does not show up right in the newer updates of inkscape) then to check you can drag away the image on your screen and you should see 2 images, the old one and the new vector right on top. You can delete the old image or not, it is up to you. Then make sure you save it as an SVG. If you just click save it should save as SVG then when you are in scal you need to IMPORT the SVG not OPEN it. If you tried to open it you would have a problem too;) It sounds like the file never got traced, give that a go, it is usually something simple like you did not click on the image before tracing. Let me know how it works out;)
LikeLike
I just found your instructions. Awesome! Worked out on the first try. Thank you so much!
LikeLike
I’m glad to hear it! Happy cutting!
LikeLike